
Shark Robot Cliff Sensor Error 4: Comprehensive Guide to Troubleshooting and Repair
Shark robot vacuums are designed to make cleaning effortless, but encountering Cliff Sensor Error 4 can disrupt their performance. This error indicates an issue with the vacuum’s cliff sensors, which are essential for detecting stairs, ledges, and other drop-offs to prevent accidents. Addressing this error promptly ensures the vacuum operates safely and efficiently. Understanding the causes, troubleshooting steps, and preventive measures can help you resolve the issue and maintain your device’s longevity.
What Causes Cliff Sensor Error 4?

What is Cliff Sensor Error 4?
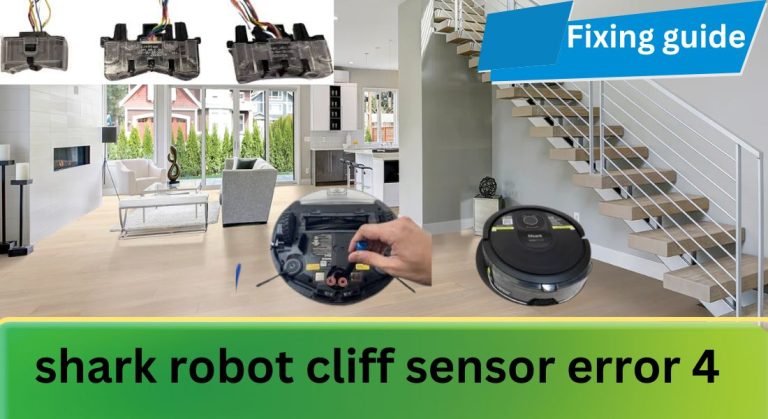
Cliff Sensor Error 4 occurs when the Shark robot vacuum’s cliff sensors malfunction or are obstructed. These sensors use infrared technology to detect changes in surface height, ensuring the vacuum avoids falls. When the sensors are dirty, damaged, or misaligned, the vacuum may incorrectly perceive flat surfaces as drop-offs, triggering the error.
Importance of Cliff Sensors
Cliff sensors play a critical role in the vacuum’s navigation system. They prevent the device from tumbling down stairs or ledges, ensuring safety during operation. Additionally, they contribute to the vacuum’s cleaning efficiency by allowing it to map and navigate your home accurately.
Causes of Cliff Sensor Error 4

Common Causes
The most frequent causes of Cliff Sensor Error 4 include:
– Dust or debris covering the sensors.
– Software glitches or outdated firmware.
– Physical damage to the sensors or their surrounding components.
– Debris accumulation in the vacuum’s wheels or brushes, affecting sensor accuracy.
Less Common Causes
Less common causes may involve:
– Misalignment or improper installation of the sensors.
– Interference from other electronic devices.
– Manufacturing defects or quality control issues.
Troubleshooting Cliff Sensor Error 4

Basic Troubleshooting Steps
Start with these simple solutions:
1. Clean the Cliff Sensors: Use a soft, dry cloth to remove dust or debris from the sensors.
2. Check for Updates: Ensure the vacuum’s firmware is up to date by connecting it to the SharkClean app.
3. Reset the Device: Turn off the vacuum, wait a few seconds, and restart it.
4. Inspect for Obstructions: Remove any debris from the wheels, brushes, and sensor areas.
Advanced Troubleshooting Techniques
If basic steps don’t resolve the issue, try these advanced methods:
1. Calibrate the Sensors: Refer to the user manual for instructions on recalibrating the cliff sensors.
2. Use Diagnostic Tools: Run diagnostic tests available in the SharkClean app or through the device’s settings.
3. Consult Official Resources: Visit the Shark website or contact customer support for specific troubleshooting guides.
Repair and Maintenance
DIY Repair Options
For those comfortable with DIY repairs:
– Source Genuine Parts: Purchase replacement sensors or components from authorized retailers.
– Follow Repair Guides: Use detailed tutorials or videos to guide you through the repair process.
– Prioritize Safety: Disconnect the vacuum from power and handle components carefully to avoid injury.
Professional Repair Services
If DIY repairs aren’t feasible:
– Contact Authorized Centers: Reach out to Shark’s authorized service centers for professional diagnosis and repair.
– Preserve Warranty: Using authorized services ensures your warranty remains intact.
– Find Local Repair Shops: While convenient, be aware that third-party repairs may void your warranty.
Prevention and Regular Maintenance
Regular Cleaning and Inspection
Prevent errors by:
– Cleaning the cliff sensors and vacuum components weekly.
– Scheduling routine inspections to identify and address potential issues early.
Software Updates and Firmware
Keep your vacuum’s software up to date by:
– Regularly checking for updates through the SharkClean app.
– Installing updates promptly to prevent glitches and ensure compatibility.
Additional Tips and Considerations
User Manual and Online Resources
- Refer to the user manual for detailed troubleshooting and maintenance instructions.
- Register your product on the Shark website to access warranty and support services.
Community Forums and Reviews
- Learn from other users’ experiences on forums and review platforms.
- Share your own solutions to help others facing similar issues.
Conclusion
Cliff Sensor Error 4 on Shark robot vacuums can be frustrating, but with the right approach, it’s manageable. By understanding the causes, following troubleshooting steps, and maintaining your device regularly, you can resolve the issue and keep your vacuum running smoothly. For complex problems, don’t hesitate to seek professional help. Regular maintenance and preventive measures are key to ensuring your Shark robot vacuum remains a reliable cleaning companion.


