
Your Shark vacuum was gliding across carpets yesterday, but today it’s just pushing debris around like a fancy broom. Before you resign yourself to buying a replacement, know this: 80% of suction failures stem from simple, fixable issues that take less than 30 minutes to resolve. That sudden loss of power usually means a clogged filter, full dust bin, or hidden hose blockage—not a dead motor. In this guide, you’ll learn exactly how to diagnose and fix every possible cause of suction loss across all Shark upright, stick, and cordless models. We’ll skip the fluff and get straight to the solutions that restore professional-grade pickup.
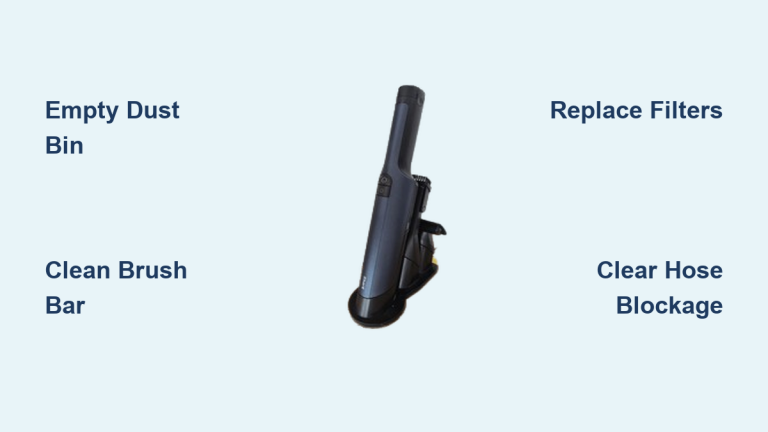
Empty Dust Bin Immediately
A full dust bin is the most common culprit behind sudden suction loss in Shark vacuums. When debris hits the MAX line, airflow chokes off completely—turning your powerful vacuum into a dust-pusher. Don’t assume “almost full” is acceptable; even 10% overfilling drastically reduces performance.
Quick Bin Check Procedure
- Upright models: Press the bin release button near the handle grip to detach
- Stick vacuums: Pull the dust cup straight downward with firm pressure
- Robot vacuums: Lift the top cover and slide the bin out horizontally
Critical: Hold the bin over your trash can before releasing the latch to avoid messes.
Proper Emptying Technique
- Press the bottom release latch while holding bin over trash
- Tap sides firmly to dislodge compacted debris stuck to walls
- Wipe interior with dry microfiber cloth if residue remains
- Never reattach when damp—wait 15 minutes minimum for complete drying
Pro tip: Empty after every use in pet households. Waiting until overflow occurs strains the motor and creates permanent suction loss over time.
Clean Tangled Brush Bar

Hair and string wrapped around the brush bar force your vacuum to work harder while picking up less debris—a classic suction killer. If your vacuum struggles on carpets but works on hard floors, tangled bristles are likely the villain.
Standard Brush Bar Cleaning Steps
- Power off and unplug corded models (remove battery for cordless)
- Flip floorhead over and inspect roller for visible tangles
- Use scissors to cut debris along the roller’s length—avoid cutting bristles
- Pull strands away in one motion toward the roller ends
- Rotate manually to check for hidden obstructions behind end caps
Warning: Never operate with a jammed brush bar—this overheats the motor.
DuoClean Dual Brush System Care
Bristle brush-roll: Remove 3-4 screws securing the cover, lift out the roller, and clear debris from both ends
Soft front roller: Press release tabs to pop out, wipe with dry towel, and hand-wash only if manufacturer-approved
Time-saver: Clean both rollers weekly in homes with pets or long hair—this prevents 90% of carpet pickup failures.
Replace Clogged Air Filters
Dirty filters silently choke airflow, causing gradual suction loss you might not notice until performance plummets. Most Shark owners don’t realize their filters need monthly attention—until debris stops lifting off floors.
Filter Locations by Model Type
- Foam filter: Behind dust bin or under motor housing (common in uprights)
- Felt filter: Typically paired with foam filter in same compartment
- HEPA filter: Rear compartment or upper handle section (critical for allergy sufferers)
Pro insight: White filters turning gray indicate immediate replacement—don’t wait for complete blockage.
Washing vs Replacement Protocol
Washable filters (foam/felt):
– Rinse under lukewarm water until runoff runs clear
– Air dry 24+ hours—never use heat sources
– Replace every 6-12 months even with regular cleaning
Disposable filters (HEPA):
– Tap gently over trash to dislodge loose dirt
– Replace every 3-6 months (more often with pets)
– Never rinse HEPA filters—water destroys the microscopic filtration layers
Warning sign: Musty odors during use signal mold growth in damp filters.
Clear Hose Blockages
A single sock or clump of pet hair trapped in hose curves can kill suction instantly. The coin test is your fastest diagnostic tool for pinpointing blockage locations before disassembling components.
Coin Test Method
- Detach wand/hose from vacuum body and floorhead
- Drop a quarter through the hose—should exit cleanly within 2 seconds
- Listen for clunking sounds indicating partial obstructions
- Feel along hose for lumps or stiff sections (common at elbow bends)
Most vulnerable spots: Connection points between wand segments and floorhead joints.
Safe Unclogging Steps
- Gentle pressure: Squeeze hose rhythmically from clog toward exit point
- Broom handle method: Insert rounded end, push slowly without twisting
- Avoid wire hangers—they puncture hose walls causing permanent leaks
- Reassemble completely before testing suction to avoid debris scatter
Critical: Never use chemical cleaners—they degrade hose material over time.
Fix Hidden Air Leaks
Cracks or loose connections create invisible suction drains that mimic filter problems. If suction works at the hose but fails at the floorhead, air leaks are your prime suspect.
Leak Detection Method
- Run vacuum at full power on hard floor setting
- Run hand around hose connections and dust bin seams
- Listen for whistling sounds near gaps or cracks
- Check bin seal for warping—press edges firmly to test
Pro tip: Perform this check after every filter cleaning—reassembly errors cause 30% of leak issues.
Quick Seal Repairs
- Hose cracks: Wrap tightly with electrical tape for temporary fixes
- Loose connections: Twist components until they click into place
- Worn bin seals: Replace the entire dust bin (seals aren’t sold separately)
- Motor housing cracks: Contact Shark support immediately—don’t operate
Warning: Even hairline cracks reduce suction by 50%. Never use duct tape—it leaves residue that worsens leaks.
Adjust Floorhead Height Correctly
Wrong height settings prevent proper floor contact, making strong suction feel weak—especially on carpets. This “not sucking” complaint often stems from mismatched floorhead positioning rather than mechanical failure.
Height Settings Explained
- Bare floors: Lowest setting (bristles barely touch surface)
- Low-pile carpet: Medium height (allows slight carpet compression)
- High-pile carpet: Highest setting (prevents roller drag)
Critical: Shark’s DuoClean models require different settings for each roller type—consult your manual.
Testing Your Setting
- Start at highest setting for your floor type
- Lower incrementally until vacuum grips floor slightly
- Test pickup on cereal-sized debris
- Adjust finer if debris scatters during cleaning
Pro insight: Hard floors need the soft roller engaged—switching to “hard floor mode” solves 40% of suction complaints.
Check Battery Health (Cordless Models)
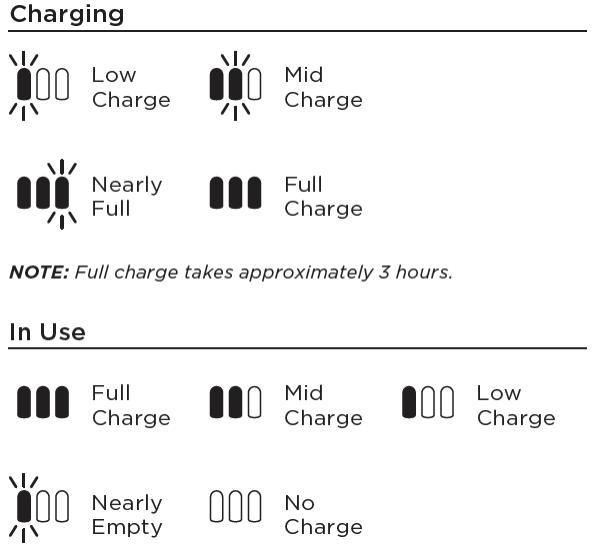
Weak batteries cause suction to fade mid-clean, mimicking mechanical failure. If power drops after 5 minutes of use, battery issues—not suction problems—are likely the culprit.
Battery Health Check
- Full charge test: Charge 12+ hours, then test suction strength
- Runtime verification: Should maintain power for full cycle time (check manual)
- Contact inspection: Clean metal contacts with dry cloth monthly
- Age threshold: Replace batteries older than 24 months
Warning sign: Flashing blue lights during use indicate battery failure.
Maximizing Battery Life
- Store on charger when not in use (prevents deep discharge)
- Recharge at 20%—never let battery hit 0%
- Clean contacts quarterly with isopropyl alcohol
- Replace entire pack when runtime drops below 50% of new condition
Critical: Never use third-party batteries—they cause motor damage and void warranties.
Deep Clean Entire System Monthly
Scheduled deep cleaning prevents 80% of recurring suction issues. This 15-minute monthly ritual keeps your Shark performing like new—and costs $0 in parts.
Weekly Maintenance Checklist
- Empty dust bin after every use (don’t wait for MAX line)
- Quick brush bar inspection for visible tangles
- Verify all connections are fully seated
- Wipe exterior with dry microfiber cloth
Monthly Deep Clean Procedure
- Remove all filters and wash per type-specific instructions
- Inspect hose internally with flashlight for hidden damage
- Check seals around dust bin and connections for wear
- Clean brush bar using the cutting technique described earlier
- Test suction on multiple surfaces with varied debris sizes
Pro schedule: Pet owners should deep clean bi-weekly; light users can extend to 8 weeks.
When to Contact Shark Professionals
Some suction issues indicate serious motor or structural failures requiring factory-trained technicians. Don’t risk electrocution or further damage by forcing DIY repairs on these critical failures.
Motor Failure Warning Signs
- Burning plastic smell during operation (shut off immediately)
- Loud grinding or high-pitched squealing noises
- Overheating despite clean filters and empty bin
- Visible melting around motor housing or electrical components
Warranty Service Triggers
- Frame cracks or broken structural components
- Electrical failures (vacuum won’t power on)
- Charging port damage on cordless models
- Persistent suction loss after completing all troubleshooting steps
Smart move: Check Shark’s warranty portal first—most suction-related repairs are covered for 5+ years on premium models.
Prevent Future Suction Loss
Stop “shark vacuum not sucking” emergencies before they start with these simple daily habits that extend your vacuum’s lifespan by years.
Daily Best Practices
- Empty bin when debris hits MAX line—never exceed capacity
- Pre-vacuum inspection: Check brush bar for tangles before use
- Use correct attachment for floor type (hard floor vs carpet)
- Store upright to prevent hose kinks and seal damage
Long-term Care Strategy
- Subscribe to filter replacements through Shark’s website
- Schedule professional service every 24 months for internal cleaning
- Never vacuum large debris, liquids, or sharp objects
- Keep owner’s manual for model-specific maintenance schedules
Bottom line: Consistent filter care and bin emptying prevent 95% of suction failures. Implement these steps, and your Shark will deliver powerful pickup for 5+ years—saving you hundreds in premature replacements. When suction drops, methodically work through these fixes starting with the dust bin. You’ll restore full power faster than you can order a new vacuum.


