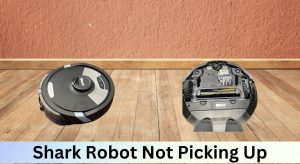
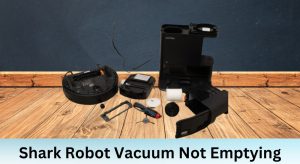
The Shark Robot Vacuum is a popular cleaning device known for its efficiency and advanced features. One of its key components is the dust bin, which collects dirt, debris, and allergens during the cleaning process. However, users may occasionally encounter an error message stating “Dust Bin Not Installed,” which can disrupt the vacuum’s operation. This issue can stem from improper installation, a full dust bin, or blockages in the suction path. Understanding the error and knowing how to troubleshoot it is essential for maintaining the vacuum’s performance.
Table of Contents
Understanding the Error Message

What the Error Message Indicates
The “Dust Bin Not Installed” error message on the Shark Robot Vacuum indicates that the vacuum is unable to detect the dust bin. This can happen if the dust bin is missing, incorrectly installed, or obstructed by debris. The vacuum relies on the dust bin to function effectively, and this error prevents it from operating until the issue is resolved.
Importance of Proper Dust Bin Installation
The dust bin plays a critical role in the vacuum’s efficiency. It collects dirt and debris, ensuring that the vacuum can clean effectively without clogging. If the dust bin is not installed correctly, the vacuum may fail to recognize it, leading to interrupted cleaning cycles and reduced performance. Proper installation and maintenance of the dust bin are essential for the vacuum’s longevity and effectiveness.
Troubleshooting Steps

Checking the Dust Bin
Verify Dust Bin Presence: Ensure the dust bin is present and correctly aligned with the vacuum. It should click into place securely.
Empty and Clean the Dust Bin: Regularly empty the dust bin to prevent overfilling and clean it to remove any debris that could cause blockages.
Inspect for Physical Damage:
Dust Bin Assembly
If, after cleaning and verifying proper installation, the dust bin still fails to click securely into place or shows signs of physical damage (e.g., a broken latch or worn connectors), it may require replacement.
Replacement Shark Dust Bin Dirt Cup for AV1010AE AV1002AE AV1110ARUS AV911S AV9113S1US IQ Robot Vacuum – View on Amazon.Proper Installation: Follow the user manual’s instructions for installing the dust bin correctly. Misalignment or improper placement can trigger the error message.
Sensor Assembly
Sensor Inspection:
After cleaning both the dust bin and the sensor contacts—and even after a reset—if the error message persists, the sensor assembly might be faulty.
Replacement Floor Drop Cliff Sensors Set for Shark AI Ultra models – Purchase on Amazon.
Resetting the Vacuum
If the error persists, try resetting the Shark Robot Vacuum. To do this, press and hold the “Clean” button for 10 seconds. This will restart the device and may resolve the issue by recalibrating its sensors.
Additional Troubleshooting
Check for blockages in the suction path, such as hair or debris, which can also cause the error. Remove any obstructions and ensure the vacuum’s airflow is unrestricted. Regularly inspect and clean the brushes, filters, and wheels to maintain optimal performance.
Maintenance and Prevention
:strip_icc()/cleaning-robot-vacuum-ad1e61d2c9ec4c4e89fbe96bba3c16dc.jpg)
Regular Maintenance Tips
Clean the Brushes: Regularly remove hair and debris from the brushes to maintain suction power.
Empty the Dust Bin: Frequently empty the dust bin to prevent overfilling and ensure efficient operation.
Clean the Filters: Replace the filters if they appear damaged, are clogged beyond cleaning, or if performance decreases despite regular maintenance.
Filters and Brushes
Replacement Parts for Shark AI models (Main Brush, HEPA Filter, Foam Filter, Side Brush) – Find them on Amazon.Check the Wheels and Sensors: Ensure the wheels and sensors are clean and free from debris to improve navigation and mobility.
Preventing Future Errors
Regular maintenance is key to preventing errors like “Dust Bin Not Installed.” Schedule routine cleaning sessions for the vacuum and follow the manufacturer’s guidelines for care and upkeep. This will help ensure the device operates smoothly and avoids interruptions.
Model-Specific Information
Different Shark Robot Vacuum models may have unique features and installation requirements. Consult the user manual or the manufacturer’s website for model-specific instructions and troubleshooting guides. This ensures you address the error correctly based on your vacuum’s design.
Official Support and Community Forums
For additional assistance, access official Shark support or community forums. These resources provide valuable tips, troubleshooting advice, and insights from other users. Engaging with the community can help you resolve issues more effectively and learn best practices for maintaining your vacuum.
Conclusion
The “Dust Bin Not Installed” error on your Shark Robot Vacuum can be resolved by ensuring proper installation, emptying the dust bin, and checking for blockages. Regular maintenance, such as cleaning the brushes, filters, and sensors, is essential for preventing future errors. By following these steps and utilizing model-specific resources, you can keep your Shark Robot Vacuum running efficiently and enjoy a cleaner home.


