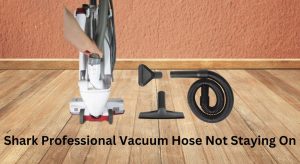
Is your Shark professional vacuum hose constantly detaching? It’s a common frustration, disrupting your cleaning and leaving you wondering why it won’t stay put. A loose vacuum hose can significantly impact suction power and cleaning efficiency, turning a quick chore into a drawn-out ordeal.
This article will provide a comprehensive guide to diagnosing and resolving the issue of a Shark professional vacuum hose that won’t stay connected. We will cover various causes, from simple fixes to more complex solutions, ensuring you can get your vacuum back in top working condition and restore its cleaning power. By the end of this guide, you’ll have the knowledge and tools to tackle this problem head-on, saving you time and frustration.
Table of Contents
Identifying the Cause
Before diving into solutions, it’s crucial to pinpoint the reason why your Shark vacuum hose isn’t staying on. Common causes include:
- Clogs: Blockages in the hose or wand can create pressure, forcing the hose to detach.
- Worn or Damaged Parts: Over time, the hose, connectors, or seals can wear out or become damaged, leading to a poor fit.
- Incorrect Assembly: If the hose wasn’t properly attached initially, it might easily disconnect during use.
- Latch or Locking Mechanism Issues: Some Shark models have a locking mechanism that secures the hose; if this is faulty, the hose won’t stay in place.
Step-by-Step Troubleshooting Guide
Here’s how to troubleshoot a Shark professional vacuum hose that won’t stay on:
1. Check for Blockages
A clogged hose is a primary suspect.
- Detach the Hose: Disconnect the hose from both the vacuum body and the wand or attachments.
- Inspect Visually: Look through the hose to see if you can spot any visible obstructions.
- Use a Broom Handle or Similar Tool: Gently push a broom handle or similar long, blunt object through the hose to dislodge any clogs.
- Flush with Water: If safe to do so (check your vacuum’s manual), rinse the hose with water to remove any remaining debris. Ensure it’s completely dry before reattaching.
2. Inspect the Hose and Connectors
Worn or damaged parts can prevent a secure connection.
- Examine the Hose: Check for cracks, tears, or holes along the length of the hose.
- Inspect Connectors: Look at the connectors on both ends of the hose for any damage or wear. Make sure they are clean and free of debris.
- Check Seals and Gaskets: If your vacuum has seals or gaskets at the connection points, inspect them for wear or damage. Replace if necessary.
3. Ensure Proper Assembly
Incorrect assembly can lead to frequent disconnections.
- Refer to the Manual: Consult your Shark vacuum’s manual for the correct way to attach the hose.
- Align Properly: Ensure the hose is correctly aligned with the vacuum body and wand before attempting to connect it.
- Secure the Connection: Push the hose firmly into place until you hear a click or feel it lock into position.
4. Examine the Locking Mechanism (If Applicable)
If your Shark vacuum has a locking mechanism, it could be the source of the problem.
- Locate the Mechanism: Identify the locking mechanism that secures the hose to the vacuum.
- Test Functionality: Check if the mechanism moves freely and locks properly.
- Clean and Lubricate: Clean the locking mechanism to remove any debris, and apply a small amount of lubricant if it seems stiff.
- Replace if Necessary: If the locking mechanism is damaged or not functioning correctly, consider replacing it.
Practical Elements

Tools/Materials
- Screwdriver (for disassembly if needed)
- Broom handle or similar long, blunt object (for clearing clogs)
- Water (for flushing the hose)
- Mild detergent (for cleaning)
- Lubricant (for locking mechanisms)
- Replacement hose or connectors (if parts are damaged)
Preparation Steps
- Unplug the Vacuum: Always unplug your vacuum cleaner before performing any maintenance or repairs.
- Gather Tools: Collect all the necessary tools and materials before you begin.
- Clear Workspace: Ensure you have a clean and well-lit workspace to make the troubleshooting process easier.
Troubleshooting Guide
| Problem | Possible Cause(s) | Solution(s) |
|---|---|---|
| Hose detaches frequently | Clog in hose | Detach the hose and clear any obstructions using a broom handle or similar tool. Rinse with water and ensure it’s completely dry before reattaching. |
| Hose detaches frequently | Worn or damaged connectors | Inspect the connectors for cracks or damage. Replace the connectors if necessary. |
| Hose detaches frequently | Incorrect assembly | Refer to the vacuum’s manual for proper assembly instructions. Ensure the hose is correctly aligned and securely attached. |
| Hose detaches frequently | Faulty locking mechanism | Check the locking mechanism for functionality. Clean and lubricate if necessary. If the mechanism is damaged, replace it. |
| Reduced suction power | Clog in hose or attachments | Check the hose and attachments for blockages. Clear any obstructions to improve suction. |
| Unusual noises during vacuuming | Clog or damaged hose | Inspect the hose for clogs or damage that could be causing the noises. Clear any blockages or replace the hose if damaged. |
| Hose difficult to attach or detach | Misalignment or stiff locking mechanism | Ensure the hose is properly aligned before attempting to attach it. If the locking mechanism is stiff, clean and lubricate it. |
| Hose has cracks or tears | Normal wear and tear | Replace the hose with a new one. |
Pro Tips
- Regular Cleaning: Clean your vacuum hose and attachments regularly to prevent clogs.
- Gentle Handling: Avoid pulling or yanking the hose, as this can damage the connectors and locking mechanisms.
- Proper Storage: Store your vacuum in a cool, dry place to prevent the hose from becoming brittle or damaged.
Alternatives/Variations
- Use a Shop Vacuum: If you have a shop vacuum, you can use it to try to suck out any clogs from the Shark vacuum hose.
- Try a Different Attachment: Sometimes, the issue isn’t with the hose itself but with the attachment you’re using. Try a different attachment to see if the problem persists.
FAQ Section
Why does my Shark vacuum lose suction when the hose is attached?
A loss of suction often indicates a blockage in the hose or attachments. Detach the hose and check for obstructions. Clear any clogs to restore suction power.
How often should I clean my Shark vacuum hose?
It’s recommended to clean your vacuum hose every 1-3 months, depending on how frequently you use your vacuum. Regular cleaning prevents clogs and maintains optimal performance.
Can I use any hose with my Shark vacuum?
No, it’s crucial to use a hose specifically designed for your Shark vacuum model. Using a different hose may result in a poor fit or damage to the vacuum.
What if I can’t find a replacement hose for my Shark vacuum?
Check the Shark website or contact their customer service for replacement parts. You can also search online retailers that sell vacuum parts.
How do I know if the locking mechanism is faulty?
If the locking mechanism doesn’t click or securely hold the hose in place, it’s likely faulty. Inspect it for damage and consider replacing it if necessary.
Is it worth repairing a vacuum hose, or should I just replace it?
If the hose has minor damage, such as a small crack, you might be able to repair it with tape. However, if the damage is significant or the hose is old and worn, it’s best to replace it.
Tips, Warnings, and Best Practices
- Safety First: Always unplug your vacuum before performing any maintenance or repairs.
- Avoid Harsh Chemicals: When cleaning the hose, avoid using harsh chemicals that could damage the material.
- Regular Maintenance: Perform regular maintenance on your vacuum to prevent issues and prolong its lifespan.
- Check for Recalls: Keep an eye out for any recalls on your Shark vacuum model, as this could indicate a known issue with the hose or other parts.
Conclusion
Dealing with a Shark professional vacuum hose that won’t stay on can be frustrating, but with the right approach, it’s a manageable problem. By systematically checking for clogs, inspecting the hose and connectors, ensuring proper assembly, and examining the locking mechanism, you can identify and resolve the issue.
Remember to prioritize safety, perform regular maintenance, and use the appropriate tools and replacement parts. By following the tips and solutions outlined in this guide, you can restore your Shark vacuum’s performance and enjoy a hassle-free cleaning experience. Take the next step and start troubleshooting your vacuum today to bring back its optimal cleaning power.


