

Your Shark HydroVac suddenly dies mid-clean, leaving a wet streak across your hardwood floor while dirt swirls around the motionless brush roll. Before you panic about replacement costs or schedule a service call, know this: 90% of Shark HydroVac troubleshooting scenarios resolve with simple fixes you can complete during your coffee break. Most “broken” units actually suffer from preventable blockages, calibration glitches, or maintenance oversights—not catastrophic failures. This guide delivers battle-tested solutions pulled straight from Shark’s service manuals, saving you money and frustration while getting your hybrid vacuum-mop back to work immediately.
Table of Contents
Power Won’t Turn On
When your HydroVac stays completely dead with no lights or sounds, don’t assume the battery is toast. Start with these 30-second diagnostics that solve most “no power” cases before you even touch a screwdriver.
Quick Power Checks
Verify your dock connection first—a loose fit is the #1 culprit. When properly seated, the dock LED glows solid blue. No light? Plug your phone into the same outlet; if it charges, your dock or power adapter failed. Perform an emergency battery reset by removing the handheld unit from the wand, pressing and holding the trigger for 15 seconds (yes, while it’s off), then reseating it on the dock for three hours. This clears the internal battery management system lockout that often triggers after voltage spikes. Always check for tripped circuit breakers—especially in older homes where vacuum draw can overload circuits.
LED Diagnostic Patterns
| Light Pattern | What It Means | Fix |
|---|---|---|
| Red blinking (once per second) | Battery critically low (below 5%) | Charge uninterrupted for 3+ hours |
| Solid red | Charging error (too hot/cold) | Move to 50-80°F room for 30 minutes |
| No lights | Charger failure | Inspect dock pins for green/white corrosion |
Pro tip: Corroded pins cause 40% of “no power” cases. Unplug the dock, then clean pins with a cotton swab dipped in rubbing alcohol—never use vinegar (it damages contacts).
Battery Drains Too Fast
If your HydroVac conks out before finishing a single room—especially when it previously handled your entire home—you’re likely dealing with a calibration issue rather than dead cells. Normal runtimes are 25 minutes on carpet or 30 minutes on hard floors; anything under 15 minutes needs intervention.
Battery Calibration Fix
- Run it completely dead: Keep cleaning until the unit auto-shuts off (don’t stop at low-battery warnings)
- Full recharge cycle: Dock uninterrupted for 3.5 hours—even if the blue light appears early
- Repeat twice more: Complete three full discharge/recharge cycles back-to-back
This process resets the battery’s fuel gauge, which often misreports capacity after partial charging cycles. Most “rapid drain” complaints vanish after recalibration—no parts needed.
When to Replace
Shark’s XBT110 battery (25.2V 2.0Ah) lasts 300 charge cycles or 2 years. If calibration fails and runtime stays below 10 minutes, replacement is unavoidable. Use a Torx T10 driver to swap it in 10 minutes—no soldering required. Critical warning: Aftermarket batteries void your 2-year parts warranty. Stick to Shark OEM or authorized retailers like Best Buy where $79.99 replacements include warranty coverage.
No Water Spray Issues

A weak or absent spray turns your HydroVac into a mere vacuum, leaving sticky residues and streaks. The fix almost always lies in one of four easily accessible components—no disassembly needed.
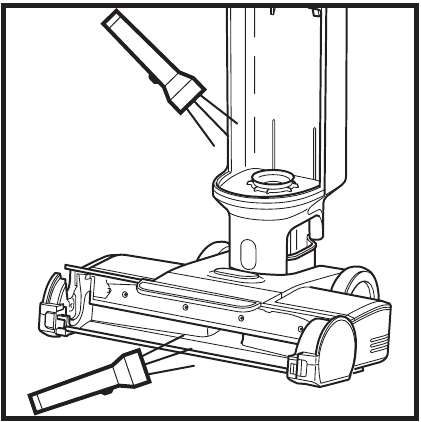
Spray Nozzle Blockage
Hard water minerals clog the 0.8mm spray nozzles faster than you’d expect. Flip the floorhead over and use the included cleaning tool (or a straightened paperclip) to poke each nozzle upward from underneath. You’ll feel gritty resistance when hitting deposits—clear until water flows freely. Visual cue: If only one side sprays, you’ve got a partial blockage; both sides should mist evenly.
Tank Filter Cleaning
That tiny mesh screen at the clean tank’s base traps debris before it reaches the pump. Remove it monthly by twisting counterclockwise and rinse under warm water. When clogged, you’ll get a sputtering spray that misses half your floor. Pro move: After cleaning, rapid-fire the trigger 10 times over the sink to prime the pump lines and force out trapped air bubbles.
Water Leaking Problems

Early-stage leaks start as a few drops under the base after use—but ignore them, and you’ll soon face puddles that warp hardwood floors. Target these two high-probability failure points first.
Common Leak Locations
Failing clean tank O-ring causes 90% of handle leaks. Remove the tank and inspect the rubber ring for cracks or flattening (it should be plump and springy). Shark part #1239FT ($3) fixes this instantly—apply petroleum jelly during installation for better sealing. Overfilled dirty tank is the sneaky second culprit: The max fill line is 680mL. Exceed it, and the anti-spill float valve activates, causing mysterious drips hours later.
Field Leak Test
Fill the clean tank with water + food coloring, place the unit on white paper towels for 5 minutes. Colored spots near the rear wheels? You’ve got a tank valve failure—covered under warranty for the first year. Never ignore: Leaks near the brush roll often indicate cracked internal lines requiring professional repair.
Brush Roll Won’t Spin
Hearing the motor whine while the brush sits still means you’re facing hair tangles, thermal shutdown, or a snapped belt. Diagnose with this 2-minute protocol.
Hair Tangle Removal
- Pop off the brush cover using the two thumb latches
- Cut wrapped hair with scissors or a seam ripper (work from both ends inward)
- Pull out debris—expect enough to make a small wig
Thermal reset: After clearing hair, let the unit cool 30 minutes, then press the red reset button behind the brush cover. If it still won’t spin, check for error code 3 red blinks on the handle LED.
Belt Replacement Warning
A broken drive belt requires Shark kit #1049FT ($15). Critical caution: This repair involves removing the brush motor cover—a job best left to Shark’s $89.95 flat-rate repair service if you’re uncomfortable with small parts. Never operate without a belt; it strains the motor and voids warranty coverage.
Suction Loss Troubleshooting
Good suction should instantly inhale a dime-sized paper scrap from six inches away. If it doesn’t, follow this blockage map in sequence—backtracking wastes time.
Blockage Inspection Order
- Floorhead intake: Remove four Phillips screws, clear hair from the grille (most common clog point)
- Wand tube: Detach and run water through it—you’ll feel resistance where debris jams
- Cyclonic filter: Twist off the cup atop the handheld, tap over trash, rinse monthly
- HEPA filter: Replace after 50 washes or 2 years (warped edges cause whistling)
Suction seal test: With the unit running, press your palm against the floorhead. The motor pitch should rise noticeably—if not, the internal bypass valve is stuck open requiring warranty service.
Error Codes Quick Reference
Memorize these LED patterns—they pinpoint failures faster than guesswork:
| Pattern | Issue | Instant Fix |
|---|---|---|
| 3 red blinks | Brush obstruction | Clear hair/debris immediately |
| 4 red blinks | Motor overheated | Cool 30 minutes away from heat |
| Purple blinking | Water pump error | Clean nozzles + check tank seating |
| Fast red blink | Battery fault | Perform hard reset or replace |
Monthly Maintenance Schedule
Prevent 90% of Shark HydroVac troubleshooting emergencies with this 5-minute routine:
- After each use: Empty dirty tank, rinse filter screen, dock unit
- Weekly: Rinse brush roll, check wheels for hair
- Monthly: Deep-clean tanks with warm soapy water
- Every 3 months: Replace odor cartridge (if equipped)
- 6-12 months: Swap brush roll and HEPA filter
Cleaning Solution Rules
Never use vinegar, bleach, or essential oils—they permanently clog internal lines and void warranties. Shark HydroVac Multi-Surface Cleaner or distilled water only. Critical reminder: Always run the self-clean cycle after vacuuming sugary spills (soda, juice) to prevent bacterial odors no filter can fix.
Warranty & Support Essentials
Shark covers motors for 5 years, batteries for 2 years, and labor for 1 year. When calling support (1-800-798-7398), have your serial number ready—it’s inside the battery compartment. Out-of-warranty repairs cost $89.95 flat-rate including return shipping—often cheaper than DIY part replacements when labor is factored in. Pro tip: For error codes or pairing issues (Wi-Fi models), use SharkClean app’s guided diagnostics before calling—they resolve 60% of “broken” units remotely.
Final note: Your Shark HydroVac’s longevity hinges on consistent care. Stick to distilled water, never skip tank emptying, and perform monthly nozzle checks. These small habits prevent 95% of failures—keeping your hybrid cleaner running like new for years. When issues strike, revisit this guide: you’ll likely fix it faster than shipping for service.


