The Shark Detect Pro is a game-changer in the world of robotic vacuums, offering advanced features like auto-empty functionality. However, even the most sophisticated devices can encounter issues. If your Shark Detect Pro won’t auto-empty, it can be frustrating and disrupt your cleaning routine. This guide will help you identify the root cause, troubleshoot effectively, and maintain your device for optimal performance.
Table of Contents
- Shark Detect Pro Auto-Empty Feature
- Troubleshooting the Shark Detect Pro Auto-Empty Issue
- Maintenance and Cleaning Regimen for the Shark Detect Pro
- Understanding the Components of the Shark Detect Pro
- Deep Cleaning the Shark Detect Pro
- Additional Tips and Recommendations for the Shark Detect Pro
- Troubleshooting Common Issues with the Shark Detect Pro
- Advanced Troubleshooting for the Shark Detect Pro
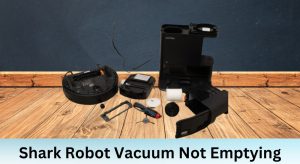
The auto-empty feature is designed to make cleaning effortless by automatically transferring debris from the vacuum’s dustbin into a larger dust bag in the base. This convenience ensures that the vacuum can continue cleaning without interruption. However, common issues like blockages, overfilled bins, or dirty components can cause the auto-empty feature to malfunction. Understanding these potential problems is the first step toward resolving them.
Troubleshooting the Shark Detect Pro Auto-Empty Issue

Identifying the Problem
Start by identifying the root cause of the auto-empty issue. Begin with a visual inspection of the vacuum and base. Check for blockages in the vacuum’s suction path, ensure the dustbin is empty, and inspect the filters for dirt buildup. If the dustbin is overfilled, the vacuum may not detect the need to empty, leading to malfunction.
Possible Causes and Solutions
Obstructions in the Vacuum or Bin:
Blockages in the vacuum’s suction path or the auto-empty base can prevent debris from transferring properly. Remove any visible debris or clogs using a soft brush or compressed air.
Using the “Evacuate and Resume” Function:
This feature clears the bin and allows the vacuum to continue operating effectively. If the bin is overfilled or compacted, use this function to reset the system.
Robot’s Inability to Detect Bin Fullness:
Regularly using the “evacuate and resume” function prevents overfilling and compaction, ensuring the vacuum can detect when the bin needs emptying.
Failure to Clean Device Components:
Dirt and debris can accumulate in the base, filters, brushroll, and brush guard, affecting performance. Clean these components regularly using compressed air or a damp cloth.
Need to replace the filters? Buy replacement filters for Shark Detect Pro from Amazon to maintain airflow and performance.
Maintenance and Cleaning Regimen for the Shark Detect Pro
Daily Maintenance Tasks
- Empty the dustbin after each use to prevent overfilling.
- Check and clean the filters to ensure proper airflow.
- Remove hair and debris from the brushes to maintain efficiency.
Weekly Maintenance Tasks
- Deep clean the filters by washing and drying them thoroughly.
- Wipe down the vacuum’s exterior to remove dust and dirt.
- Inspect and clean the suction path to prevent blockages.
Monthly Maintenance Tasks
- Thoroughly clean the auto-empty base, including the dust bag compartment.
- Check and clean the vacuum’s suction path for any hidden debris.
Understanding the Components of the Shark Detect Pro

The Vacuum Itself
The vacuum requires regular maintenance of its filters, dustbin, and brushes to function effectively. Keeping these components clean ensures optimal performance and longevity.
The Auto-Empty Base
The auto-empty base also needs attention. Replace the dust bag when full, clean the base to prevent blockages, and ensure it’s free from dirt and debris.
Deep Cleaning the Shark Detect Pro
/how-to-clean-shark-vacuum-filter-5217133-06-81debb2bce5e48668277f5ad4fbe11f4.jpg)
Cleaning the Motor and Ducts
Use a soft-bristled brush to remove debris from the motor and ducts, then wipe them down with a dry cloth. This ensures the vacuum’s internal components remain clean and efficient.
Cleaning the Filters
The pre-filter and HEPA filter require regular cleaning. Gently tap the pre-filter to remove loose debris, and use a soft brush or dry cloth for the HEPA filter. Avoid washing the HEPA filter, as water can damage it.
When the filters stop performing well, grab genuine Shark HEPA and pre-filter replacements on Amazon to keep your vacuum in top shape.
Additional Tips and Recommendations for the Shark Detect Pro
- Regularly check and replace filters as needed to maintain performance.
- Avoid using the vacuum in extreme temperatures or humid environments.
- Store the vacuum in a dry, cool place when not in use.
- Refer to the user manual for specific maintenance instructions.
Troubleshooting Common Issues with the Shark Detect Pro
Blockages and Reduced Suction
Check the suction path, including the hose, wand, and vacuum inlet, for obstructions. Regular cleaning prevents blockages and ensures consistent suction power.
Filter Maintenance
Clean and replace filters as recommended by the manufacturer. Dirty filters can reduce suction and damage the vacuum over time.
Advanced Troubleshooting for the Shark Detect Pro

Checking for Compacted Dirt
If debris is compacted in the dustbin or auto-empty base, rinse the affected area with water to dislodge it. Check if the compartment can be unclipped or if there’s a button to release it.
Seeking Further Assistance
If troubleshooting steps don’t resolve the issue, contact Shark customer support for further assistance. They can provide guidance or arrange repairs if necessary.
By following this guide, you can keep your Shark Detect Pro running smoothly and enjoy the convenience of its auto-empty feature. Regular maintenance and prompt troubleshooting ensure your vacuum remains a reliable cleaning partner for years to come.


