
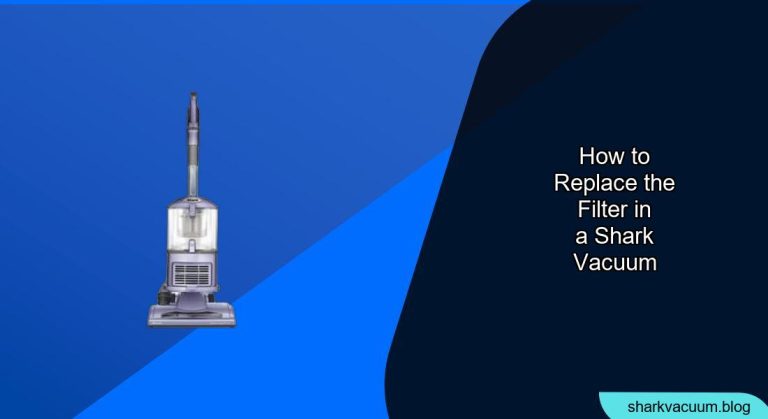
Replacing the filter in your Shark vacuum is essential for maintaining its suction power and overall performance. A clean filter ensures that your vacuum effectively captures dust, dirt, and allergens, preventing them from recirculating into your home. Neglecting filter maintenance can lead to reduced cleaning efficiency and potential motor damage. This guide will walk you through the process of replacing the filter in your Shark vacuum, ensuring optimal performance and longevity.
This article provides a comprehensive, step-by-step guide on how to replace the filters in your Shark vacuum cleaner. We will cover everything from identifying the type of filters in your model to the actual replacement process, along with tips on maintaining your vacuum for long-term use. Whether you have an upright, a stick, or a robot vacuum, following these instructions will help you keep your Shark vacuum running smoothly and efficiently.
Identifying Your Shark Vacuum Filter Type
Before you begin, it’s crucial to identify the type of filters your Shark vacuum uses. Shark vacuums typically have two main filters: a pre-motor filter and a post-motor filter. The pre-motor filter protects the motor from dust and debris, while the post-motor filter captures finer particles and allergens. The location and type of these filters can vary depending on your specific Shark model. Consult your vacuum’s user manual to confirm the exact filter types and their locations.
Tools and Materials You’ll Need
- New Shark vacuum filters (pre-motor and post-motor)
- A small brush or soft cloth
- A trash can or bag for disposing of the old filters
Step-by-Step Guide to Replacing Your Shark Vacuum Filter
- Power Off and Unplug: Before performing any maintenance, ensure your Shark vacuum is powered off and unplugged from the electrical outlet. This is a crucial safety measure to prevent accidental operation during the filter replacement process.
- Locate the Pre-Motor Filter: The pre-motor filter is typically located near the dust cup or motor housing. Refer to your user manual for the exact location if you’re unsure. Common locations include under the dust cup or behind a removable panel.
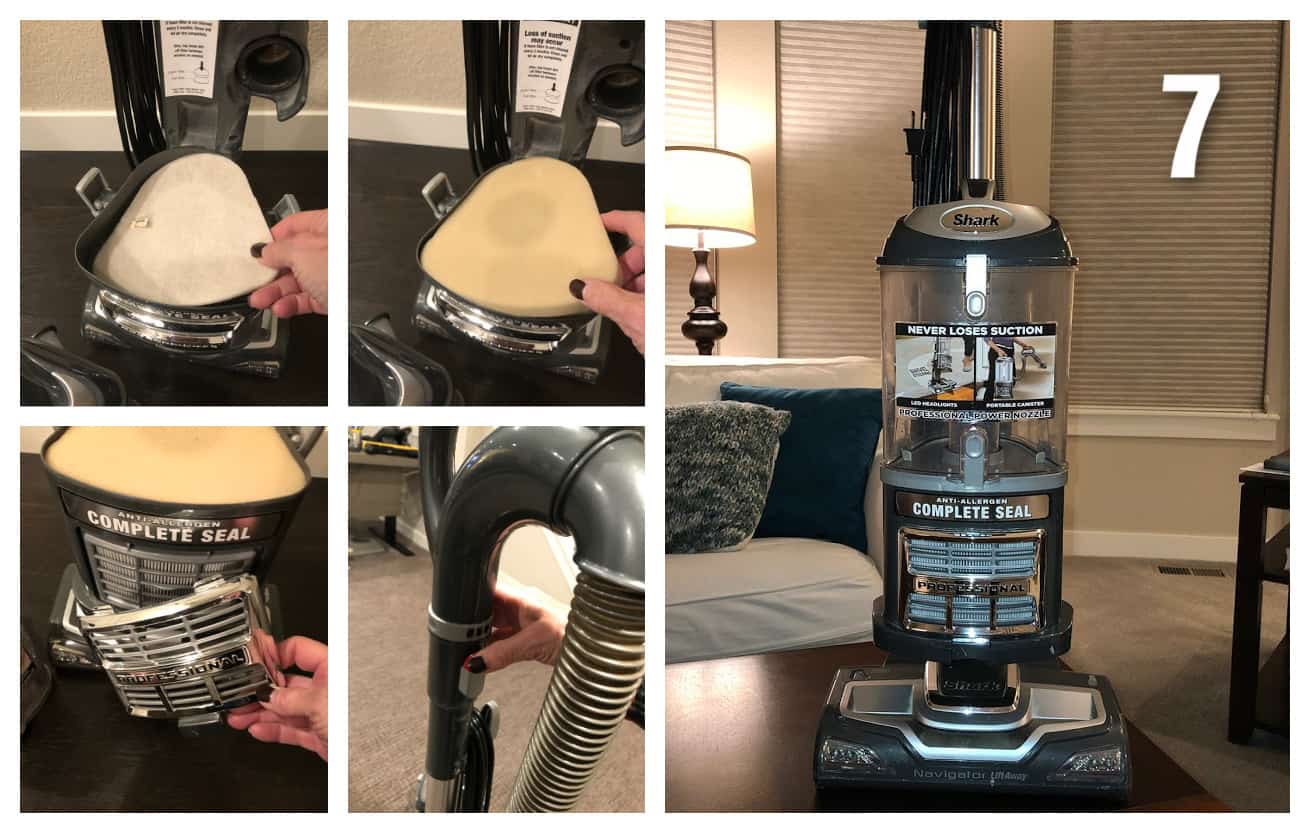
- Remove the Pre-Motor Filter: Open the filter compartment or access panel. Gently remove the pre-motor filter. Depending on your model, it may be a foam or felt filter, or a combination of both.
- Clean the Filter Housing: Before installing the new filter, use a small brush or soft cloth to clean the filter housing. Remove any accumulated dust or debris to ensure a clean and proper fit for the new filter.
- Install the New Pre-Motor Filter: Insert the new pre-motor filter into the housing, making sure it fits snugly and securely. Ensure that the filter is oriented correctly, following any markings or instructions provided.
- Locate the Post-Motor Filter: The post-motor filter is usually located near the exhaust vent of the vacuum. This filter is designed to capture fine particles and allergens before the air is expelled from the vacuum.
- Remove the Post-Motor Filter: Open the post-motor filter compartment. Remove the old filter. This filter is often a HEPA (High-Efficiency Particulate Air) filter designed to trap very small particles.
- Clean the Filter Housing: As with the pre-motor filter, clean the post-motor filter housing to remove any dust or debris. This ensures a clean environment for the new filter and optimal performance.
- Install the New Post-Motor Filter: Insert the new post-motor filter into its housing. Ensure it fits properly and is securely in place. Close the compartment or access panel.
- Reassemble the Vacuum: Reassemble any parts you removed to access the filters, such as the dust cup or access panels. Ensure everything is properly aligned and securely fastened.
- Test the Vacuum: Plug the vacuum back into the electrical outlet and power it on. Listen for any unusual noises or changes in suction. If everything sounds normal, your filter replacement was successful.
Troubleshooting Guide
- Reduced Suction After Filter Replacement:
- Problem: The vacuum has reduced suction even after replacing the filters.
- Solution: Double-check that the filters are installed correctly and are the right type for your model. Also, ensure the dust cup is empty and that there are no clogs in the hose or attachments.
- Unusual Noises:
- Problem: The vacuum is making strange noises after replacing the filters.
- Solution: Turn off the vacuum immediately. Check that the filters are properly seated and that no parts are misaligned. Consult your user manual for troubleshooting steps or contact Shark customer support.
- Filter Doesn’t Fit:
- Problem: The new filter doesn’t fit into the filter housing.
- Solution: Verify that you have the correct filter for your Shark vacuum model. Check the part number on the filter packaging against your vacuum’s model number. If the filter is the wrong size, purchase the correct one.
- Dust Escaping from the Vacuum:
- Problem: Dust is escaping from the vacuum while in use.
- Solution: Ensure that all filters are properly installed and that the dust cup is correctly attached. Check for any cracks or damage to the vacuum body that may be causing leaks.
- Vacuum Overheating:
- Problem: The vacuum is overheating during use.
- Solution: Overheating can occur if the filters are clogged or if there is a blockage in the vacuum. Clean or replace the filters and check for any obstructions in the hose, wand, or brush roll.
Pro Tips for Maintaining Your Shark Vacuum Filter
- Regular Cleaning: Clean your filters regularly, even if they don’t appear dirty. Wash the foam and felt filters every month and replace them every 3-6 months.
- HEPA Filter Replacement: Replace the HEPA filter every year, or as recommended by the manufacturer, to maintain optimal filtration efficiency.
- Avoid Washing HEPA Filters: HEPA filters are not designed to be washed. Washing them can damage the filter material and reduce their effectiveness.
- Check for Blockages: Regularly check for blockages in the hose, wand, and brush roll. Clear any obstructions to maintain optimal suction and prevent motor strain.
- Use Genuine Shark Filters: Use only genuine Shark replacement filters to ensure proper fit and performance. Generic filters may not provide the same level of filtration and can potentially damage your vacuum.
Alternatives/Variations
/how-to-clean-shark-vacuum-filter-5217133-06-81debb2bce5e48668277f5ad4fbe11f4.jpg)
- Using a Shop Vacuum: For a more thorough cleaning, consider using a shop vacuum to clean the filter housing. This can help remove stubborn dust and debris.
- DIY Filter Cleaning Solution: Create a mild cleaning solution using water and a small amount of dish soap to clean foam and felt filters. Rinse thoroughly and allow to air dry completely before reinstalling.
- Filter Subscription Services: Consider subscribing to a filter replacement service that automatically sends you new filters on a regular schedule. This ensures you always have fresh filters on hand.
FAQ Section
How often should I replace my Shark vacuum filters?
Replace your foam and felt pre-motor filters every 3-6 months, depending on usage. The HEPA post-motor filter should be replaced annually. Regular replacement ensures optimal suction and filtration.
Can I wash my Shark vacuum filters?
Yes, you can wash the foam and felt pre-motor filters with water and a mild detergent. Rinse thoroughly and allow to air dry completely before reinstalling. However, do not wash the HEPA post-motor filter, as this can damage its filtration capabilities.
Where can I buy replacement filters for my Shark vacuum?
You can purchase replacement filters from the SharkClean website, major retailers like Amazon and Walmart, or local appliance stores. Ensure you buy filters that are compatible with your specific Shark vacuum model.
What happens if I don’t replace my Shark vacuum filters?
If you don’t replace your filters regularly, your vacuum’s suction power will decrease, and it may not effectively capture dust and allergens. This can lead to poor cleaning performance and potential damage to the vacuum’s motor.
How do I know if my Shark vacuum filter needs to be replaced?
Signs that your filter needs replacing include reduced suction power, visible dirt and debris on the filter, and a musty odor coming from the vacuum. Regular cleaning and timely replacement will keep your vacuum running efficiently.
Are generic filters as good as genuine Shark filters?
While generic filters may be cheaper, they may not provide the same level of filtration and may not fit your vacuum properly. Using genuine Shark filters ensures optimal performance and protects your vacuum from potential damage.
Tips, Warnings, and Best Practices
- Safety First: Always unplug your vacuum before performing any maintenance or repairs.
- Read the Manual: Consult your Shark vacuum’s user manual for specific instructions and recommendations.
- Proper Drying: Ensure that foam and felt filters are completely dry before reinstalling to prevent mold and mildew growth.
- Avoid Harsh Chemicals: Do not use harsh chemicals or abrasive cleaners to clean your filters, as these can damage the filter material.
- Regular Maintenance: Incorporate filter cleaning and replacement into your regular cleaning routine to keep your vacuum in top condition.
Conclusion
Replacing the filter in your Shark vacuum is a simple yet crucial task for maintaining its performance and prolonging its lifespan. By following this step-by-step guide, you can ensure that your vacuum operates at its best, providing a cleaner and healthier home environment. Remember to clean or replace your filters regularly, use genuine Shark replacement filters, and address any issues promptly to keep your vacuum running smoothly for years to come.


