Your Shark vacuum suddenly lost suction mid-clean, leaving debris scattered across your floor. That familiar frustration hits when you realize you’ve got a clog—but don’t reach for the phone just yet. Most Shark vacuum blockages can be cleared in under 10 minutes with simple household items and the right technique. This complete guide shows you exactly how to unclog a Shark vacuum without tools or technical expertise.
Shark engineered their vacuums with smart detachable points specifically for easy maintenance access. You’ll discover where clogs most commonly hide, which everyday item clears 90% of blockages, and crucial prevention tips to avoid future headaches. Let’s get your vacuum breathing like new again.
Table of Contents
- Shark Vacuum Clog Hotspots Revealed
- Quick Visual Inspection Steps That Save Time
- Unclog Hose with Broom Handle Technique
- Clear Upper Tube Blockages Without Damage
- Proper Disassembly Sequence for Foolproof Results
- Extract Stubborn Debris Without Vacuum Damage
- Prevent Future Clogs With Simple Habits
- When to Call Shark Support Experts
- Quick Clog Diagnosis Checklist You Need

Every Shark model has predictable clog locations based on how debris travels through the machine. These connection points separate easily for cleaning, though they’re not always obvious at first glance. Knowing exactly where to check saves you precious time during your how to unclog a Shark vacuum process.
Hose Connection Points That Trap Debris
The flexible hose connects at two critical junctions—where it meets the vacuum body and where it attaches to the cleaning head. These snap-fit connections release with gentle pressure, exposing the entire hose length for inspection. Pay special attention to these connection points as they’re prime clog locations where hair and string accumulate.
Upper Tube Assembly Blockage Zones
The rigid tube running from floor head to main body frequently traps larger items that made it past the initial filter. This section separates from both ends, giving you full access to check for paper, socks, or fabric wads stuck inside. When learning how to unclog a Shark vacuum, this upper tube is often where stubborn blockages hide.
Component Separation Zones You’re Missing
Look for slight seams or ridges along your vacuum’s body—these mark where parts detach. Shark intentionally designed these break points for maintenance access, not manufacturing shortcuts. These separation zones allow you to isolate problem areas when troubleshooting your clog.
Quick Visual Inspection Steps That Save Time
Before diving into disassembly, a 30-second visual check identifies the clog location and saves time. This preliminary step is crucial when you need to know how to unclog a Shark vacuum efficiently.
What to look for during inspection:
– Visible debris at hose openings
– Crushed or kinked hose sections
– Dust accumulation at connection points
– Unusual wear patterns on tubes
Test suction method that works:
Turn your vacuum on lowest setting and feel for weak airflow at different points. The location with weakest suction typically holds your clog. This simple test prevents unnecessary disassembly and focuses your unclogging efforts where they’ll be most effective.
Unclog Hose with Broom Handle Technique
The broom handle method clears most hose blockages without damage or specialized tools. This technique works because the handle’s smooth surface pushes debris without tearing the hose interior—a critical step in how to unclog a Shark vacuum successfully.
Step-by-step process:
1. Detach hose from vacuum body by pressing release tabs
2. Remove hose from floor head connection
3. Lay hose straight on floor—avoid sharp bends
4. Insert broom handle gently into one end
5. Push steadily until resistance gives way
6. Continue pushing until debris exits opposite end
Pro tip: If debris feels stuck, rotate the broom handle while pushing. This corkscrew motion breaks up compacted clogs without hose damage. For wet messes, wrap duct tape around the handle (sticky side out) to grab and extract stubborn material.
Clear Upper Tube Blockages Without Damage

Upper tube clogs typically involve larger items that made it past the floor head but couldn’t navigate the tube’s curves. These blockages sit in the straight section between bends and require careful extraction.
Common culprits to check for:
– Paper towels or tissues
– Small socks or fabric scraps
– Children’s toys or game pieces
– Pet hair compacted into solid mass
Extraction technique that works:
Separate the upper tube at both connection points. Hold tube up to light—any blockage creates a visible shadow. Use your fingers or needle-nose pliers to pull debris back out the same direction it entered. Never force objects through, as this can damage the internal structure.
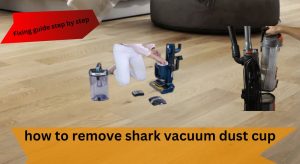
Proper Disassembly Sequence for Foolproof Results
Following the correct order prevents damage and makes reassembly foolproof. Shark’s design allows complete access without removing screws or panels—a key advantage when learning how to unclog a Shark vacuum.
Disassembly order that works:
1. Power off and unplug vacuum
2. Remove dust cup and empty debris
3. Detach hose from main body
4. Separate hose from floor head
5. Remove upper tube assembly
6. Check floor head intake separately
Reassembly reminder: Reverse this exact order, ensuring each connection clicks securely. A loose connection creates new suction leaks that feel like remaining clogs, wasting your time and effort.
Extract Stubborn Debris Without Vacuum Damage
Some clogs resist simple pushing or pulling. These techniques handle tough blockages without causing harm to your vacuum—a critical consideration when you’re figuring out how to unclog a Shark vacuum completely.
For compressed debris:
Use compressed air to blow from the clean end back toward the clog. This reverses debris flow and often dislodges compacted material. Hold the nozzle 2-3 inches from the tube opening for best results.
For wet or sticky messes:
Run warm water through detachable hose sections only. Never submerge electrical components. Let parts dry completely for 24 hours before reassembly to prevent mold growth or electrical issues.
For pet hair clogs:
Wrap duct tape around broom handle (sticky side out) and insert into hose. The tape grabs hair clusters as you pull back out. This method works better than pushing for tangled pet hair.
Prevent Future Clogs With Simple Habits
Simple habits reduce clog frequency and extend vacuum life. These preventive measures take seconds but save hours of frustration when dealing with how to unclog a Shark vacuum regularly.
Before each use:
– Quick-scan floors for socks, papers, or large debris
– Empty dust cup when half-full
– Check hose for visible kinks or damage
Weekly maintenance:
– Rinse washable filters per model instructions
– Inspect brush roll for wrapped hair or string
– Wipe down hose exteriors to spot wear early
Monthly deep clean:
– Disassemble and wash all detachable hoses
– Check all connection points for cracks
– Test suction strength at each component
When to Call Shark Support Experts
Some clogs require professional attention despite your best efforts. Contact Shark Customer Care if you notice these signs after attempting how to unclog a Shark vacuum.
Call immediately if:
– Burning smell or unusual motor sounds
– Visible cracks in tubes or hoses
– Electrical issues after reassembly
– Repeated clogs in same location
Shark Customer Care:
– Phone: 877-581-7375
– Hours: Monday-Friday 9am-9pm ET, Saturday 9am-6pm ET
Before calling:
Have your model number ready (found on vacuum rating label) and note which troubleshooting steps you’ve completed. This information helps Shark support resolve your issue faster.
Quick Clog Diagnosis Checklist You Need
Use this rapid-fire checklist to locate clogs in under two minutes when you’re trying to figure out how to unclog a Shark vacuum:
Airflow test: Feel for suction at hose end, floor head, and dust cup
Visual sweep: Check all connection points for visible debris
Component isolation: Test each section separately
Sound check: Listen for whistling (indicates air leaks) versus straining (indicates blockage)
This diagnostic approach pinpoints the exact problem location, saving you from unnecessary disassembly and making your unclogging process efficient.
Your Shark vacuum should now breathe freely again. Remember: most clogs clear with the broom handle method, and regular emptying prevents 80% of future blockages. Keep this guide handy—vacuum clogs happen, but they don’t have to ruin your cleaning day. When you know exactly how to unclog a Shark vacuum, you’ll save time, money, and frustration with every cleaning session.