
That persistent drip under your sink isn’t just annoying—it’s a ticking time bomb for water damage. When your kitchen water valve fails, it can flood cabinets, warp flooring, and even compromise your home’s structure within hours. Replacing a faulty valve is one of the most critical DIY plumbing tasks you can master, potentially saving hundreds in emergency plumbing fees. This guide delivers the exact steps to replace your kitchen sink water valve safely and permanently, using professional techniques that prevent leaks for decades. You’ll learn water-shutoff protocols most homeowners miss, avoid costly installation errors, and gain confidence to handle plumbing emergencies.
Why Your Kitchen Water Valve Needs Immediate Replacement
Ignoring a leaking valve risks catastrophic damage—just 1/8-inch of standing water can seep through subflooring within 24 hours. Most kitchen valves fail due to mineral buildup from hard water or rubber washer deterioration after 8-10 years. If you notice drips when the faucet is off, visible corrosion on valve handles, or valves that won’t turn smoothly, replacement is urgent. Delaying repair puts your home at risk of mold growth in hidden spaces, which often requires $2,000+ in remediation. Don’t confuse valve leaks with faucet issues; if water pools under the sink when all taps are closed, the valve itself is failing.
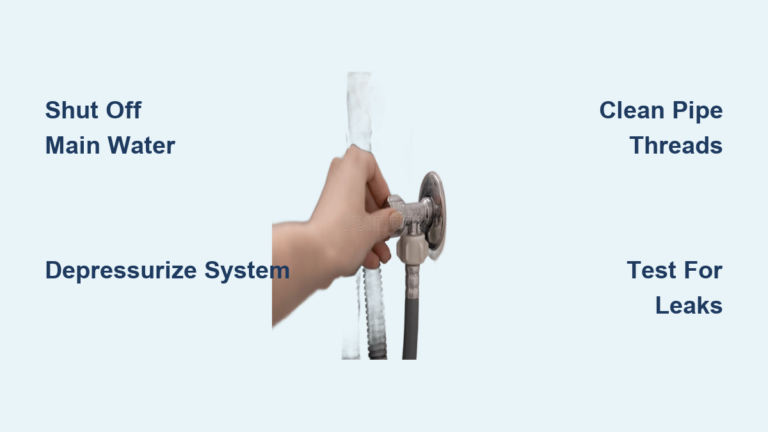
Shut Off Water Supply: The Critical First Step Before You Begin

Skipping proper water shutoff causes 70% of DIY plumbing disasters. Never rely solely on under-sink valves—they often seize shut after years of disuse. For complete safety:
- Locate your main water shut-off (usually in basement, crawl space, or near water meter) and turn clockwise until fully closed
- Depressurize the system by opening the highest faucet in your home (like an upstairs bathroom) followed by the lowest point (basement sink or floor drain)
- For hot water lines only: Close the cold inlet valve on your water heater (blue handle) AND open the pressure relief valve to drain residual hot water
- Test by turning on your kitchen faucet—zero water flow confirms successful shutoff
Pro Tip: Place towels under work areas before starting. Residual water in pipes will drip for 5-10 minutes after shutoff.
Essential Tools and Materials: What You Must Have Before Starting
Gather these items to avoid mid-project store runs:
- ¼-turn brass ball valve (½” size—measure existing pipe diameter with calipers)
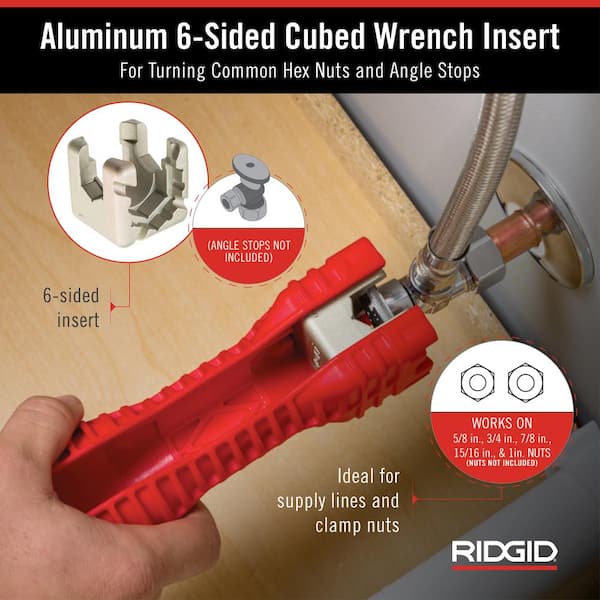
- Two adjustable wrenches (10″ and 12″ for leverage)
- Teflon tape (blue industrial grade, NOT white plumbing tape)
- Emery cloth (for pipe thread cleaning—sandpaper won’t cut it)
- Bucket wrench (for tight spaces behind cabinets)
- Safety glasses and waterproof gloves (mineral deposits can spray when loosening old valves)
Critical Warning: Never use plastic valves—they crack under pressure surges. Brass handles 150+ PSI and lasts 20+ years.
Step 1: Depressurize the Plumbing System Correctly
This step prevents dangerous pressure bursts when disconnecting lines. For municipal water systems:
- Close main shutoff → Open highest + lowest faucets → Wait until all dripping stops
- For well systems, add: Turn off well pump breaker AND release pressure at the tank’s Schrader valve
Visual Cue: When no more water drips from open faucets, the system is depressurized. If you hear hissing, residual pressure remains—wait longer.
Step 2: Remove the Old Valve Without Damaging Pipes
- Position a bucket under the valve and place towels on cabinet floor
- Hold the supply pipe steady with one wrench (prevents twisting connected pipes)
- Loosen the compression nut on the faucet supply line with your second wrench—turn counterclockwise in quarter-turn increments
- Remove the valve nut connecting to the main pipe using the same two-wrench technique
- Clean pipe threads with emery cloth until shiny metal appears—remove all old tape and mineral deposits
Common Mistake: Forcing seized nuts cracks pipes. Apply penetrating oil, wait 15 minutes, then tap nut gently with hammer before turning.
Step 3: Prepare Pipe Threads for a Leak-Free Connection
Thread quality determines 90% of leak prevention. Wrap Teflon tape clockwise (with thread direction) in 4 tight layers—start 2 threads back from pipe end. For hot water lines, add pipe dope over the tape on the final thread. Never wrap tape over the first thread—this causes tape to bunch and create gaps. Test fit the new valve by hand; it should screw on smoothly for 2-3 full turns. If resistance occurs, re-clean threads immediately—cross-threading guarantees leaks.
Step 4: Install the New ¼-Turn Ball Valve Properly
- Hand-tighten the new valve until snug (don’t use tools yet)
- Give exactly 1.5 additional turns with wrench—overtightening cracks brass fittings
- Reconnect the faucet supply line with fresh Teflon tape, tightening only ¼-turn past hand-tight
- Position valve handles horizontally when closed (standard for ¼-turn valves)
Pro Tip: Install valves with the flow arrow pointing toward the faucet. Reversed installation causes premature failure.
Step 5: Test for Leaks Before Restoring Full Water Pressure

Half-open failures cause the most damage. Here’s the plumber’s testing sequence:
- Partially open main shutoff (25% open) for 60 seconds
- Check connections with dry paper towel—even slow seeps show as dark spots
- Fully open main valve only if zero moisture appears
- Open kitchen faucet slowly—sudden pressure surges crack new joints
- Cycle new valve 5 times—check for drips at stem and connections after each cycle
Critical Check: Place paper towels under the valve overnight. Morning moisture reveals “sweating” leaks invisible during initial testing.
Troubleshooting Common Valve Replacement Problems
Leaking Around the Valve Stem After Installation
This indicates a loose packing nut. Tighten it only 1/8 turn with pliers—over-tightening crushes the O-ring. If leaks persist, disassemble and replace the internal cartridge (included with most quality valves).
Water Still Flowing After Valve Closure
Your valve may be installed backward. Shut off main water, disconnect the valve, and verify the flow arrow points toward the faucet. Reverse installation prevents full shutoff.
Stuck Valve Handles on New Installations
Mineral deposits in water lines jam moving parts. Flush pipes by:
– Removing supply lines
– Turning on main water for 10 seconds (into bucket)
– Reconnecting lines and testing valve operation
When to Call a Professional Plumber Immediately
Stop work and call a pro if:
– Galvanized pipes crumble when touched (requires complete line replacement)
– Water continues flowing after main shutoff (indicates failed main valve)
– You smell sewer gas during work (sign of vent system damage)
– Your home has polybutylene pipes (gray plastic common in 1980s-90s)—these require specialized fittings
Red Flag: If you see green corrosion on copper pipes, stop immediately—this indicates electrolysis that compromises entire plumbing systems.
Prevent Future Valve Failures: Maintenance Tips That Work
Extend valve life 300% with quarterly maintenance:
1. Exercise valves monthly—turn handles fully off/on 3 times to prevent mineral bonding
2. Replace rubber washers annually (accessible via stem screw)
3. Install water softeners if hardness exceeds 7 GPG (prevents internal scaling)
4. Check for moisture under sinks after vacations—early leaks save $1,000+ in repairs
Pro Insight: Upgrade all under-sink valves to ¼-turn ball valves—they outlast compression valves 5:1 and cost under $20.
Replacing your kitchen water valve isn’t just a fix—it’s insurance against disaster. By following these precise steps, you’ve installed a valve that should last 20+ years with minimal maintenance. Remember: proper shutoff, thread preparation, and gradual pressure testing are non-negotiable for leak-proof results. If you encounter corroded pipes or persistent leaks, don’t risk flood damage—call a licensed plumber immediately. For ongoing protection, add a smart water leak detector under your sink that shuts off main water automatically during emergencies. Your home’s safety depends on valves that work when you need them most.


