
That frustrating dribble instead of a powerful spray when you need to rinse stubborn food off your plates? Or worse—the sprayer that won’t shut off completely, leaving a constant drip that drives you crazy? These are dead giveaways your kitchen sink spray hose has failed. Don’t call a plumber just yet. Replacing this critical component is a surprisingly simple DIY project that takes under 45 minutes with basic tools. Most homeowners can restore full sprayer functionality in less time than it takes to order takeout. The best part? You’ll save $150+ on service calls while gaining the satisfaction of fixing a daily annoyance yourself. This guide walks you through every critical step to replace your kitchen sink spray hose correctly the first time.
Whether your hose is cracked, kinked beyond repair, or just won’t retract smoothly, the solution lies in a straightforward swap. We’ll cover how to identify your exact hose type, avoid costly mistakes during installation, and ensure leak-free operation for years. By the end, you’ll have a sprayer that delivers strong, consistent pressure and shuts off cleanly—no more water waste or messy countertops.
Essential Tools and Materials You’ll Need

Gathering everything before starting prevents mid-repair frustration. Working under your sink demands efficiency, and scrambling for tools wastes time and risks damaging connections. Most required items are already in your toolbox, but having the precise replacement hose is non-negotiable for success.
Required Tools and Supplies
- Exact-match spray hose assembly (verify compatibility with your faucet model)
- Two adjustable wrenches (8–10 inch sizes work best for tight spaces)
- Groove-joint pliers (Channellocks) for stubborn nuts
- Slip-joint pliers to compress quick-connect fittings
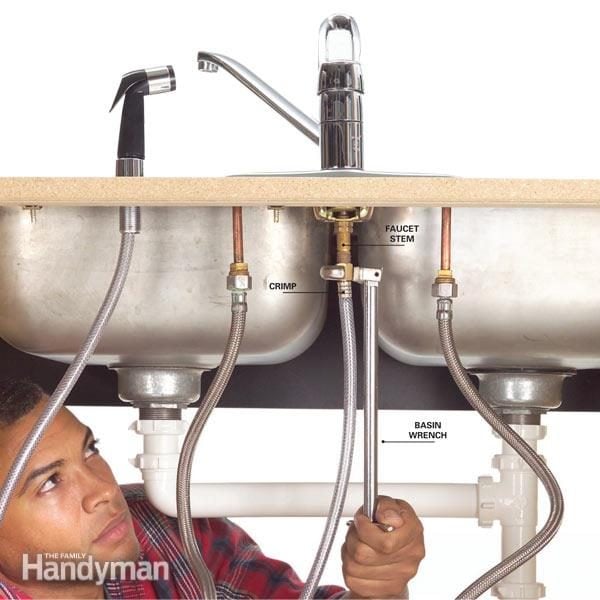
- Adjustable basin wrench (essential for deep cabinet installations)
- Plumber’s tape (Teflon tape) for threaded connections
- Plumber’s grease (not regular grease—this won’t degrade rubber seals)
- Small bucket and old towels (to catch unavoidable drips)
- Flashlight or headlamp (critical for seeing connections clearly)
Choosing the Correct Replacement Hose
Buying the wrong hose guarantees leaks and rework. Before removing the old unit, identify your system type:
* Threaded Connection Hoses screw directly into the faucet body or a dedicated port on the cold water line. Measure the thread diameter (usually 15/16″ or 55/64″) using a caliper or compare to a known nut.
* Quick-Connect Hoses click into a socket on the faucet. Look for a small release collar—squeeze this with slip-joint pliers to detach. Take photos of both connection points and bring them to the hardware store. Universal kits exist, but model-specific hoses (like Moen 142107 or Delta RP46074) prevent 90% of installation errors. If unsure, bring the old hose segment for direct comparison.
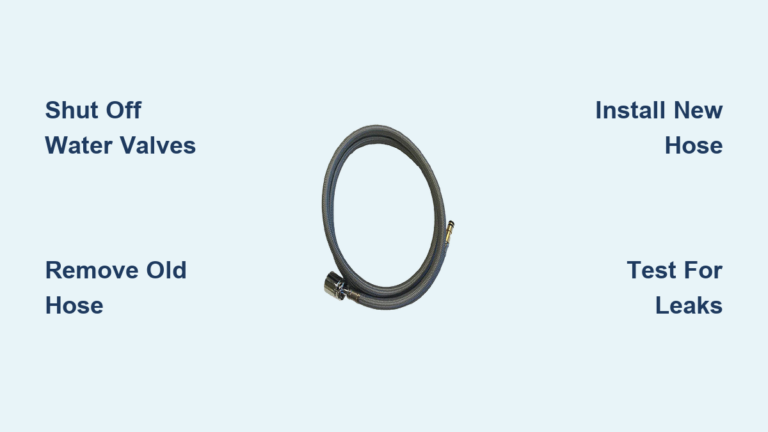
Step-by-Step Hose Replacement
Skipping water shut-off risks flooding your cabinet—never skip this critical safety step. Locate the shutoff valves under the sink (usually two small levers). Turn both hot and cold valves clockwise until fully closed. Test by briefly turning on the faucet—no water should flow. Now you’re ready to proceed safely.
Step 1: Disconnect the Old Spray Hose
- Position a bucket under the P-trap and lay towels across the cabinet floor. Residual water will spill out.
- Identify the connection type: Threaded hoses have a visible nut screwed onto the faucet body. Quick-connect hoses show a plastic collar near the faucet.
- Break the connection: For threaded fittings, grip the faucet’s hex-shaped base with one wrench while loosening the hose nut with the second. For quick-connect, squeeze the release collar inward with slip-joint pliers and pull the hose straight out. Pro Tip: Wrap the wrench jaws with electrical tape to prevent scratching chrome finishes. Expect 2–4 ounces of water to drain—this is normal.
Step 2: Remove the Spray Head and Mounting Hardware
- Reach through the sink deck opening to locate the mounting nut or C-clip securing the spray head base.
- Loosen the mounting nut: Use groove-joint pliers from below to turn the nut counterclockwise. If your model uses a C-clip, compress the spring arms with needle-nose pliers to release it.
- Extract the assembly: Gently pull the entire hose and spray head upward through the sink deck. Inspect the old hose for kinks, cracks, or mineral buildup—this reveals why it failed. Critical Check: Note how the hose routes through cabinet obstacles; replicate this path with the new hose to prevent binding.
Step 3: Install the New Hose Assembly
- Prep the connection: Apply plumber’s grease to the new hose’s ferrule (metal sleeve) and O-rings. This prevents binding and ensures watertight seals.
- Route the hose: Thread the new hose through the sink deck hole from below, matching the old hose’s path. Avoid sharp bends—maintain a gentle arc for smooth retraction.
- Secure the connections: For threaded fittings, hand-tighten the nut first, then give a ¼-turn with wrenches (over-tightening cracks fittings!). For quick-connect, push firmly until you hear a distinct click. Warning: Never force connections—if it resists, check alignment. Cross-threading causes immediate leaks.
Step 4: Final Leak Test and Calibration
- Slowly restore water: Open shutoff valves ¼-turn at a time while watching connections. Full pressure should build gradually.
- Check for drips: Run hot and cold water for 60 seconds. Wipe connections dry with a paper towel—any moisture indicates a loose joint needing quarter-turn tightening.
- Test sprayer function: Pull out the spray head fully and release. It should retract smoothly without hanging up. Activate the sprayer—strong, consistent flow with zero drip after release confirms success. Pro Tip: Do 3–5 full extension/retraction cycles to seat the hose properly.
Troubleshooting Common Issues Post-Installation
Even perfect installations can have quirks. Address these issues immediately before they cause water damage or frustration.
Leaking at the Connections
Drips at new joints almost always mean insufficient tightening. First, turn off water and dry connections completely. Hold the faucet base steady with one wrench while tightening the hose nut another ⅛-turn with the second wrench. Never exceed ¼-turn past hand-tight—this strips plastic threads. If leaks persist, disassemble and check for:
– Pinched O-rings (replace with spares from your kit)
– Debris in the faucet port (clean with a toothpick)
– Incorrect tape application (re-wrap threads with 3 clockwise turns of Teflon tape)
Sprayer Not Retracting or Draining Slowly
A hose that won’t snap back usually has routing issues. Open the cabinet and:
1. Ensure the hose isn’t kinked around cabinet braces or plumbing lines
2. Verify the hose has a slight upward curve toward the sink deck (gravity aids drainage)
3. Check for obstructions like stray screws or zip ties in the hose path
Time-Saver: Dribble soapy water inside the hose channel—this lubricates the retraction spring for smoother movement. Most hoses self-correct after 24 hours of use as the spring settles.
Weak Water Flow or Pressure
Don’t assume the new hose is faulty—90% of low-pressure issues come from clogged screens. Here’s the fix:
1. Unscrew the spray head and remove the aerator screen
2. Soak it in white vinegar for 15 minutes to dissolve mineral deposits
3. Rinse thoroughly under running water while scrubbing with an old toothbrush
4. Reinstall and test. If pressure remains low, check the main faucet aerator—debris there restricts flow to both spout and sprayer.
Maintaining Your New Spray Hose

Proactive care prevents premature failure and extends your hose’s lifespan to 5+ years. Build these habits into your routine:
Flush the hose monthly by detaching the spray head and running hot water through the exposed hose for 30 seconds. This clears sediment before it accumulates. For hard water areas, soak the spray head in equal parts vinegar and water every 3 months—mineral buildup is the #1 cause of clogged spray patterns. Critical Tip: Never hang heavy objects (like dish towels) on the spray head—that constant tension fatigues the retraction spring. When cleaning under the sink, periodically check hose routing to ensure cabinet modifications haven’t created new kink points.
Replacing your kitchen sink spray hose yourself isn’t just cost-effective—it’s empowering. You’ve transformed a daily nuisance into a smoothly functioning tool with minimal effort. That strong, reliable spray stream you now enjoy? It’s proof you’ve mastered a fundamental home maintenance skill. Keep your toolkit ready; this same process applies to future replacements or helping neighbors with identical issues. For ongoing faucet care, explore our guide on preventing mineral buildup in spray heads—your next DIY win awaits.


