
Replacing the power cord on your Shark vacuum can save you money and extend the life of your appliance. This comprehensive guide will walk you through the process, providing detailed steps, helpful tips, and essential safety precautions. Whether your cord is frayed, damaged, or simply too short, this guide will help you get your Shark vacuum back in action.
Damaged power cords are a common issue with vacuum cleaners. Instead of replacing the entire vacuum, replacing the cord is often a cost-effective and environmentally friendly solution. This guide provides a clear, step-by-step approach to safely replacing the cord on your Shark vacuum, ensuring you can continue to enjoy its cleaning power. Let’s dive in!
1. Gathering Your Tools and Materials

Before you begin, ensure you have all the necessary tools and materials. This preparation will make the replacement process smoother and more efficient.
Tools/Materials:
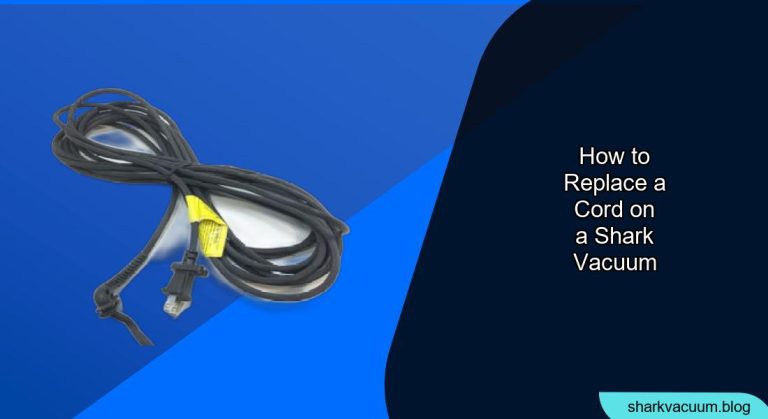
- Replacement Power Cord: Purchase a new power cord that matches the original specifications of your Shark vacuum. You can find these at most appliance repair shops or online retailers.
- Screwdrivers: You’ll need both Phillips head and flathead screwdrivers in various sizes.
- Wire Strippers: Essential for safely removing the insulation from the wires.
- Wire Connectors or Electrical Tape: To securely connect the new cord’s wires to the vacuum’s internal wiring.
- Pliers: For gripping and manipulating wires.
- Multimeter (Optional): Useful for testing the continuity of the wires.
- Work Gloves: To protect your hands.
2. Safety First: Unplug and Prepare
Safety is paramount when working with electrical appliances. Taking the proper precautions will prevent accidents and ensure a smooth replacement process.
- Unplug the Vacuum: Always disconnect the vacuum cleaner from the power outlet before starting any repair work. This prevents electric shock.
- Prepare Your Workspace: Set up a clean, well-lit workspace. Place the vacuum on a stable surface where you have enough room to maneuver.
- Ground Yourself: Consider using an anti-static wrist strap to prevent static electricity from damaging the vacuum’s internal components.
- Review the Manual: Consult your Shark vacuum’s user manual for any specific safety instructions or warnings related to repairs.
3. Opening the Vacuum Casing
Accessing the power cord requires opening the vacuum’s casing. The method varies depending on the Shark model, so follow these general steps carefully.
- Locate the Screws: Examine the vacuum casing for screws. These are typically located on the back, bottom, or sides of the unit. Use the appropriate screwdriver to remove them.
- Document Screw Locations: As you remove screws, keep track of their locations. Different screws may be used in different areas, and replacing them correctly is crucial for reassembly.
- Pry Open the Casing: Once all screws are removed, carefully pry open the casing. Use a flathead screwdriver or a plastic opening tool to gently separate the parts. Avoid using excessive force, which can damage the plastic.
- Identify the Cord Connection: Once the casing is open, locate where the power cord connects to the vacuum’s internal wiring. This is usually near the motor or a circuit board.
4. Disconnecting the Old Power Cord
With the vacuum open, you can now disconnect the old power cord. Proceed carefully to avoid damaging any internal components.
- Note the Wire Connections: Before disconnecting any wires, take a photo or make a detailed note of how the wires are connected. This will be invaluable when connecting the new cord.
- Disconnect the Wires: Use pliers to gently disconnect the wires from their terminals. If the wires are soldered, you may need to use a soldering iron to desolder them.
- Remove the Cord Restraint: Most Shark vacuums have a cord restraint or clamp that secures the power cord to the casing. Loosen or remove this restraint to free the cord.
- Pull Out the Old Cord: Carefully pull the old power cord out of the vacuum casing. Ensure that you’ve disconnected all wires and removed any restraints before doing so.
5. Connecting the New Power Cord
With the old cord removed, you can now connect the new power cord. Follow the steps below to ensure a secure and safe connection.
- Thread the New Cord: Insert the new power cord through the cord restraint and into the vacuum casing. Ensure it’s properly positioned and won’t be pinched or strained.
- Connect the Wires: Using your notes or photo as a guide, connect the new cord’s wires to the corresponding terminals. Use wire connectors or electrical tape to create secure connections.
- Wire Connectors: These provide a secure, solderless connection. Simply insert the wires into the connector and twist to lock them in place.
- Electrical Tape: Wrap each wire connection tightly with electrical tape, ensuring no bare wire is exposed.
- Secure the Cord Restraint: Tighten or reattach the cord restraint to secure the new power cord in place. This prevents the cord from being pulled out or damaged.
6. Reassembling the Vacuum
Once the new cord is connected, carefully reassemble the vacuum casing.
- Align the Casing Parts: Carefully align the two halves of the vacuum casing. Ensure that all wires are tucked inside and won’t be pinched.
- Replace the Screws: Replace all the screws you removed earlier, using your notes to ensure they go in the correct locations. Tighten the screws securely, but avoid over-tightening, which can damage the plastic.
- Test the Vacuum: Before fully reassembling, plug in the vacuum and test it to ensure the new cord is working correctly. If it doesn’t turn on, double-check your wire connections.
7. Final Checks and Testing
After reassembling the vacuum, perform a final check to ensure everything is in order.
- Inspect the Cord: Examine the new power cord for any signs of damage or strain. Ensure it’s securely connected and properly restrained.
- Test the Vacuum: Plug in the vacuum and turn it on. Test all the functions to ensure it’s working correctly.
- Listen for Unusual Noises: Pay attention to any unusual noises or vibrations. These could indicate a problem with the reassembly.
- Check for Overheating: After running the vacuum for a few minutes, check for any signs of overheating. If the motor or cord becomes excessively hot, stop using the vacuum and investigate further.
FAQ Section
How do I know if my vacuum cord needs to be replaced?
Look for signs of damage such as fraying, cuts, or exposed wires. If the vacuum only works when the cord is in a specific position, it’s likely damaged internally and needs replacement.
Can I use any power cord as a replacement?
No, it’s crucial to use a power cord that matches the original specifications of your Shark vacuum. Using an incompatible cord can damage the vacuum or create a safety hazard.
What if my vacuum still doesn’t work after replacing the cord?
Double-check all your wire connections to ensure they are secure. Also, inspect the vacuum’s motor and other internal components for any signs of damage. If the problem persists, consult a professional repair service.
Is it safe to replace the power cord myself?
Yes, as long as you take the necessary safety precautions and follow the steps outlined in this guide. Always unplug the vacuum before starting any repair work, and use proper tools and materials.
Where can I buy a replacement power cord for my Shark vacuum?
You can find replacement power cords at most appliance repair shops, online retailers like Amazon, or directly from the Shark website.
What should I do with the old power cord?
Dispose of the old power cord properly. You can take it to an electronic waste recycling center or follow your local regulations for disposing of electrical waste.
Tips, Warnings, and Best Practices
- Safety First: Always unplug the vacuum before starting any repair work.
- Use Quality Parts: Purchase a high-quality replacement power cord that matches the original specifications of your Shark vacuum.
- Take Photos: Before disconnecting any wires, take photos or make detailed notes of how they are connected.
- Secure Connections: Ensure all wire connections are secure and properly insulated.
- Avoid Over-Tightening: When reassembling the vacuum, avoid over-tightening the screws, which can damage the plastic.
- Test Thoroughly: After reassembling the vacuum, test it thoroughly to ensure it’s working correctly.
Conclusion
Replacing the power cord on your Shark vacuum is a straightforward process that can save you money and extend the life of your appliance. By following this comprehensive guide, you can safely and effectively replace the cord and get your vacuum back in action. Remember to prioritize safety, use quality parts, and take your time to ensure a successful repair. Now that you’ve learned how to replace the cord, you can confidently tackle this repair and keep your Shark vacuum running smoothly for years to come. Don’t hesitate to revisit this guide if you encounter any issues, and happy cleaning!


