
That sickening crack when a heavy pot slips from your grip and strikes your kitchen floor isn’t just startling—it’s the start of a frustrating eyesore. A broken tile disrupts your kitchen’s flow, creates tripping hazards, and invites moisture damage beneath the surface. Whether it’s a hairline fracture from accidental impact or a shattered slab due to subfloor movement, this guide delivers actionable solutions for how to repair broken tile in kitchen surfaces. You’ll learn to diagnose damage severity, execute seamless crack fixes without replacement, and confidently replace destroyed tiles—all while avoiding costly mistakes that doom DIY repairs.
Ignoring a damaged tile risks worsening the problem: moisture seeps into subflooring, grout crumbles, and neighboring tiles loosen. But rushing into repair without proper assessment is equally dangerous. This guide walks you through every critical step—from gathering niche tools like V-grooving bits to color-matching epoxy with artist’s acrylics—ensuring your repair lasts years, not weeks. Let’s transform that eyesore back into a flawless kitchen surface.
Gather These Tools Before Fixing Your Kitchen Tile
Don’t start chiseling until you’ve assembled every tool on this list. Missing one item risks damaging surrounding tiles or voiding your repair’s durability. Kitchen tile repairs demand specialized gear for two distinct scenarios: cosmetic crack fixes and full tile replacement.
Safety Gear You Must Wear for Tile Repair
Protect yourself from flying ceramic shards and silica dust before touching tools. Always wear ANSI-approved safety glasses, an N95 respirator mask (not a basic dust mask), and cut-resistant work gloves. Tile fragments can slice skin, while grinding creates inhalable particles that irritate lungs. Skip safety gear, and you risk serious injury—especially when chiseling shattered porcelain near toes or knees.
Materials for Quick Crack Repairs vs. Full Tile Replacement
For hairline cracks: Grab a two-part epoxy syringe kit, isopropyl alcohol, lint-free cloths, artist’s acrylic paints, and matte polyurethane sealant. These fix surface-level damage in under 30 minutes.
For shattered tiles: You’ll need a rotary tool with diamond grout bit, cold chisel, hammer, notched trowel, thinset mortar, replacement tile, and grout float. Replacement jobs take 24–48 hours due to curing times.
Pro Tip: Test epoxy color on scrap tile first. Most kits include off-white filler—you’ll need acrylic paints to match your tile’s glaze.
Fix Hairline Cracks in Kitchen Tiles Without Replacement

If your tile has a non-structural crack (no movement when pressed), skip replacement. This method hides damage invisibly in 90 minutes, preserving your floor’s integrity. Never attempt this for tiles with “spiderweb” fractures or hollow sounds—that signals underlying failure requiring full replacement.
Step 1: Clean and Prep the Crack for Maximum Adhesion
Vacuum loose debris, then scrub the crack with isopropyl alcohol on a cotton swab. Grease or soap residue prevents epoxy bonding. For deeper adhesion, V-groove the crack using a Dremel with a pointed carbide bit: gently widen the top into a shallow “V” shape. This creates a reservoir for epoxy to grip. Skip this step, and your repair will flake off within months.
Step 2: Inject Epoxy Deep Into Fine Cracks for Invisible Repair
Mix two-part epoxy per instructions. For hairline cracks, load epoxy into a syringe and inject it slowly from one end to the other—do not stop mid-injection. Overfill slightly, then smooth with plastic wrap taped over the crack. If the crack is wider than 1/16 inch, press epoxy putty into the groove with a plastic knife, overfilling by 10%. Let cure 24 hours. Rushing this step causes weak bonds that crack under foot traffic.
Step 3: Color Match and Seal Your Tile Crack Repair
After curing, prime the repair with stain-blocking primer. Then, build color in translucent layers: dip a damp fine-tip brush in watered-down acrylic paint, dabbing tiny amounts to mimic your tile’s pattern. Match undertones first (e.g., warm beige vs. cool gray), then add surface speckles. Finish with matte polyurethane to match the tile’s sheen. Glossy sealant on matte tile? That shiny patch will scream “repair!”
Replace a Shattered Kitchen Floor Tile Step by Step
When tiles are shattered, loose, or show hollow sounds when tapped, replacement is non-negotiable. This process takes patience but avoids recurring damage. Critical first step: Confirm the subfloor is solid. Press on neighboring tiles—if they shift, call a pro before proceeding.
Step 1: Remove Surrounding Grout Without Damaging Neighbors
Protect adjacent tiles with painter’s tape. Use a rotary tool with diamond grout bit to scrape out grout 1/8 inch deep around the broken tile. Work slowly at 45-degree angles—never force the tool. If grout resists, switch to a manual grout saw. Damaging neighboring tiles here adds $100+ in extra replacements.
Step 2: Chip Out the Broken Tile Safely in Small Pieces
Drill 4–5 holes (1/4 inch apart) through the tile’s center with a masonry bit. This relieves pressure for cleaner removal. Place a cold chisel at the tile’s center, tap lightly with a hammer, and work outward in 2-inch increments. Shards should break cleanly. If the tile resists, stop—you’re likely hitting hardened thinset beneath. Vacuum all dust before proceeding.
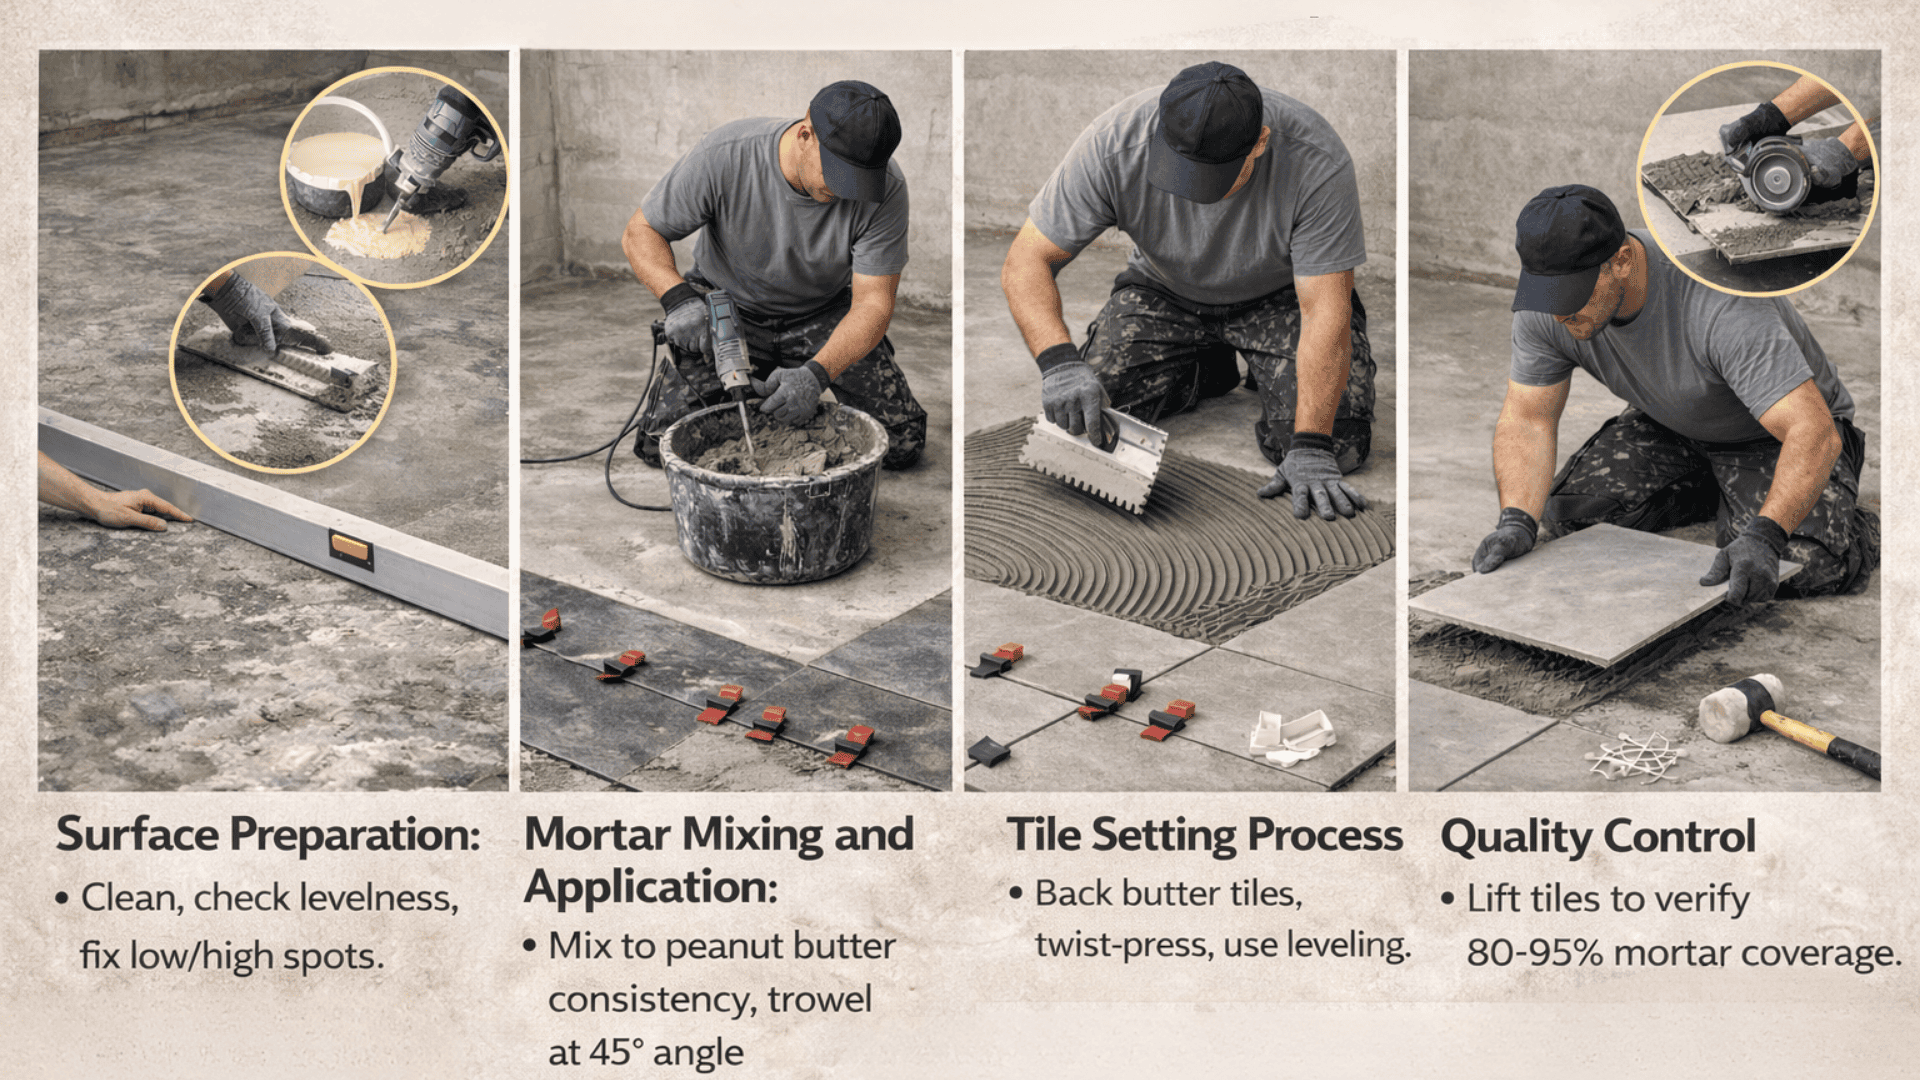
Step 3: Prepare the Subfloor for New Tile Adhesion
Scrape old adhesive with a grout scraper until the subfloor is smooth and bare. Vacuum twice: first with a shop vac, then with a crevice tool. Any debris left behind creates lippage (uneven tiles). Test stability by pressing your palm firmly—you should feel zero flex. If the subfloor moves, address structural issues first.
Step 4: Set the New Tile Perfectly Level With Surrounding Tiles

Mix thinset mortar to peanut butter consistency. Back-butter the replacement tile (spread mortar on its back) and the recess. Press tile into place with spacers, then check level from all angles. Tap high spots gently with a rubber mallet—never your shoe. Wipe excess mortar immediately with a damp sponge. Wait 24 hours before grouting.
Step 5: Grout and Seal for a Waterproof Kitchen Tile Repair
Apply grout diagonally with a float, pressing firmly into joints. Wipe excess after 15 minutes using a damp sponge at 45 degrees. Cure for 72 hours, then seal grout lines with penetrating sealer. Skip sealing, and kitchen spills will stain grout within weeks. For floors, wait 14 days before heavy use.
Avoid These 4 Costly Tile Repair Mistakes
Skipping Subfloor Inspection Causes Recurring Cracks
If tiles crack repeatedly in the same spot, the subfloor is shifting. Test before repairing: bounce gently on the area. If you feel movement, reinforce joists or install underlayment. Ignoring this turns a $20 epoxy fix into $500 in recurring damage.
Rushing Epoxy Cure Time Leads to Failed Repairs
Epoxy needs 24 hours to reach full strength. Walking on it sooner creates micro-fractures. Set phone reminders for each stage: 4 hours for touch-dry, 12 for light use, 24 for full traffic. Kitchen repairs fail 80% of the time due to impatience here.
Using the Wrong Grout Color Ruins Your Tile Appearance
Mismatched grout draws attention to repairs. Test batches on cardboard first. Mix grout with acrylic grout additive for flexibility—kitchens need this to handle temperature swings. For white tiles, add a drop of gray paint to grout; pure white looks unnatural.
When to Hire a Pro for Kitchen Tile Damage
Multiple Cracked Tiles Signal Structural Problems
If 3+ tiles crack in a line, your subfloor has movement issues. Stop DIY immediately—you need a structural engineer to assess joists. Forcing tile replacements over shifting foundations wastes money and risks injury from sudden floor collapse.
Shower Tile Repairs Require Expert Water Damage Assessment
Never DIY-tile repairs in wet areas like backsplashes near sinks. Hidden water damage behind tiles requires moisture meters and mold testing. Professionals use uncoupling membranes to prevent future leaks—attempting this yourself risks $5,000+ in hidden water damage.
A well-executed tile repair blends invisibly into your kitchen, but the real victory is prevention. Place rubber mats under heavy appliances, use felt pads on chair legs, and reseal grout annually with penetrating sealer. For future cracks, keep epoxy kits and matching grout on hand—they pay for themselves in avoided call-out fees. Remember: if the damage feels beyond surface-level, invest in a pro’s diagnostic skills. Your kitchen’s longevity depends on fixing the cause, not just the symptom. With these steps, you’ve transformed from victim of tile trauma to confident kitchen restorer.


