
Your kitchen deserves the precision and instant heat control that only a gas hob can provide, but a botched installation creates serious safety risks. Whether you’re replacing an old unit or installing your first gas hob, understanding the proper installation process ensures years of reliable cooking without gas leaks or performance issues. This guide walks you through exactly how to install a gas hob in kitchen settings safely and correctly, highlighting critical steps that most DIYers miss. You’ll learn what measurements matter most, why professional gas connections are non-negotiable, and how to verify your installation meets safety standards before lighting your first burner.
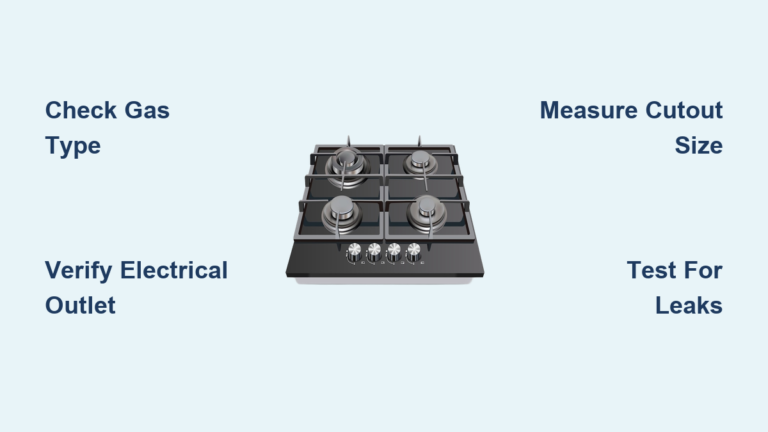
Verify Your Kitchen Meets Gas Hob Installation Requirements
Before purchasing a gas hob, confirm your kitchen can safely accommodate it—this prevents costly mistakes and potential safety hazards. Many homeowners discover too late that their gas type doesn’t match the hob specifications or that their electrical setup falls short of requirements.
How to Confirm Your Gas Supply Type and Pressure
Natural gas and liquid petroleum gas (LPG) require different pressure settings and burner orifices—installing the wrong type creates dangerous yellow flames and incomplete combustion. Check your gas meter or cylinder type to determine whether you have natural gas (typically 3.5″ water column pressure) or LPG (10-14″ water column). Your new hob must explicitly state compatibility with your gas type; mismatched systems require professional conversion by a certified technician before installation. Never attempt to modify gas orifices yourself—this violates safety codes and creates carbon monoxide risks.
Essential Electrical Requirements for Gas Hob Operation
Your gas hob needs more than just a gas line—it requires a dedicated 13A electrical outlet within 4 feet for the ignition system. This circuit must have Ground Fault Circuit Interrupter (GFCI) protection to prevent electrical hazards near water sources. Verify your kitchen has this dedicated circuit before installation day; adding one requires a licensed electrician. Without proper electrical support, your ignition system won’t function, leaving you with manual lighting—a significant safety compromise that most building inspectors won’t approve.
Critical Clearance Measurements Before Cutting Your Countertop
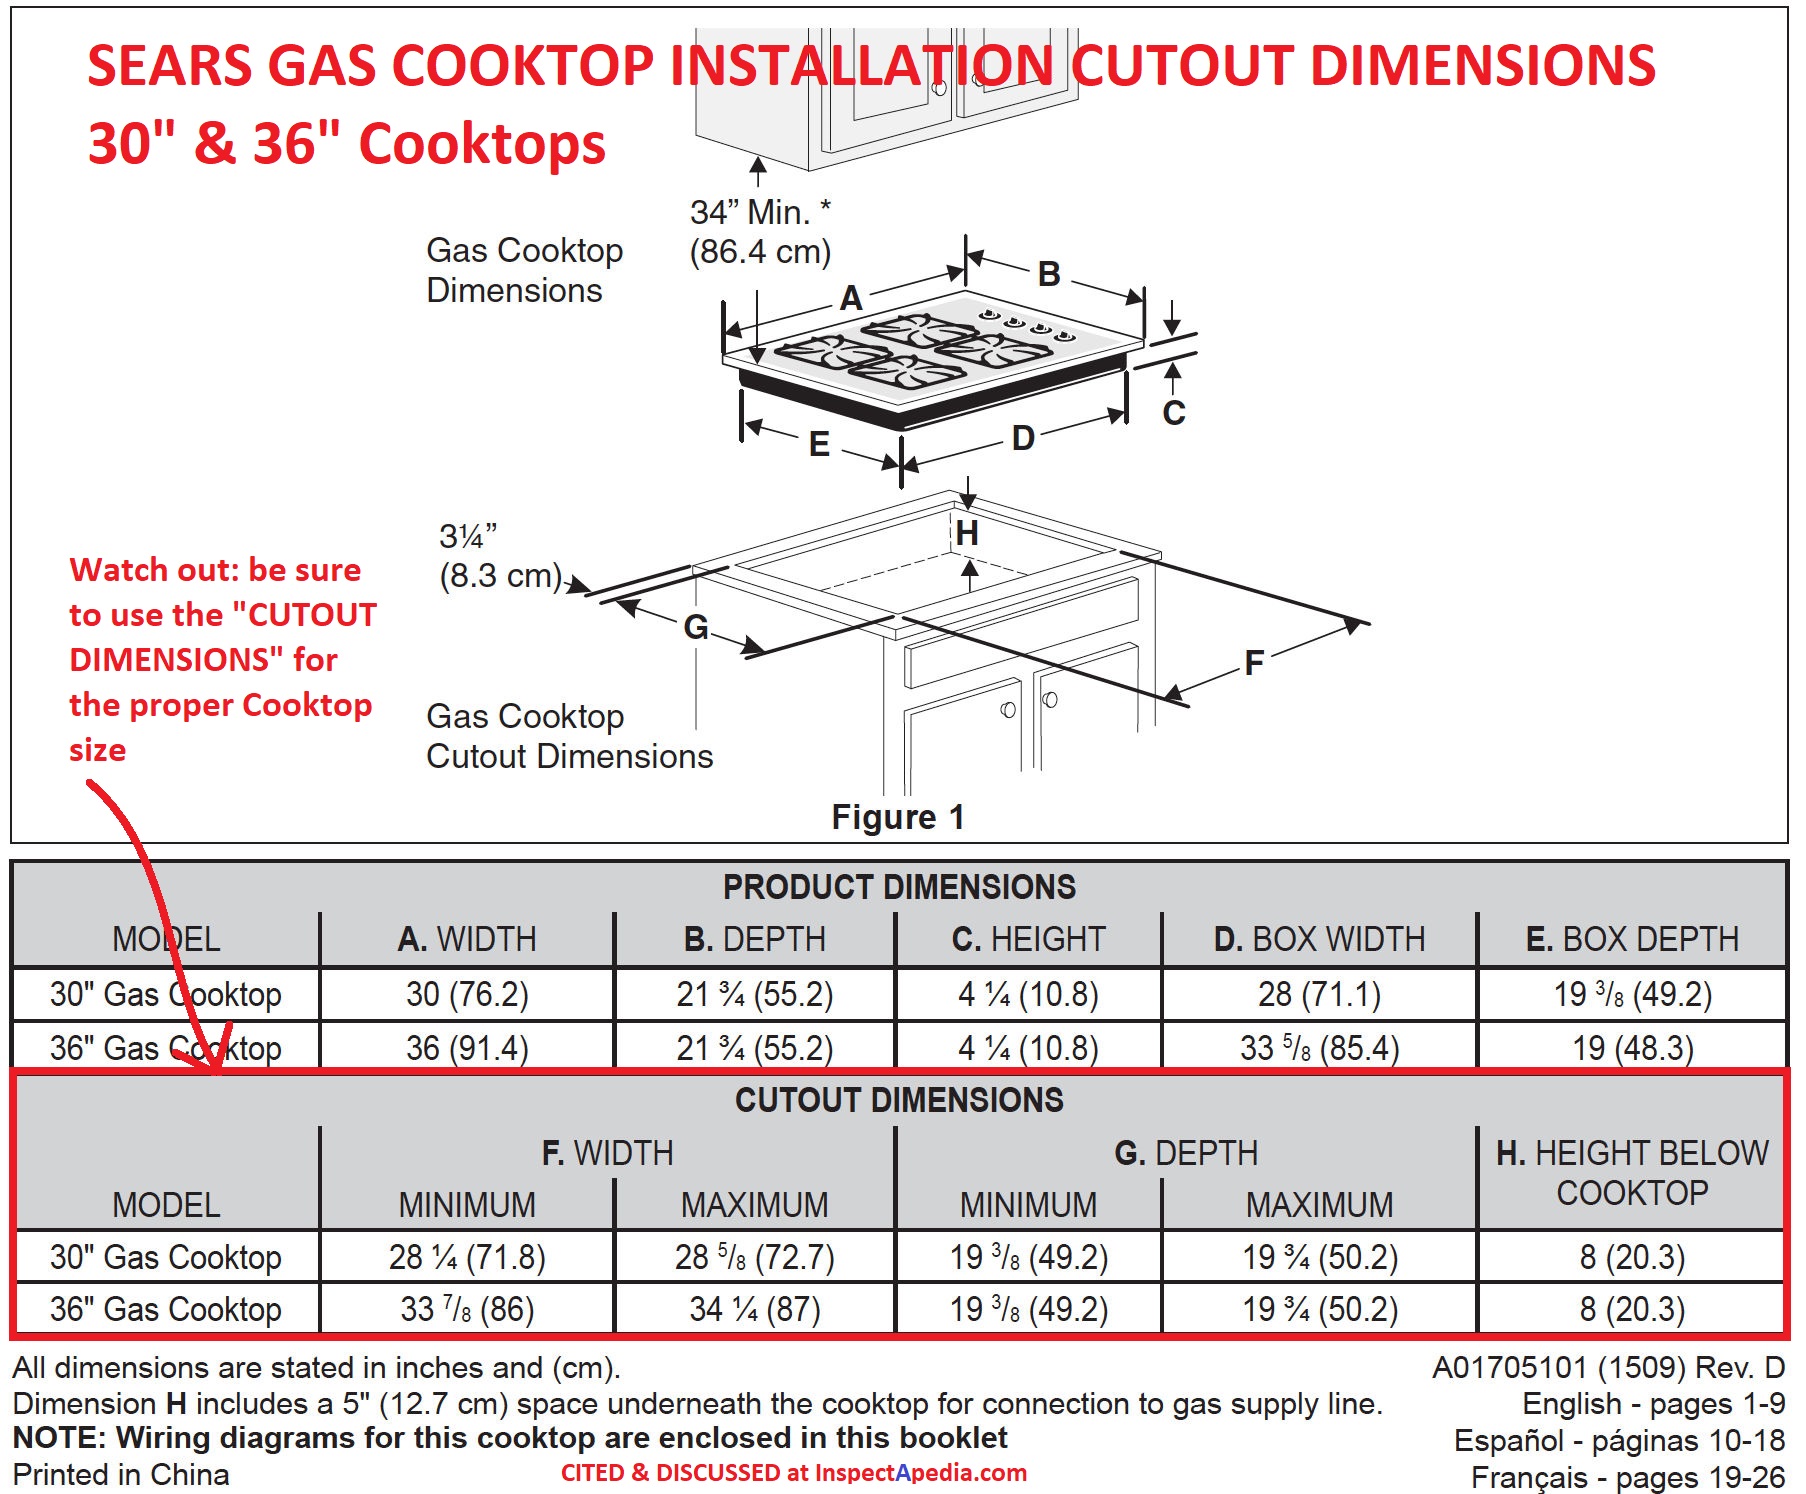
Standard 60cm (24-inch) gas hobs require precise cutouts—typically 29.5″ to 30″ width with 20-22″ depth—but always use the manufacturer’s template rather than generic measurements. Measure twice and verify clearance requirements: minimum 2″ from sides and rear to combustible materials like cabinets, and 30″ above to non-combustible surfaces like range hoods. Cutting an oversized hole creates instability, while insufficient clearance risks fire hazards from heat transfer to surrounding materials. Double-check your template alignment with adjacent cabinetry to avoid last-minute surprises during installation.
Gather the Right Tools for Safe Gas Hob Installation
Assembling the proper tools before starting prevents dangerous mid-installation pauses and ensures professional-quality results. Working with gas lines demands specialized equipment that standard toolkits often lack—skimping here risks leaks that could have catastrophic consequences.
Must-Have Professional Tools for Precision Installation
You’ll need an adjustable spanner, pipe cutter, and spade bit drill for the countertop cutout, but the critical gas-specific tools include yellow PTFE tape rated for gas applications (standard white tape won’t suffice) and a professional-grade pipe thread sealant. A flexible gas hose (3/8″ or 1/2″ diameter, 3-5 feet long) must meet local safety standards—never reuse old hoses. Include a gas pressure gauge (0-5 PSI range) to verify proper supply pressure, and keep a fire extinguisher rated for Class B (flammable gases) and Class C (electrical) fires within immediate reach.
Non-Negotiable Safety Gear for Gas Line Work
Never connect gas lines without proper safety equipment—this isn’t optional. You must have gas leak detection solution (commercial spray or homemade soapy water mix) to test every connection. A carbon monoxide detector must be installed within 10 feet of the hob location before first use. Wear safety glasses to protect against debris during countertop cutting, and keep natural gas detectors nearby during the entire installation process. If you lack any of these safety items, postpone the installation—gas leaks can accumulate silently to explosive concentrations before detection.
Precise Countertop Cutout: Avoid Costly Measurement Mistakes
The countertop cutout determines whether your gas hob sits flush and secure—a poorly executed cutout causes wobbling, improper sealing, and potential gas leaks beneath the unit. This step requires meticulous attention that many DIYers underestimate.
How to Use Manufacturer Templates for Perfect Fit
Place the manufacturer’s template on your countertop, ensuring perfect alignment with front and side edges before marking. Use painter’s tape along cut lines to prevent chipping, then drill starter holes at each corner with a 1/4″ drill bit before using a jigsaw with a fine-tooth blade. Cut slowly along the line, maintaining consistent pressure to avoid splintering. After cutting, sand edges smooth and apply sealant to prevent moisture damage—unsealed edges swell over time, creating gaps that compromise stability. Test-fit the hob before final installation; it should sit flush without rocking.
What to Do If Your Countertop Cutout Is Too Large
An oversized cutout creates instability that affects burner performance and safety. If your hole exceeds specifications by more than 1/8″, don’t force installation—this voids warranties and creates fire hazards. Solutions include adding a stainless steel mounting frame designed for your hob model or installing a custom-cut metal reinforcement plate beneath the countertop. Never use silicone sealant to compensate for gaps; this traps moisture and prevents proper ventilation beneath the unit, accelerating corrosion and creating potential gas accumulation points.
Professional Gas Connection Techniques That Prevent Leaks
Gas line connections represent the most critical safety aspect of installation—improper connections cause leaks that lead to explosions, fires, and carbon monoxide poisoning. While you can prepare the installation area, final gas connections must be made by a licensed professional in most jurisdictions.
Why Flexible Gas Hoses Beat Rigid Pipes for Hobs
Professionals always use flexible stainless steel gas hoses (maximum 3-5 feet length) rather than rigid pipes for hobs—they accommodate minor countertop movement without stressing connections. Rigid copper pipes can work-harden and crack from vibration, creating slow leaks that accumulate dangerously. Ensure your flexible hose has certification markings (UL, CSA, or equivalent) and replace any hose showing kinks, corrosion, or damaged fittings. Never exceed the manufacturer’s specified maximum length—longer hoses increase pressure drop and reduce burner performance.
Proper PTFE Tape Application for Leak-Free Connections
Apply yellow gas-rated PTFE tape clockwise (with the thread direction) for 3-5 wraps on all male threads before connection—this creates a proper seal without tape fragments entering the gas stream. Wrap tape only on the first 3-4 threads, leaving the last thread bare to prevent tape extrusion into the gas flow. After hand-tightening connections, use two wrenches to secure them—one holding the fitting stationary while the other tightens the connector—to prevent stress on the gas line. Never overtighten—this strips threads and creates leaks that worsen with pressure testing.
Mandatory Safety Tests After Gas Hob Installation
Skipping post-installation safety tests risks undetected gas leaks that could have catastrophic consequences. These verification steps separate professional installations from dangerous DIY attempts.
How to Perform a Professional-Level Gas Leak Test
With the gas supply turned on slowly, apply leak detection solution to every connection point—bubbles indicate leaks requiring immediate correction. Professionals pressurize the system to 14″ water column for natural gas (20″ for LPG), isolate it, and monitor for 10 minutes; maximum allowable pressure drop is 0.5″ water column. No bubbles should form for at least 60 seconds at each connection. Test during different pressure states: with all burners off, during ignition, and with maximum burner output. Never use open flames to check for leaks—this causes explosions.
Interpreting Flame Color: What Blue vs. Yellow Means

After installation, light each burner and observe the flame—proper combustion shows a steady blue cone with a slight yellow tip. Yellow or orange flames indicate incomplete combustion, producing dangerous carbon monoxide. This typically means improper air/gas mixture requiring professional adjustment of air shutters. Weak, floating flames suggest inadequate gas pressure, while roaring flames indicate excessive pressure. If any burner shows abnormal flame characteristics, shut off the gas immediately and contact your installer—do not attempt to cook until combustion is verified safe.
Why Professional Certification Is Required for Final Connection
Gas installation regulations exist for life-saving reasons—most jurisdictions require licensed professionals to handle final gas connections due to the extreme risks involved. Understanding these requirements prevents dangerous legal shortcuts.
Understanding Local Gas Installation Regulations
In the UK, all gas work must be performed by Gas Safe Registered engineers; in the US, licensed plumbers or gas fitters with specific certifications are required. These professionals carry insurance that covers damages from installation errors—DIY attempts leave you personally liable for any resulting property damage or injuries. Permits typically cost $50-$200 and require final inspections verifying proper clearances, ventilation, and combustion safety. Never skip professional certification—this isn’t bureaucracy but essential protection for your family’s safety.
What to Expect During a Professional Installation Check
A certified installer will verify gas pressure at the hob inlet (3.5″ WC for natural gas, 11″ WC for LPG), perform combustion analysis checking CO emissions (<400 ppm), and test flame failure devices on each burner. They’ll document pressure test results, verify ventilation meets 1 CFM per 100 BTU requirement, and provide a signed installation certificate required for warranty validation. This typically takes 2-4 hours and costs $150-$400—money well spent compared to potential costs of improper installation. Request copies of all documentation for your records and future sales.
Essential Post-Installation Maintenance for Longevity
Proper maintenance extends your gas hob’s life while preventing dangerous buildup that affects performance and safety. Many cooking problems stem from neglected routine care rather than installation errors.
Daily and Monthly Cleaning Procedures That Prevent Buildup
After each use, wipe the hob with a damp cloth and mild detergent—never let grease accumulate. Weekly, remove burner caps and clean ports with a soft brush to maintain proper flame patterns. Monthly, check for spider webs in venturi tubes (a common cause of weak flames) and verify ignition electrode gap (1/8″ minimum). Never immerse electronic ignition components in water—this destroys expensive parts. For tough grease, use a paste of baking soda and water rather than harsh chemicals that damage finishes.
When to Call a Professional for Service
Annual professional service checks gas pressure, verifies combustion efficiency, and inspects safety systems—critical for maintaining warranty coverage. Call a technician immediately if you notice delayed ignition (more than 5 seconds), inconsistent burner performance, or the smell of gas during operation. These indicate developing problems that worsen over time. Keep your installer’s contact information visible near the hob for emergencies—quick response saves lives when gas issues arise.
Installing a gas hob properly blends precise measurements, strict safety protocols, and professional verification. While you can prepare the installation area and understand the process, never compromise on professional gas connection and safety testing—your family’s wellbeing depends on it. Follow this guide to ensure your kitchen upgrade delivers the precise cooking control you want without compromising safety. Remember: when it comes to gas appliances, proper installation isn’t just about performance—it’s about preventing potentially catastrophic consequences.


