
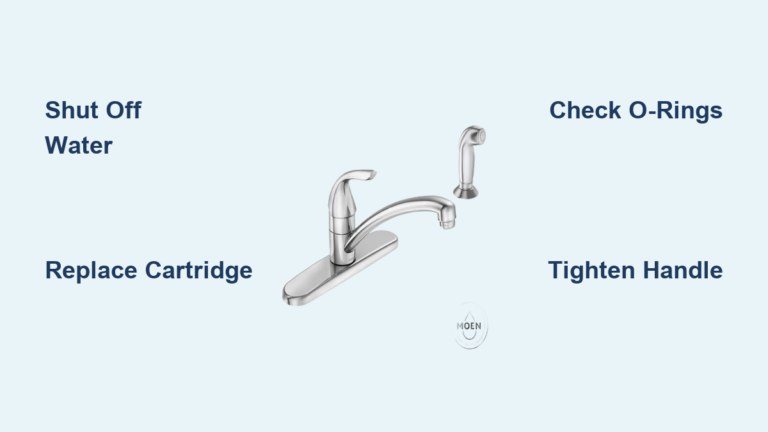
That annoying drip from your Moen kitchen faucet handle isn’t just irritating—it’s wasting gallons of water daily and could lead to costly water damage beneath your sink. When water starts seeping from where the handle meets the faucet body, you’re dealing with a classic Moen cartridge or O-ring failure. The good news is that with basic tools and the right approach, you can fix this common plumbing problem yourself in under an hour without calling a plumber. This guide gives you the exact steps to diagnose and repair your leaking Moen kitchen faucet handle, saving you money and preventing further damage to your cabinets and countertops.
Why Your Moen Kitchen Faucet Handle Is Leaking (and How to Confirm)
Before grabbing your tools, you need to verify that the leak is actually coming from the handle mechanism rather than another source. Many homeowners mistakenly blame the handle when the problem originates elsewhere.
Water Dripping From Handle Base When Faucet Is On
If water appears around the handle base only when the faucet is running, you’re almost certainly dealing with a worn cartridge. As the internal cartridge degrades from mineral deposits and normal wear, it loses its ability to maintain a proper seal. The pressurized water then escapes through the handle shaft. You’ll typically notice water pooling at the base of the handle or dripping down the faucet body when you turn on the water.
Handle Base Leak When Faucet Is Off
A leak at the handle base that continues even when the faucet is completely shut off usually indicates a severely damaged cartridge that can no longer create a watertight seal. This is more serious than a leak that only occurs during use because it means water is constantly escaping your plumbing system. To confirm, wipe the area completely dry, turn off the faucet, and check back in 15 minutes for new moisture.
Handle Feels Loose or Wobbly Before Leaking Starts
Many Moen handle leaks begin with subtle warning signs. If your handle has developed play or feels less secure when turning, the internal components are likely wearing out. The cartridge may be cracking or the O-rings losing elasticity. Addressing the issue at this stage prevents full-blown leaks and is significantly easier than waiting until water damage occurs.
Essential Tools and Parts for Moen Faucet Handle Repair
Gathering everything before you start prevents frustrating mid-repair trips to the hardware store and ensures your fix lasts.
Must-Have Tools for a Successful Moen Handle Repair
Basic toolkit:
– Phillips and flathead screwdrivers
– 5/32″ or 7/64″ Allen wrench (most common for Moen handles)
– Adjustable wrench or basin wrench
– Needle-nose pliers
– Small towel and bucket
Specialty items worth buying:
– Moen cartridge puller tool (part #148218) – $8 at hardware stores
– Silicone-based plumber’s grease (never use petroleum-based)
– Penetrating oil for stubborn cartridges
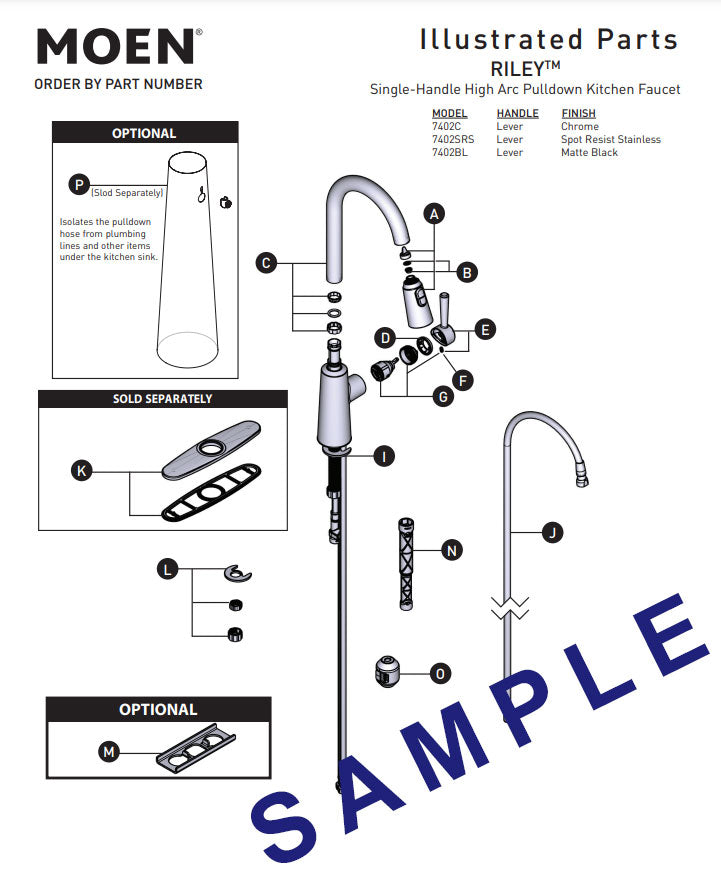
Critical Replacement Parts (Model-Specific)
Cartridge identification is crucial: Moen uses different cartridges across models. Find your model number (typically printed inside the cabinet door or on the base of the faucet) before purchasing parts.
- 1225 cartridge: Most common in newer Moen single-handle kitchen faucets
- 1222 cartridge: Found in older Moen kitchen faucets
- O-ring kit: Moen part #30-043 or #30-044 depending on model
Pro Tip: Purchase an extra O-ring kit even if you’re only replacing the cartridge. These small rubber rings often crack when removed and cause leaks if reused.
Step-by-Step: Replacing a Worn Moen Cartridge (Handle Leak Fix)
This is the definitive solution for 90% of Moen kitchen faucet handle leaks. Complete this repair in 30-45 minutes with minimal plumbing experience.
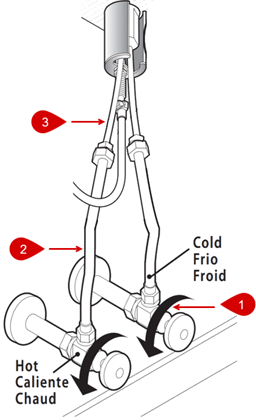
Shut Off Water and Prepare Your Workspace
- Turn off both hot and cold shutoff valves under the sink (clockwise)
- Open the faucet fully to drain remaining water and relieve pressure
- Place a towel in the sink basin to catch small parts and protect the finish
- Clear everything from under the sink for adequate workspace
Critical warning: Never skip the shutoff valve test. Turn valves off, then briefly turn on the faucet to confirm water stops flowing. Proceeding without verifying shutoff could flood your cabinets.
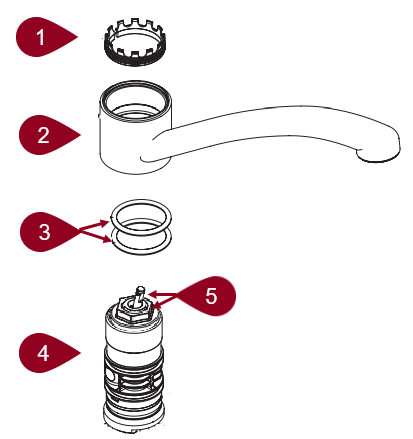
Remove the Handle and Access the Cartridge
- Pry off the decorative cap on top of the handle (use a flathead screwdriver)
- Remove the exposed set screw with the appropriate Allen wrench
- Lift the handle straight up – if stuck, gently wiggle while pulling
- Unscrew the decorative escutcheon (cover plate) to expose the cartridge
Visual cue: If you see significant mineral buildup around the handle base, you’ll need extra cleaning time before installing the new cartridge.
Replace the Faulty Cartridge
- Remove the retaining clip using needle-nose pliers (C-shaped clip around cartridge)
- Apply penetrating oil if the cartridge appears stuck (wait 10 minutes)
- Use the cartridge puller tool to grip and extract the old cartridge
- Clean the valve cavity thoroughly with vinegar-soaked paper towels
- Lubricate the new cartridge O-rings with silicone grease
- Align the new cartridge exactly as the old one (take a photo first!)
- Insert the cartridge firmly until it seats completely
- Reinstall the retaining clip and decorative components
Time-saver: Before removing the old cartridge, take a clear photo with your phone showing its exact orientation. Moen cartridges must be installed in precise alignment to function properly.
Troubleshooting Moen Faucet Leaks That Won’t Stop After Repair
Even after a proper cartridge replacement, some leaks persist due to overlooked issues.
Handle Base Still Leaking After Cartridge Replacement
Most common cause: You reused old O-rings that cracked during removal. The cartridge sits inside a sleeve with multiple O-rings that create the watertight seal. Always replace these when doing cartridge work.
Fix: Disassemble again and replace all O-rings with the new kit. Apply generous silicone grease to each ring before installation—this prevents pinching and extends their life.
Water Dripping From Spout After Handle Repair
This seemingly unrelated issue often appears after handle repair because:
- Cartridge misalignment: The new cartridge isn’t seated perfectly
- Debris dislodged: Repair work pushed sediment into the aerator
- Cross-connection: Hot and cold lines temporarily reversed
Immediate solution: Remove and clean the aerator at the spout tip. If the drip continues, disassemble again and verify the cartridge orientation matches your reference photo.
Preventing Future Moen Kitchen Faucet Handle Leaks
The best repair is one you never need to do again. Implement these simple maintenance habits.
Monthly Handle Tightness Check
Grab your faucet handle and gently try to wiggle it side-to-side. If you feel any movement beyond normal operation, the set screw has loosened. Tighten the handle set screw just enough to eliminate play—overtightening strips the plastic threads. Do this monthly while wiping down your sink.
Avoid the #1 Cause of Premature Cartridge Failure
Never crank your handle shut with excessive force. Moen cartridges are designed to stop water flow with minimal pressure. Aggressively slamming the handle against the stops creates micro-fractures in the plastic cartridge that eventually cause leaks. Train household members to turn handles gently to the stop position.
Annual Cartridge Lubrication (The Professional Secret)
Once a year, remove the handle and apply a small amount of silicone grease to the cartridge shaft where it interfaces with the handle mechanism. This reduces friction during operation and prevents the “sticky handle” sensation that leads to users forcing the handle, which accelerates wear.
When to Call a Professional for Your Leaking Moen Faucet
While most Moen handle leaks are DIY-friendly, certain situations warrant professional help:
- Multiple leaks persist after two repair attempts
- Visible water damage to cabinet structure or flooring
- Corroded or damaged supply lines that need replacement
- Complete handle mechanism failure where parts won’t stay assembled
Moen offers a lifetime limited warranty on cartridges and O-rings. If your repair fails due to a defective part, contact Moen customer service at 1-800-BUY-MOEN with your model number for free replacement parts—no proof of purchase required for these components.
Fixing a leaking Moen kitchen faucet handle is one of the most satisfying DIY plumbing repairs you can tackle. By correctly identifying the leak source, using the right replacement parts, and following the precise installation steps, you’ll stop that annoying drip and prevent costly water damage. Remember to always shut off the water properly before starting, take photos of components before disassembly, and never reuse old O-rings. With these techniques, your Moen faucet will operate smoothly for years to come—saving you money on water bills and avoiding unnecessary service calls.


