
Dealing with a dirty home can be frustrating, especially when you’re short on time. A Shark robot vacuum offers a convenient way to keep your floors clean, but like any vacuum, it requires regular maintenance. One of the most important tasks is emptying the dust cup. A full dust cup reduces the vacuum’s efficiency, leaving dirt and debris behind. This guide will walk you through the process, ensuring your robot vacuum continues to perform at its best, keeping your home spotless with minimal effort.
This comprehensive guide provides a detailed walkthrough on how to efficiently empty the dust cup of your Shark robot vacuum. By following these steps, you’ll maintain your vacuum’s performance, prolong its lifespan, and ensure it effectively cleans your home. Let’s dive in and learn how to keep your Shark robot vacuum running smoothly!
Step 1: Power Off and Locate the Dust Cup

Before you begin, ensure the Shark robot vacuum is powered off. This prevents any accidental starts while you’re handling it.
- Power Off: Press the power button on the robot vacuum to turn it off. The location of the power button may vary slightly depending on your specific Shark model, but it is generally located on the top or side of the unit.
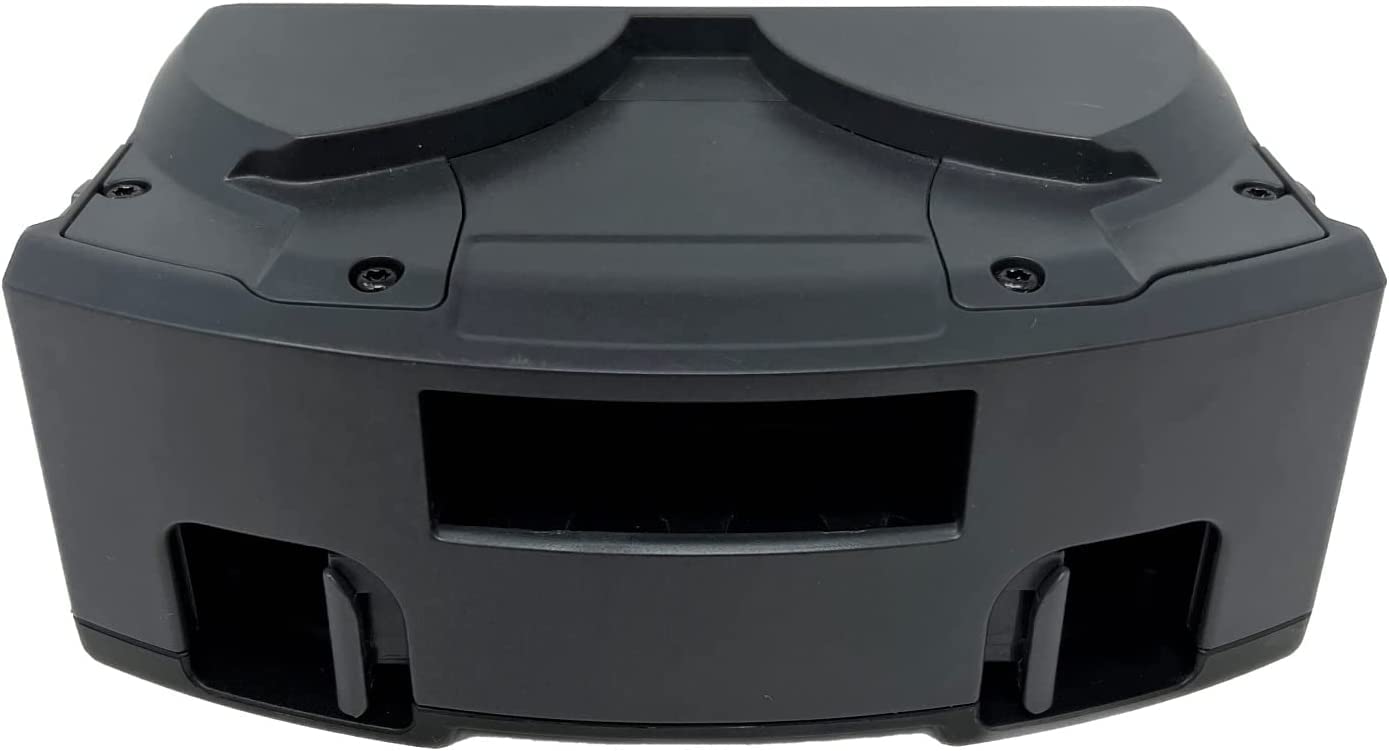
- Locate the Dust Cup: The dust cup is typically located either on the side or at the rear of the robot. Consult your owner’s manual if you’re unsure of its exact location. It’s usually a clearly marked, removable compartment.
Step 2: Remove the Dust Cup
Once you’ve located the dust cup, carefully remove it from the robot vacuum.
- Release Mechanism: Most Shark robot vacuums have a release button or latch that you need to press or slide to detach the dust cup.
- Gentle Removal: Once the release mechanism is activated, gently pull the dust cup away from the robot’s body. Avoid yanking it, as this could damage the components.
Step 3: Empty the Dust Cup
With the dust cup removed, it’s time to empty its contents.
- Position Over Trash: Hold the dust cup over a trash bin or outdoor garbage can to minimize dust and debris from spreading.
- Open the Dust Cup: Look for a door, lid, or latch on the dust cup that opens to allow you to empty it. Some models may have a button to release the bottom of the cup.
- Empty Debris: Shake, tap, or gently dislodge the collected dirt, dust, and debris into the trash. Ensure all contents are removed.
Step 4: Clean the Filter
Cleaning the filter is essential for maintaining your Shark robot vacuum’s suction power and overall performance.
- Locate the Filter: The filter is usually housed within or directly attached to the dust cup. Refer to your owner’s manual for the exact location and removal instructions.
- Remove the Filter: Gently remove the filter from the dust cup.
- Clean the Filter:
- Option 1 (Gentle Cleaning): Tap the filter gently against the inside of the trash bin to dislodge loose dust and particles.
- Option 2 (Washing): Some filters are washable. Check your owner’s manual to confirm if yours is. If washable, rinse the filter under lukewarm water until the water runs clear. Allow the filter to air dry completely (usually 24 hours) before reinstalling it. Never use soap or a washing machine to clean the filter.
- Inspect the Filter: Check the filter for any tears or damage. If the filter is damaged, replace it with a new one to maintain optimal performance.
Step 5: Reassemble and Reinstall
Once the dust cup and filter are clean and dry (if washed), reassemble them and reinstall the dust cup.
- Reassemble Filter: If you removed the filter from the dust cup, reinsert it, ensuring it fits securely in place.
- Reinstall Dust Cup: Align the dust cup with the robot vacuum and gently push it back into place until you hear a click or feel it latch securely. Ensure it is properly seated to avoid any issues during operation.
Step 6: Power On and Resume Cleaning
With everything back in place, you’re ready to power on your Shark robot vacuum and resume cleaning.
- Power On: Press the power button to turn the robot vacuum back on.
- Resume Cleaning: Place the robot vacuum back on the floor and press the clean button to resume its cleaning cycle.
Troubleshooting Guide
1. Robot Vacuum Not Picking Up Dirt
- Problem: The robot vacuum is running, but it’s not effectively picking up dirt and debris.
- Solution:
- Check the Dust Cup: Ensure the dust cup is not full. A full dust cup reduces suction power.
- Clean the Filter: A clogged filter can significantly reduce suction. Clean or replace the filter as needed.
- Inspect the Brush Roll: Check the brush roll for tangled hair, strings, or debris. Remove any obstructions.
- Check for Obstructions: Ensure there are no obstructions blocking the suction path.
2. Dust Cup Difficult to Remove
- Problem: The dust cup is stuck and difficult to remove from the robot vacuum.
- Solution:
- Ensure Power is Off: Make sure the robot vacuum is powered off before attempting to remove the dust cup.
- Check Release Mechanism: Ensure you are properly engaging the release button or latch.
- Gentle Wiggling: Gently wiggle the dust cup while pulling to help release any stuck debris.
- Consult Manual: Refer to your owner’s manual for specific removal instructions.
3. Unusual Noises During Operation
- Problem: The robot vacuum is making unusual noises, such as rattling or grinding.
- Solution:
- Check for Obstructions: Inspect the brush roll and suction path for any obstructions.
- Ensure Proper Assembly: Make sure the dust cup and filter are properly assembled and securely in place.
- Inspect for Damage: Check for any damaged parts, such as a cracked dust cup or broken filter.
- Contact Support: If the noise persists, contact Shark customer support for assistance.
4. Reduced Suction Power
- Problem: The robot vacuum’s suction power has decreased significantly.
- Solution:
- Clean the Filter: A dirty filter is the most common cause of reduced suction. Clean or replace the filter regularly.
- Check for Blockages: Inspect the hoses and suction paths for any blockages.
- Empty the Dust Cup: Ensure the dust cup is not full.
- Check Brush Roll: Make sure the brush roll is clean and rotating freely.
5. Error Messages
- Problem: The robot vacuum is displaying error messages or fault codes.
- Solution:
- Consult Manual: Refer to your owner’s manual to identify the meaning of the error message.
- Troubleshoot: Follow the troubleshooting steps provided in the manual for the specific error code.
- Contact Support: If you cannot resolve the issue, contact Shark customer support for further assistance.
Pro Tips for Maintaining Your Shark Robot Vacuum

- Regular Emptying: Empty the dust cup after each cleaning session or at least once a week, depending on usage.
- Filter Maintenance: Clean the filter every 2-4 weeks to maintain optimal suction power. Replace the filter every 6-12 months, or as needed.
- Brush Roll Cleaning: Regularly inspect and clean the brush roll to remove tangled hair and debris.
- Sensor Cleaning: Wipe the sensors on the robot vacuum with a soft, dry cloth to ensure accurate navigation.
- Battery Care: Follow the manufacturer’s instructions for charging and storing the battery to prolong its lifespan.
Alternatives/Variations
- Using a Bagless Vacuum: For a deeper clean, you can use a bagless vacuum with a hose attachment to thoroughly clean the dust cup and filter housing.
- Compressed Air: Use compressed air to blow out dust and debris from hard-to-reach areas of the dust cup and filter. Be sure to do this outdoors to avoid spreading dust inside your home.
- Microfiber Cloth: Wipe down the exterior of the dust cup with a microfiber cloth to remove any surface dust or grime.
- Different Cleaning Schedules: Adjust your cleaning schedule based on your home’s needs. If you have pets or high-traffic areas, you may need to empty the dust cup and clean the filter more frequently.
FAQ Section
How often should I empty the dust cup of my Shark robot vacuum?
Empty the dust cup after each cleaning session or at least once a week, depending on how often you run your robot vacuum and the amount of dirt and debris it collects. Regular emptying ensures optimal suction power and cleaning performance.
Can I wash the filter of my Shark robot vacuum?
Some Shark robot vacuum filters are washable, but it depends on the model. Check your owner’s manual to confirm if your filter is washable. If it is, rinse it under lukewarm water until the water runs clear and allow it to air dry completely before reinstalling.
What happens if I don’t clean the filter regularly?
If you don’t clean the filter regularly, it can become clogged with dust and debris, reducing the suction power of your robot vacuum. This can lead to ineffective cleaning and potentially damage the motor over time.
How do I know when to replace the filter?
You should replace the filter every 6-12 months, or sooner if you notice a decrease in suction power or if the filter appears damaged or excessively dirty even after cleaning. Refer to your owner’s manual for specific replacement recommendations.
What should I do if the dust cup is difficult to remove?
Ensure the robot vacuum is powered off and that you are properly engaging the release mechanism. Gently wiggle the dust cup while pulling to help release any stuck debris. Consult your owner’s manual for specific removal instructions.
Can I use soap to clean the filter?
No, never use soap or any cleaning detergents to clean the filter. Soap residue can damage the filter material and affect its performance. Use only lukewarm water to rinse the filter.
Tips, Warnings, and Best Practices
- Safety First: Always power off the robot vacuum before performing any maintenance tasks, including emptying the dust cup and cleaning the filter.
- Read the Manual: Refer to your owner’s manual for specific instructions and recommendations for your Shark robot vacuum model.
- Gentle Handling: Handle the dust cup and filter with care to avoid damage.
- Proper Drying: Ensure the filter is completely dry before reinstalling it to prevent mold and mildew growth.
- Regular Maintenance: Establish a regular maintenance schedule to keep your robot vacuum running smoothly and efficiently.
- Avoid Overfilling: Do not allow the dust cup to overfill, as this can reduce suction power and potentially damage the motor.
Conclusion
Emptying the dust cup of your Shark robot vacuum is a simple yet crucial task for maintaining its performance and longevity. By following this comprehensive guide, you can ensure your robot vacuum continues to efficiently clean your home, providing you with more free time and a spotless living environment. Remember to regularly empty the dust cup, clean the filter, and follow the pro tips for optimal results. A well-maintained Shark robot vacuum is a reliable partner in keeping your home clean and tidy.


