
Your kitchen shelves stare back at you every time you grab a coffee mug—cluttered with mismatched dishes, dusty trinkets, and that one bowl you never use. What if those same shelves could feel like a curated display that makes meal prep joyful? Over 68% of homeowners with open shelving admit they struggle with balancing style and daily functionality. The secret isn’t expensive decor—it’s intentional styling that works with your routine. In this guide, you’ll discover how to transform chaotic shelves into organized, personality-filled spaces that actually make your kitchen easier to use. No Pinterest-perfect pressure required—just real solutions for real kitchens.
Arrange Daily Essentials on Lower Shelves for Maximum Efficiency
Stop digging through cabinets every morning. Your most-used items deserve prime real estate at arm level. Place coffee mugs, everyday plates, and frequently used bowls on lower shelves where you can grab them in seconds. Stack plates horizontally (not vertically) to prevent chipping and allow quick access to the bottom piece. Keep glassware grouped within easy reach of your coffee maker or sink. This simple shift saves 3-5 minutes daily—adding up to 30+ hours reclaimed annually.
How to Group Items by Frequency of Use
- Daily drivers: Mugs, cereal bowls, and prep plates on front lower shelves
- Weekly warriors: Serving platters and specialty glasses on middle shelves
- Occasional treasures: Holiday dishes and cake stands on high or back shelves
- Hidden helpers: Wrap infrequently used appliances in fabric to maintain visual calm
Pro Tip: Place a wooden cutting board vertically against the back of lower shelves—it creates instant height variation while hiding messy cabinet interiors. This takes 2 minutes but makes shelves look instantly styled.
Avoid This Common Shelf Styling Mistake
Never cram shelves beyond 70% capacity. Overcrowding makes items hard to access and creates visual chaos. If your lower shelf holds more than 12 items, rotate out seasonal pieces. Test functionality by closing your eyes and grabbing a plate—you should hit it on the first try.
Create Visual Harmony Using the Rule of Three
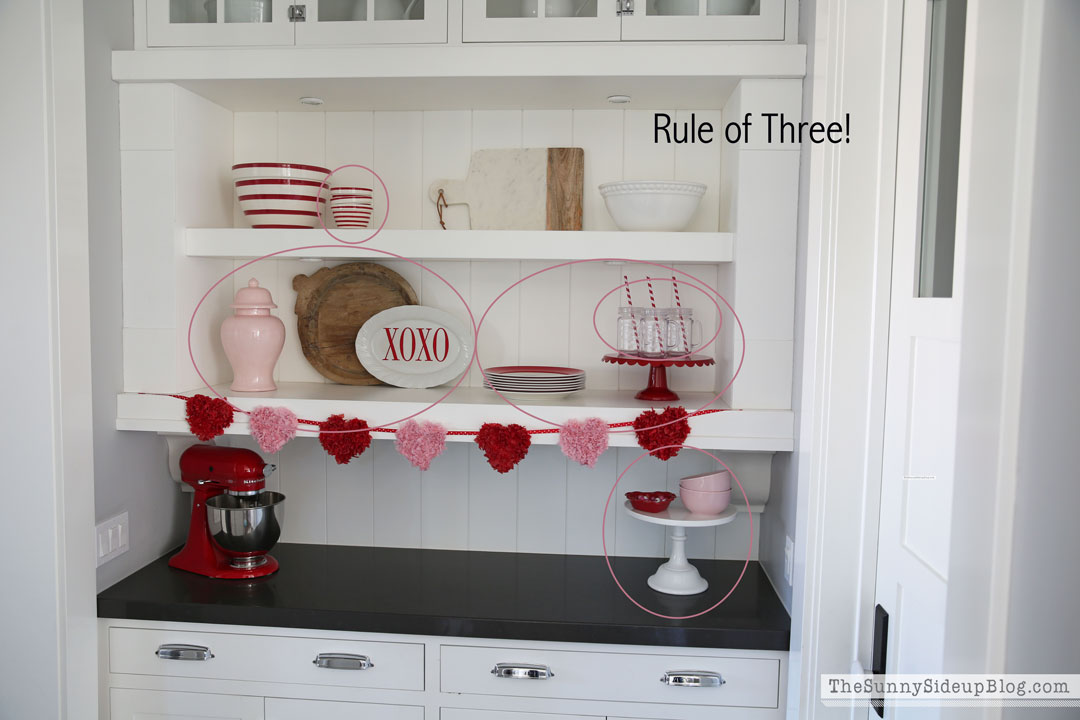
Your brain naturally finds odd-numbered groupings more pleasing. Arrange items in trios to create dynamic displays that feel intentional, not staged. Cluster three ceramic canisters for coffee, sugar, and tea, or group five vintage mugs (keeping the odd-number rule) on a woven tray. Place the tallest item (like a pitcher) at the back, medium (stacked bowls) in the center, and shortest (spice jars) in front for layered depth.
Fix Flat-Looking Shelves in 5 Minutes
Flat arrangements scream “storage unit.” Add dimension by:
– Stacking two plates with a folded linen napkin between them
– Leaning a wooden spoon against a bowl
– Placing a small potted herb in front of taller items
– Using a cake stand to elevate everyday items
Warning: Avoid symmetrical arrangements—they feel sterile. Instead of matching mugs side-by-side, mix textures: one stoneware mug beside two glass tumblers.
How to Choose Your Color Palette Without Overthinking
Limit shelf colors to 3 core tones: Start with neutral bases (white, wood, or black), add one earth tone (terracotta, sage), and use a single pop color (cobalt blue mug, rust pitcher) as your accent. This creates cohesion while allowing personality to shine. Test your palette by taking a black-and-white photo—if items blend into one blob, simplify.
Style Windowsills as Mini Herb Gardens
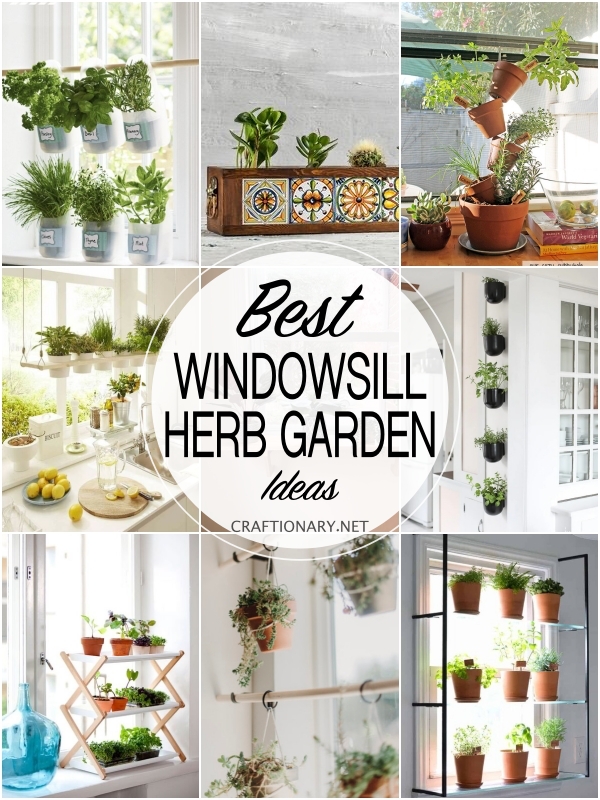
That sunny windowsill isn’t just for your cat’s naps—it’s prime styling real estate. Transform it into a functional herb garden with shallow pots of basil, mint, or thyme. Place pots on a small wooden tray to protect the sill and create a contained display. Pair with a tiny ceramic vase holding fresh-cut flowers from your garden for instant restaurant-worthy charm.
Pet-Safe Windowsill Styling Solutions
If cats claim your sill, layer functionality: Add a soft fleece blanket over a non-slip mat, then tuck small herb pots along the outer edge. Choose pet-friendly plants like spider plants or cat grass in matching terra cotta pots. Critical: Avoid lilies, pothos, or sago palms—these are toxic to cats. Stick to rosemary or parsley for safe greenery.
Why Narrow Spaces Need Strategic Grouping
For slim shelves under 6 inches deep: Use tiered stands to create “levels” without depth. Place cookbooks upright with a decorative bookend, then tuck small items (a single spoon, salt cellar) in front. Limit to 5-7 items total—any more feels cramped. Try this: Stack two cookbooks sideways, add a small plant, and finish with one ceramic spoon rest.
Pet-Proof Your Shelf Displays Without Sacrificing Style
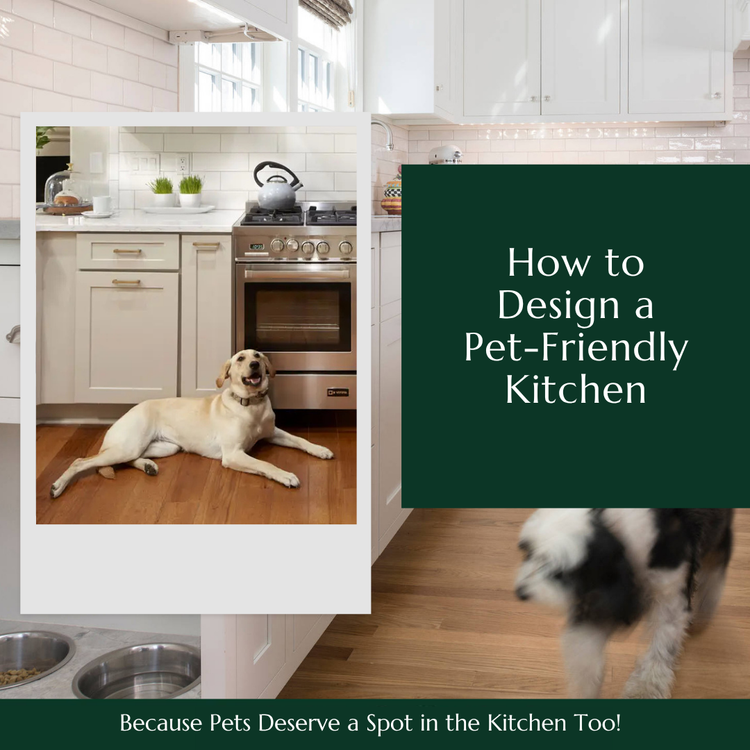
Open shelves in pet homes need smart adaptations. Secure wobbly items with museum putty (invisible and removable), and choose unbreakable materials like stoneware or bamboo. Place pet beds on lower shelves near windows—add a washable cushion that matches your decor. For curious cats, install a shallow shelf 18 inches off the ground as their designated “viewing platform.”
How to Style Shelves with Pets Using the 80/20 Rule
Keep 80% of displayed items durable and 20% decorative. Example: Three sturdy ceramic bowls (for pet water) styled beside two pretty but breakable vases. Store fragile heirlooms in closed cabinets. Pro move: Spray shelves with pet-safe bitter apple deterrent to keep cats off food-prep zones.
Emergency Fixes for Shelf Chaos After Pet Incidents
When Fluffy knocks something over: Immediately wipe surfaces with vinegar-water mix to remove pet hair and odors. Replace broken items with stackable bins—store spices inside, then style the bin with a linen cover. Reset your shelf styling in 10 minutes using the “rule of three” grouping method.
Refresh High Shelves for “Wow” Factor Without a Ladder
Hard-to-reach shelves shouldn’t become dust traps. Style them as intentional vignettes visible from across the room. Hang copper pots by their handles against the back wall, or display a collection of vintage platters standing upright. Use magnetic hooks to secure items that might slide. For deep nooks, place a small LED puck light inside to spotlight decorative pieces.
Transform Awkward Nooks Into Functional Displays
That corner above your fridge? Install a floating shelf and style it as a “coffee station” with stacked mugs and a small grinder. Deep cabinets work for displaying tall items like wine bottles—lay them horizontally on a wooden tray. Time-saver: Use command hooks inside cabinet doors to hang measuring spoons, keeping fronts clutter-free.
How Often to Rotate High Shelf Decor
Swap high-shelf items quarterly to prevent dust buildup and refresh your space. Spring: Swap winter mugs for floral-patterned ones. Fall: Display mini pumpkins beside your coffee canister. Takes 7 minutes but makes your kitchen feel newly decorated.
Maintain Your Styled Shelves With a 2-Minute Daily Habit
Styled shelves require maintenance—but not marathon cleaning sessions. Wipe shelves while coffee brews each morning: Run a microfiber cloth along fronts and tops. Store cleaning spray in a lower cabinet for quick access. Every Sunday, do a 5-minute “shelf sweep”—remove stray items and reposition anything that’s shifted.
Prevent Dust Buildup on Open Shelving
Dust settles 40% faster on open shelves than cabinets. Combat this by:
– Using matte-finish dishware (glossy shows dust)
– Placing a small HEPA air purifier nearby
– Spraying shelves monthly with anti-static spray
– Choosing darker wood tones that camouflage dust
Pro Tip: Style shelves near the stove with metal or ceramic items—they resist grease splatters better than porous materials.
When to Break the Rules for Your Lifestyle
If you hate dusting, mix open and closed storage: Style the top two shelves openly, then use louvered cabinet doors below. If you collect mismatched dishes, lean into it—group “eclectic” shelves by color instead of style. Your shelves should serve you, not Instagram.
Final Touches: Make Every Shelf Tell Your Story
The most beautiful shelves reflect who you are, not who Pinterest says you should be. Place that chipped mug from your honeymoon next to daily dishes. Stack cookbooks from your favorite chef beside your toddler’s art project. Style a shelf with all-white dishes for calm, or go bold with rainbow-colored canisters—your kitchen, your rules.
3-Step Shelf Refresh for Instant Joy
- Remove everything (yes, even that dusty vase)
- Keep only what you use weekly plus 3 meaningful decor pieces
- Style using the rule of three with negative space between groups
Spend 15 minutes today styling one shelf. Notice how grabbing your morning coffee feels different when your space supports you. In two weeks, swap out one item for something seasonal—a lemon in summer, cinnamon sticks in winter. Your shelves aren’t static displays; they’re living parts of your home. The goal isn’t perfection—it’s creating shelves that make you smile when you walk in, cat hair and all. Start small, stay consistent, and watch your kitchen transform from functional to fabulous.


