The Shark Navigator vacuum is a popular choice for many households due to its powerful suction and maneuverability. However, over time, the wheels can accumulate hair, dirt, and debris, hindering its performance and making it difficult to push around. Cleaning the wheels is a simple maintenance task that can significantly improve your vacuum’s efficiency and extend its lifespan. This guide provides a comprehensive, step-by-step approach to cleaning the wheels of your Shark Navigator vacuum, ensuring it continues to glide smoothly across your floors.
Regular cleaning of your Shark Navigator’s wheels not only restores its maneuverability but also prevents potential damage to your floors and the vacuum itself. Accumulated debris can scratch hardwood floors or put extra strain on the vacuum’s motor. By following these instructions, you can keep your Shark Navigator in optimal condition, ensuring it remains a reliable cleaning companion for years to come. Let’s dive into the process of cleaning those wheels and getting your vacuum back in top shape.
Table of Contents
- Tools and Materials You’ll Need
- Step 1: Unplug Your Shark Navigator Vacuum
- Step 2: Locate the Wheels
- Step 3: Remove Large Debris by Hand
- Step 4: Cut Away Tangled Hair and Threads
- Step 5: Scrub the Wheels and Axles
- Step 6: Rinse with Warm Water
- Step 7: Wipe Clean and Dry
- Step 8: Reassemble the Wheels (If Removed)
- Step 9: Test the Vacuum
- Troubleshooting Guide
- Pro Tips for Maintaining Your Shark Navigator Wheels
- FAQ Section
- Tips, Warnings, and Best Practices
- Conclusion
Tools and Materials You’ll Need
Before you begin, gather the necessary tools to make the cleaning process smooth and efficient:
- Screwdriver: A Phillips head screwdriver is useful for removing the wheels if necessary.
- Small Brush or Toothbrush: For scrubbing away dirt and debris.
- Scissors or Seam Ripper: To cut away tangled hair and threads.
- Damp Cloth or Paper Towels: For wiping down the wheels and surrounding areas.
- Warm Water: For rinsing off stubborn dirt.
- Mild Dish Soap (Optional): For a deeper clean if needed.
Safety first! Before you start any maintenance or cleaning, always unplug your Shark Navigator vacuum from the power outlet. This prevents any accidental start-ups while you’re working on it.
Step 2: Locate the Wheels
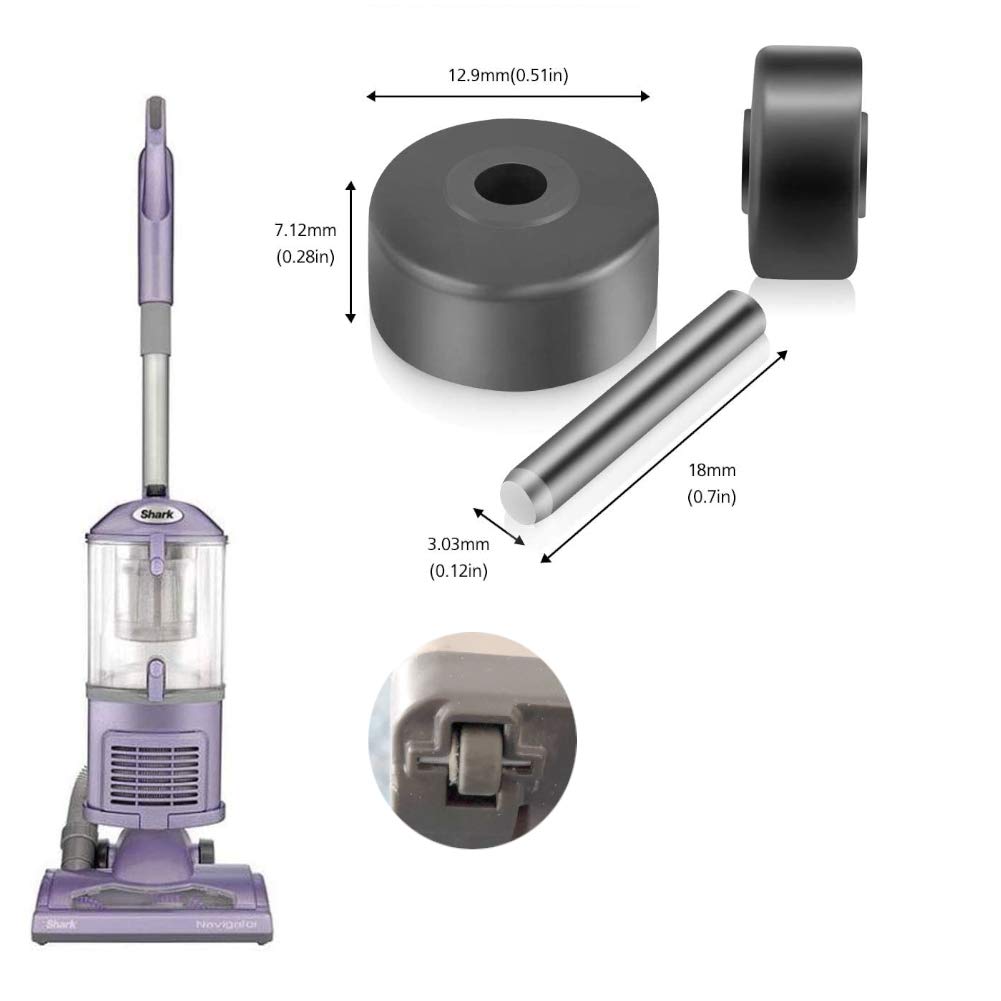
The Shark Navigator typically has two main wheels at the back of the vacuum head and possibly a smaller swivel wheel in the front. Identify all the wheels you need to clean. Focus on the larger rear wheels first, as they tend to accumulate the most debris.
Step 3: Remove Large Debris by Hand
Start by manually removing any large pieces of debris, such as clumps of hair, threads, or visible dirt, that are wrapped around the wheels or axles. This initial removal makes the subsequent cleaning steps easier and more effective.
Step 4: Cut Away Tangled Hair and Threads

Use scissors or a seam ripper to carefully cut away any tangled hair or threads that are tightly wound around the wheels. Slide the scissors between the wheel and the vacuum body to snip the tangled material. Be cautious not to damage the wheels or the vacuum housing. Clear as much of the tangled material as possible.
Step 5: Scrub the Wheels and Axles

Using a small brush or an old toothbrush, scrub the wheels and axles to loosen any remaining dirt and debris. If necessary, dampen the brush with warm water to help dislodge stubborn particles. For a deeper clean, you can add a drop of mild dish soap to the water. Ensure you scrub all surfaces of the wheel, paying special attention to the areas where the wheel meets the vacuum body.
Step 6: Rinse with Warm Water
If you used soap, rinse the wheels thoroughly with warm water to remove any soap residue. Make sure no soap remains, as it can attract more dirt. If you didn’t use soap, this step can still help remove loosened debris.
Step 7: Wipe Clean and Dry
Use a damp cloth or paper towels to wipe down the wheels and the surrounding areas. Ensure you remove all remaining dirt and moisture. Allow the wheels to air dry completely before reassembling or using the vacuum. This prevents any moisture-related damage or the buildup of mold and mildew.
Step 8: Reassemble the Wheels (If Removed)
If you removed the wheels for a more thorough cleaning, reassemble them now. Ensure they are securely attached and rotate freely. If the wheels don’t rotate smoothly, double-check for any remaining debris or obstructions.
Step 9: Test the Vacuum
Plug the vacuum back into the power outlet and test it on a hard surface to ensure the wheels are functioning correctly. The vacuum should move smoothly and easily. If you notice any issues, repeat the cleaning process or consult the Shark Navigator user manual for further troubleshooting.
Troubleshooting Guide
Wheel Doesn’t Spin Freely
- Problem: The wheel is still blocked by debris.
- Solution: Double-check for any remaining hair, threads, or dirt around the axle. Use the scissors or brush again to remove any obstructions.
Wheel is Squeaky
- Problem: The wheel may need lubrication.
- Solution: Apply a small amount of silicone-based lubricant to the axle. Be careful not to use too much, as it can attract dirt.
Vacuum is Still Difficult to Push
- Problem: Other parts of the vacuum may need cleaning.
- Solution: Check and clean the brush roll, filters, and any other areas where debris can accumulate.
Wheel Keeps Falling Off
- Problem: The wheel may not be securely attached.
- Solution: Ensure the wheel is properly aligned and securely fastened. If the attachment mechanism is damaged, contact Shark customer support for assistance.

- Regular Cleaning: Clean the wheels every 1-3 months, depending on usage, to prevent buildup.
- Use a Vacuum with Brush Roll Shutoff: When vacuuming hard floors, turn off the brush roll to prevent it from kicking debris into the wheels.
- Inspect Regularly: Periodically inspect the wheels for signs of wear and tear.
- Lubricate: Use silicone spray to lubricate the wheels after cleaning, this helps repel hair.
FAQ Section
How often should I clean my Shark Navigator vacuum wheels?
Cleaning the wheels of your Shark Navigator vacuum every 1-3 months is generally recommended. However, if you have pets or frequently vacuum areas with a lot of hair or debris, you might need to clean them more often. Regular cleaning prevents buildup and ensures optimal performance.
What’s the best way to remove hair wrapped around the vacuum wheels?
The most effective way to remove hair wrapped around the vacuum wheels is to use a pair of scissors or a seam ripper. Carefully slide the scissors between the wheel and the vacuum body to snip the tangled hair. Once the hair is cut, you should be able to pull it away easily.
Can I use WD-40 to lubricate the wheels of my Shark Navigator vacuum?
It’s generally not recommended to use WD-40 to lubricate the wheels of your Shark Navigator vacuum. WD-40 can attract dirt and dust, which can cause more problems in the long run. Instead, use a silicone-based lubricant, which is less likely to attract debris.
What kind of brush should I use to scrub the wheels?
A small brush or an old toothbrush works well for scrubbing the wheels of your Shark Navigator vacuum. The bristles should be stiff enough to dislodge dirt and debris, but not so stiff that they damage the wheels. A toothbrush is especially useful for getting into tight spaces.
How do I prevent hair from getting tangled around the wheels in the first place?
To minimize hair from getting tangled around the wheels, regularly vacuum areas prone to hair accumulation, such as pet beds and carpets. Additionally, consider using a vacuum with a brush roll shutoff feature, which prevents the brush roll from agitating hair and debris on hard floors, reducing the likelihood of it getting wrapped around the wheels.
What do I do if one of the wheels breaks or becomes damaged?
If one of the wheels on your Shark Navigator vacuum breaks or becomes damaged, contact Shark customer support or visit their website to inquire about replacement parts. Using a vacuum with a broken or damaged wheel can cause further damage to the vacuum and may not be safe.
Tips, Warnings, and Best Practices
- Warning: Always unplug the vacuum before performing any maintenance to prevent electrical shock.
- Best Practice: Keep the wheels clean to extend the life of your vacuum and maintain optimal performance.
- Tip: Use a flashlight to inspect the wheels for hidden debris.
- Warning: Avoid using excessive force when removing or reassembling the wheels, as this can cause damage.
Conclusion
Cleaning the wheels of your Shark Navigator vacuum is a straightforward but essential task that significantly impacts its performance and longevity. By following these steps, you can ensure your vacuum continues to glide smoothly across your floors, making your cleaning routine more efficient. Regular maintenance, including wheel cleaning, will keep your Shark Navigator in top condition, providing reliable cleaning power for years to come. Take the time to clean those wheels and experience the difference it makes.


