
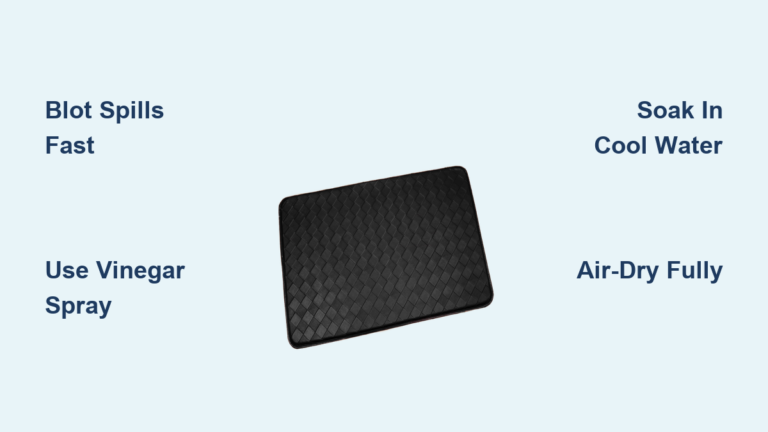
Standing on a memory foam kitchen mat after hours of cooking feels like a luxury—until you notice crumbs embedded in the fibers or that stubborn coffee stain near the coffee maker. These comfortable workhorses trap food particles, grease, and moisture that can breed bacteria and shorten their lifespan. Most homeowners make critical mistakes like shoving them in the washing machine or using harsh chemicals that destroy the foam’s structure. This guide reveals exactly how to clean memory foam kitchen mats safely while preserving their supportive cushioning for years. You’ll learn immediate spill responses, monthly deep-cleaning methods that won’t disintegrate the foam, and the non-negotiable drying process that prevents mold growth inside the mat. Skip these steps, and you’ll face foul odors and flattened padding within months.
Memory foam kitchen mats demand special care because their open-cell structure acts like a sponge, absorbing liquids and particles deep into the core. Unlike rubber or vinyl mats, you can’t simply hose them down or toss them in the laundry. The wrong cleaning method causes irreversible damage—heat melts the foam, agitation breaks down the cell structure, and improper drying leads to mildew in hidden layers. Yet with the right technique, you’ll maintain that “walking-on-clouds” comfort while keeping your kitchen hygienic. Whether you’re dealing with bacon grease splatters or tracked-in mud, this guide covers every scenario using only household items. Let’s dive into the immediate actions that save your mat after spills happen.
Fix Fresh Spills Before They Penetrate the Foam Core
The moment coffee splashes or olive oil drips on your mat, your response determines whether it becomes a permanent stain. Memory foam’s porous nature means liquids seep downward within seconds, making immediate action critical. Waiting even 5 minutes allows contaminants to bond with the foam cells, turning simple spills into set-in stains that require aggressive (and damaging) treatments later. Always address spills when they occur—this 2-minute habit prevents 90% of deep-cleaning emergencies and extends your mat’s usable life by years.
Blot Light Spills With a Microfiber Cloth in Under 60 Seconds
For water-based spills like juice or broth, or light surface dust, skip the cleaners entirely. Grab a dry microfiber cloth and press firmly over the wet area—never wipe, as lateral motion pushes debris deeper. The cloth’s split fibers lift moisture through capillary action without abrasion. For sticky residues like syrup, dampen the cloth corner with cool water only (no soap) and gently dab until the stickiness disappears. Immediately follow with a dry section of the cloth to absorb residual moisture. This method works because memory foam releases surface contaminants easily when addressed immediately, avoiding chemical exposure that degrades the material over time. Pro Tip: Keep a dedicated microfiber cloth under your sink for instant spill response—this simple habit prevents most deep-cleaning needs.
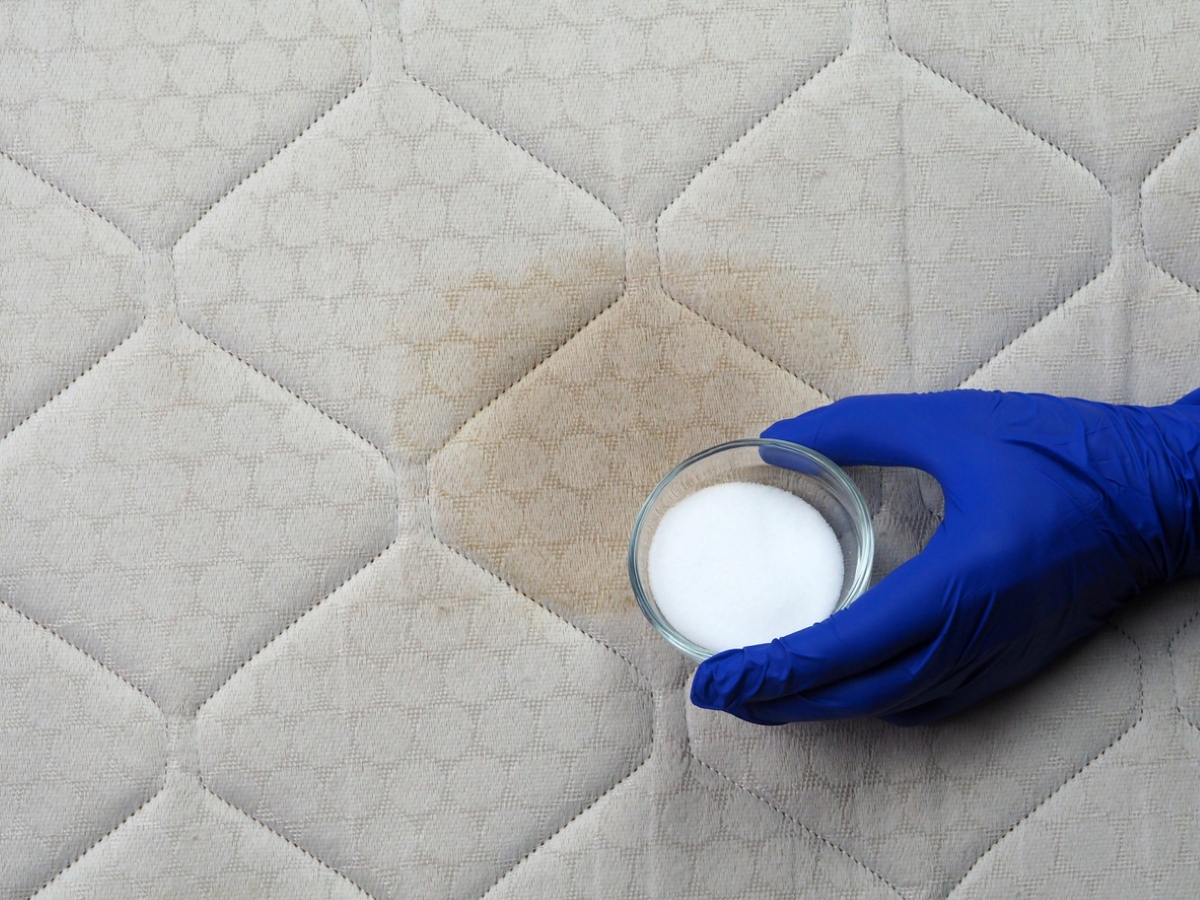
Neutralize Set-In Stains With Vinegar Before Rinsing
When spills linger beyond immediate attention—like dried wine or cooking oil—you’ll need a gentle pre-treatment. First, scrape off any solid debris with a spoon edge. Then mix 1 teaspoon white vinegar with 1 cup cool water in a spray bottle (never apply full-strength vinegar). Mist the solution onto the stain, wait 3 minutes for the acid to break molecular bonds, then blot vigorously with a dry cloth. The vinegar neutralizes organic compounds without foaming like soap would, which could trap residue. For protein-based stains (eggs, dairy), use cold water only—heat sets proteins permanently. Critical Warning: Never rub stains circularly; use a straight-in-and-out dabbing motion to lift particles toward the surface. Finish by pressing a dry towel over the area for 2 minutes to draw out loosened contaminants. This method works because vinegar’s mild acidity dissolves bonds without compromising foam integrity, unlike harsh degreasers.
Deep Clean Monthly With a Bathtub Soak to Remove Hidden Grime
Weekly spot-cleaning isn’t enough—ground-in dirt and grease accumulate in the foam’s lower layers, causing odors and material breakdown. A monthly deep clean removes this hidden buildup before it compromises structural integrity. Skipping this leads to permanent discoloration and that sour “wet dog” smell as bacteria thrive in damp foam. Always check your mat’s care label first; some gel-infused models require specific pH-neutral cleaners. Never attempt machine washing—even “gentle” cycles create destructive agitation that tears foam cells apart. The bathtub method safely penetrates deep without mechanical stress.
Submerge and Soak Using Cool Water Only in 5 Steps
Fill your tub with just enough cool water to cover the mat (lukewarm max—never hot). Hot water melts the polyurethane foam, causing permanent flattening. Add 1 tablespoon mild dish soap (like Dawn Free & Clear) or 2 tablespoons oxygen bleach—never chlorine bleach, which disintegrates foam polymers. Submerge the mat and press gently to saturate (do not twist or wring). Agitate by slowly moving your hands through the water to create suds that lift dirt. Soak exactly 15 minutes—longer causes waterlogging that extends drying time dangerously. Drain dirty water, then rinse by holding the mat under cool running water while squeezing gently from top to bottom. Continue until runoff is completely clear; residual soap attracts more dirt and accelerates wear. Time Saver: Place a weighted plate on the mat during soaking to keep it submerged without manual effort.
Prevent Mold Growth With Proper Air-Drying Techniques

Improper drying causes 80% of memory foam mat failures—trapped moisture breeds mold inside the foam within 24 hours. Heat sources like radiators or hairdryers seem tempting but melt the foam’s open-cell structure, creating hard, lumpy patches. Tumble drying is catastrophic: centrifugal force compresses the foam irreversibly. Only slow air-drying preserves the delicate cell architecture while eliminating moisture at the core. Rushing this step guarantees musty odors and premature replacement.
Position Your Mat for Maximum Airflow Without Distortion
After rinsing, press the mat against the tub wall to expel excess water—apply even pressure without twisting. Never hang by one edge; gravity will stretch the foam unevenly. Instead, drape it over a clothesline with the entire surface exposed, or lay it flat on a drying rack with space beneath (use pool noodles as spacers if needed). Critical Checkpoint: Flip the mat every 4 hours to expose both sides equally—hidden moisture pools on the bottom surface. Ideal drying spots include shaded patios or well-ventilated garages; direct sun fades colors and degrades foam. Total drying time ranges from 24 hours (low humidity) to 48 hours (damp climates). Test readiness by pressing your palm firmly into the center—if any coolness remains, continue drying. Using a damp mat reintroduces moisture to the foam, restarting the mold cycle.
Eliminate Lingering Kitchen Odors With Baking Soda
Food odors embed deep in foam pores where liquids can’t reach. Vinegar rinses help but leave their own scent, while commercial deodorizers often contain alcohol that dries out foam. Baking soda neutralizes odors chemically without residue. Sprinkle ½ cup evenly over the dry mat, working it into the surface with a dry brush. Let it sit 12 hours (overnight is ideal)—this gives time for odor molecules to bind with the soda crystals. Vacuum thoroughly using an upholstery attachment on low suction; high suction can pull foam fibers. For persistent smells, repeat after 48 hours. Pro Tip: Store baking soda in your mat’s storage spot to absorb ambient kitchen odors between cleanings.
Extend Mat Life With These Daily Maintenance Habits
Preserving your mat starts long before deep cleaning. Daily care prevents 70% of damage cases. Shake the mat outside weekly to dislodge crumbs—never beat it, as impact fractures foam cells. Vacuum with a brushless attachment on low suction to avoid snagging fibers. Rotate the mat 180 degrees monthly so high-traffic areas (like in front of the sink) wear evenly. Non-Negotiable Rule: Never place near heat sources like ovens or dishwashers—the constant warmth degrades foam elasticity. If your mat develops permanent indentations, flip it over; most have dual-sided non-slip backing. When storing, roll loosely (never fold) in a breathable cotton bag—plastic containers trap moisture.
Memory foam kitchen mats reward proper care with years of comfort, but one wrong cleaning step can destroy them permanently. Stick to cool water, gentle agitation, and patient air-drying to maintain that signature cushioning. Remember the golden rule: if a method involves heat, twisting, or chemicals stronger than dish soap, it will damage your mat. Implement these techniques consistently, and your mat will stay fresh, supportive, and hygienic through daily kitchen chaos. For immediate spill control, keep a microfiber cloth and vinegar spray under your sink—these two items handle 95% of cleaning needs without risking foam integrity. Your feet (and your kitchen) will thank you for the extra care.


