Your hiking boots slog through mud, snow, and river crossings while supporting your body weight for miles. Yet most hikers treat them like disposable sneakers—until they crack, leak, or lose grip mid-trail. This isn’t just inconvenient; it’s dangerous. Proper hiking boot maintenance transforms gear that lasts one season into a decade-long trail companion. Without it, even $300 boots fail prematurely as leather dries out, waterproofing fails, and stitching unravels. The fix? A 10-minute routine after every hike that prevents 90% of common failures. You’ll keep your boots supple, waterproof, and trail-ready while avoiding costly replacements. Let’s dive into the exact steps that protect your investment.
Stop Drying Boots Near Heat: The Critical Cleaning & Drying Process
Mud and grit aren’t just messy—they grind into leather fibers like sandpaper during wear, accelerating wear. Skipping cleaning after hikes guarantees premature cracking. But how you dry boots matters more than the wash itself.
How to Remove Trail Grime Without Damaging Leather
Start by knocking off dried mud with a stiff horsehair brush—never a wire brush that scratches. Focus on seams where dirt hides. For stubborn caked-on debris, use a soft toothbrush dipped in cool water. Never soak boots or use dish soap; these strip natural oils. Instead, apply a dedicated leather cleaner like Nikwax Footwear Gel with a microfiber cloth using gentle circular motions. Rinse residue with a damp sponge, then wipe dry immediately. This step alone prevents leather from becoming brittle.
The 3-Step Drying Method That Prevents Cracking
What happens after cleaning makes or breaks your boots:
1. Remove laces and insoles to expose all moisture-trapping areas
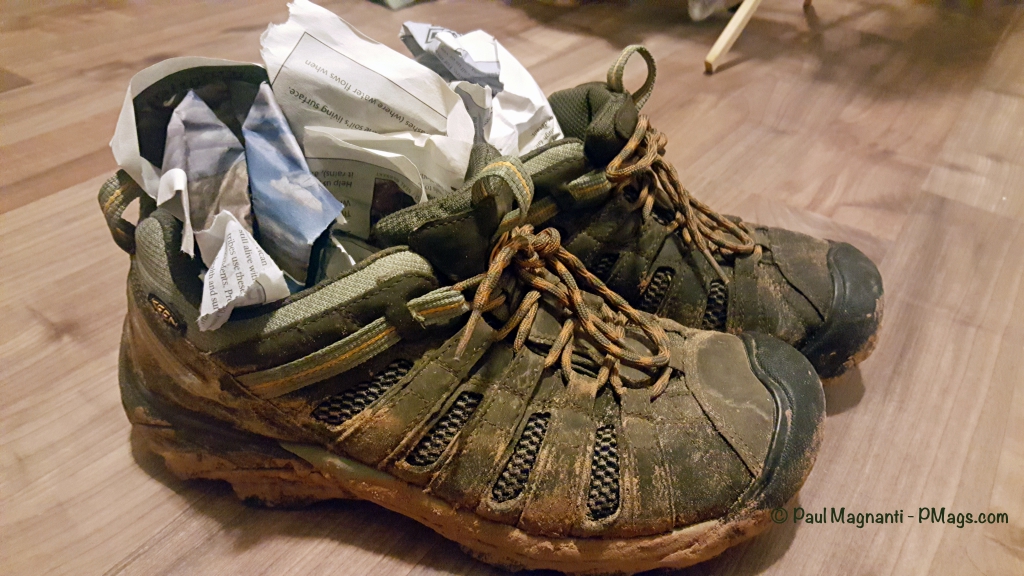
2. Stuff with crumpled newspaper (not paper towels) to wick moisture from the inside out—replace every 4 hours
3. Place in the coolest room of your house (like a basement closet), away from windows or vents
Critical mistake to avoid: Radiators, hair dryers, or sunlight seem fast but bake leather into a stiff, cracked shell. If boots feel damp after 24 hours, repeat newspaper stuffing—they’re not fully dry until the tongue feels cool against your wrist.
Condition Leather Right: Fix Dry Boots in 3 Steps (Before They Crack)

Leather is porous skin that loses natural oils with every hike. Unconditioned boots become stiff, leak water, and develop stress cracks at flex points. This isn’t cosmetic—it’s structural failure waiting to happen.
Choosing the Right Conditioner for Your Boot Type
Not all conditioners work for all leathers. Using the wrong product traps moisture or darkens light boots:
– Full-grain/oil-tanned boots: Use Bick 4 or Venetian Shoe Cream (non-silicone formulas that penetrate without greasiness)
– Suede/nubuck: Apply Nikwax Conditioner for Leather with a suede brush to lift nap
– Avoid: Mink oil (over-softens leather) or silicone-based products (clog pores)
The Exact Conditioning Technique That Lasts
- Apply sparingly to a lint-free cloth—never directly to boots
- Rub in small circles along the leather grain, focusing on ankle flex zones and toe caps
- Wait 1 hour, then buff off excess with a dry cloth until matte finish appears
Condition every 3-5 hikes or when leather feels “chalky.” Over-conditioning attracts dirt—your boots should never feel oily.
Waterproofing Secrets: Wax vs. Spray for Trail-Proof Boots
Waterproofing isn’t about keeping boots dry—it’s about maintaining breathability while repelling water. Conditioned leather resists light rain, but heavy downpours demand proper sealing. Get this wrong, and you’ll trap sweat inside while boots still leak.
Beeswax for Heavy-Duty Trail Protection
Sno-Seal or Obenauf’s Heavy Duty LP creates a sacrificial barrier that handles river crossings and snow. Here’s the pro technique:
– Warm boots gently with a hair dryer on low for 30 seconds
– Rub solid wax vigorously into leather until it melts slightly
– Repeat heating and waxing 3 times for deep penetration
– Cure overnight before testing with the “toast test”: water should bead and roll off
Use this method for full-grain leather boots used in wet climates. Reapply when water soaks in instead of beading.
Spray Sealers for Breathable Fabric Boots
Modern boots with mesh panels need breathable protection. Nikwax Fabric & Leather Proof is the only solution that won’t clog pores:
– Spray 6-8 inches from boot in well-ventilated area
– Focus on stitching and toe caps (not fabric linings)
– Air dry 12 hours, then repeat for maximum effect
Never use wax on fabric boots—it stiffens materials and kills breathability. Re-spray when water stops beading on fabric sections.
Rescue Neglected Boots: Fix Cracks, Replace Hardware & Store Properly

Old, stiff boots aren’t trash—they’re salvageable with targeted care. Cracks form from dehydration, not age. And hardware failures often doom boots prematurely when simple fixes exist.
Reviving Cracked Leather in 48 Hours
For boots with visible cracks or extreme stiffness:
1. Deep clean with saddle soap to strip old waxes
2. Apply Leather Honey generously to damaged areas
3. Wrap in plastic overnight to force absorption
4. Repeat for 2 days until leather flexes smoothly
This saturates dried fibers. Finish with standard conditioning and waxing—most cracks disappear as leather swells.
Replace Hardware Before It Fails
- Laces: Soak new waxed laces in warm water before threading—they’ll knot tighter and last 2x longer
- Grommets: Dab clear nail polish inside metal eyelets to prevent lace fraying
- Insoles: Swap worn insoles annually; sweaty feet accelerate leather decay
Pro tip: Rotate boots between hikes. Wearing the same pair two days consecutively traps moisture in the midsole, degrading glue bonds.
The Exact Hiking Boot Maintenance Schedule (After Every Hike to Yearly)
Guessing when to maintain boots guarantees neglect. Follow this timeline based on actual trail impact—not calendar dates.
After Every Single Hike (5 Minutes)
- Brush off debris with stiff brush
- Wipe with damp cloth (no cleaners)
- Stuff with newspaper; dry overnight in cool room
After 3-5 Hikes or Mud Soaks (15 Minutes)
- Deep clean with leather-specific soap
- Condition all leather surfaces
- Air dry 24 hours before next use
Seasonally or Every 6 Months (20 Minutes)
- Reapply wax or spray waterproofing
- Inspect laces, grommets, and sole stitching
- Replace insoles if compressed
Annually (Pre-Season Deep Dive)
- Full restoration: clean, condition, waterproof
- Check for sole separation (press firmly on midsole)
- For boots with >500 trail miles: consult cobbler for resoling
Critical storage rule: Never store boots in plastic bags. Wrap in acid-free tissue, stuff with cedar shoe trees, and keep in breathable cotton bag in a closet. Plastic traps humidity, causing mold that eats glue.
Final Note: Consistent hiking boot maintenance isn’t fussy—it’s trail insurance. Spend 10 minutes after hikes to avoid $250 replacements and trailside emergencies. Conditioned, waterproofed boots stay flexible on rocky descents, keep feet dry in stream crossings, and support your ankles mile after mile. Treat your boots right, and they’ll carry you safely through thousands of adventures. Start tonight: pull out that brush and newspaper. Your future self—standing summit-ready in reliable boots—will thank you.