
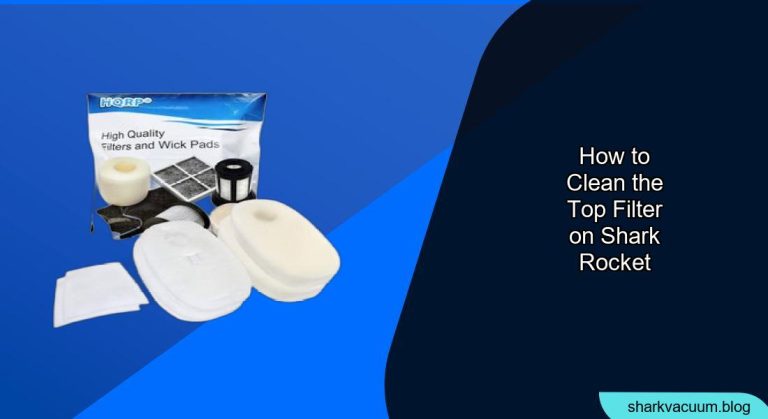
Is your Shark Rocket vacuum not performing like it used to? A dirty top filter might be the culprit. Over time, dust and debris accumulate, reducing suction power and overall cleaning efficiency. Cleaning the top filter is a simple maintenance task that can significantly improve your vacuum’s performance and extend its lifespan. This guide will walk you through the process, ensuring your Shark Rocket is back to its best.
A clean filter not only restores suction power but also helps to capture allergens and improve air quality in your home. Neglecting filter maintenance can lead to decreased performance, motor strain, and potentially costly repairs down the road. Fortunately, cleaning your Shark Rocket’s top filter is a quick and easy process you can do at home. With just a few simple steps, you can keep your vacuum running smoothly and efficiently.
In this article, we’ll cover everything you need to know about cleaning the top filter on your Shark Rocket vacuum. We’ll provide a step-by-step guide, explain how often you should clean the filter, offer some pro tips, and address common issues. Let’s dive in and get your Shark Rocket working like new again!
Identifying the Top Filter on Your Shark Rocket
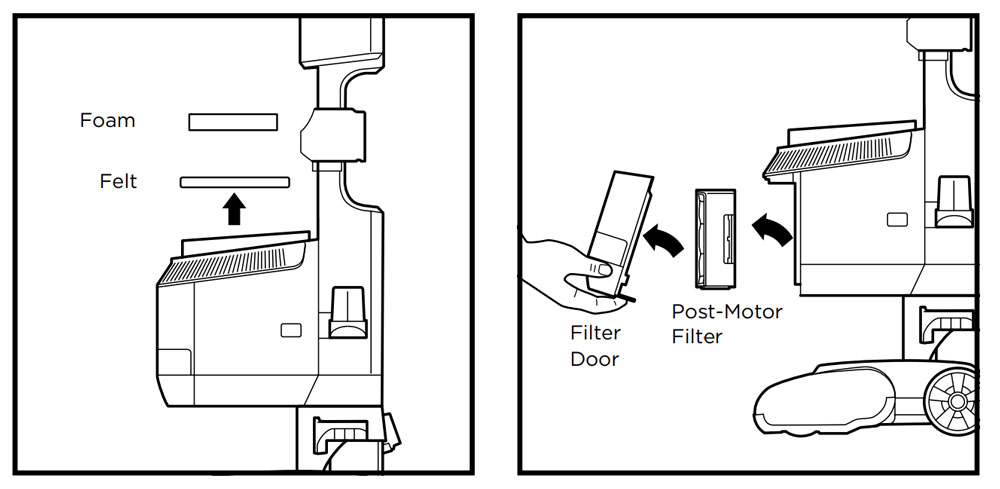
Before you begin, it’s crucial to identify the top filter correctly. The top filter, often referred to as the pre-motor filter, is typically located near the top of the vacuum, usually beneath a removable cover or inside the dust cup assembly. Consult your Shark Rocket’s user manual for the exact location if you’re unsure. Most Shark Rocket models have a similar filter placement, but variations can occur.
Step-by-Step Guide to Cleaning the Top Filter
Here’s a detailed guide to cleaning the top filter on your Shark Rocket vacuum:
- Unplug the Vacuum: Always unplug your Shark Rocket from the power outlet before performing any maintenance. This is a crucial safety step to prevent accidental operation.
- Locate the Filter Compartment: Depending on your model, the filter compartment is usually located near the top of the vacuum or within the dust cup assembly. Refer to your user manual for the precise location.
- Remove the Filter: Open the filter compartment and carefully remove the top filter. Take note of how the filter is oriented so you can replace it correctly later.
- Tap Off Loose Debris: Gently tap the filter against a trash can to dislodge any loose dust and debris. This initial step helps to remove the larger particles before washing.
- Rinse with Water: Rinse the filter under lukewarm water until the water runs clear. Avoid using soap or detergents, as they can leave residue that may affect the filter’s performance.
- Squeeze Out Excess Water: Gently squeeze the filter to remove excess water. Do not twist or wring the filter, as this can damage the material.
- Air Dry Completely: Allow the filter to air dry completely for at least 24 hours before reinstalling it. Ensure the filter is fully dry to prevent mold and mildew growth.
- Reinstall the Filter: Once the filter is completely dry, reinstall it into the filter compartment, making sure it’s properly aligned.
- Close the Filter Compartment: Securely close the filter compartment or reassemble the dust cup assembly.
- Plug in and Test: Plug in your Shark Rocket vacuum and test its suction power. You should notice a significant improvement in performance.
How Often Should You Clean the Top Filter?

The frequency of cleaning depends on your usage habits and the environment you’re cleaning. As a general guideline, clean the top filter every month or after every few uses. If you have pets or allergies, you may need to clean the filter more frequently. Regularly checking the filter’s condition will help you determine the optimal cleaning schedule.
Tools and Materials You Might Need
- Sink or basin
- Lukewarm water
- Clean, lint-free cloth or paper towels
- Trash can
Troubleshooting Common Issues

- Reduced Suction After Cleaning: Ensure the filter is completely dry before reinstalling it. A wet filter can restrict airflow and reduce suction.
- Filter Smells After Cleaning: Make sure you’re only using water to clean the filter. Soaps and detergents can leave residue that causes odors.
- Filter Looks Damaged: If the filter is torn or damaged, it’s time to replace it. Using a damaged filter can harm your vacuum’s motor.
- Vacuum Still Not Working Well: Check other parts of your vacuum, such as the brush roll and hose, for clogs or blockages.
- Filter Dries Misshapen: Try to reshape the filter gently while it’s still damp to help it retain its original form as it dries.
Pro Tips for Maintaining Your Shark Rocket Filter
- Use a Spare Filter: Consider purchasing a spare filter so you can continue using your vacuum while the other filter is drying.
- Gentle Cleaning: Avoid using abrasive cleaners or brushes, as they can damage the filter material.
- Check Regularly: Make it a habit to check the filter’s condition regularly to catch issues early.
- Proper Drying: Ensure the filter is placed in a well-ventilated area to dry completely.
- Avoid Direct Sunlight: Don’t dry the filter in direct sunlight, as this can degrade the material.
Alternatives to Washing the Filter
While washing is the recommended method for cleaning the top filter, you can also use compressed air to blow out loose debris. However, this method is less effective at removing embedded dirt and should only be used as a temporary solution. Vacuuming the filter with another vacuum cleaner is also an option, but be gentle to avoid damaging the filter.
FAQ About Cleaning Shark Rocket Filters
How do I know when my Shark Rocket filter needs replacing?
If you notice a persistent decrease in suction power, even after cleaning the filter, or if the filter is visibly damaged, it’s time to replace it.
Can I use soap to clean the Shark Rocket filter?
No, avoid using soap or detergents, as they can leave residue that may affect the filter’s performance and potentially damage the vacuum.
How long does it take for the filter to dry completely?
The filter typically takes at least 24 hours to dry completely. Ensure it’s fully dry before reinstalling it to prevent mold and mildew growth.
Where can I buy replacement filters for my Shark Rocket vacuum?
Replacement filters are available on the SharkClean website, as well as from major retailers like Amazon, Walmart, and Target.
What happens if I don’t clean the filter regularly?
Neglecting filter maintenance can lead to decreased suction power, motor strain, and potentially costly repairs. It can also affect the air quality in your home.
Is there a specific type of water I should use to clean the filter?
Lukewarm tap water is sufficient for cleaning the filter. Avoid using hot water, as it can damage the filter material.
Tips, Warnings, and Best Practices
- Safety First: Always unplug the vacuum before cleaning to prevent electric shock.
- Gentle Handling: Handle the filter gently to avoid tearing or damaging the material.
- Complete Drying: Ensure the filter is completely dry before reinstalling it.
- Regular Checks: Check the filter regularly to maintain optimal performance.
- Avoid Harsh Chemicals: Do not use harsh chemicals or abrasive cleaners.
Conclusion
Cleaning the top filter on your Shark Rocket vacuum is a simple yet essential maintenance task that can significantly improve its performance and extend its lifespan. By following the steps outlined in this guide, you can keep your vacuum running smoothly and efficiently. Remember to clean the filter regularly, handle it with care, and allow it to dry completely before reinstalling it.
Now that you know how to clean the top filter, take the next step and give your Shark Rocket some much-needed maintenance. Your home will be cleaner, and your vacuum will thank you!


