
Nothing ruins a perfect hiking day faster than the sharp sting of a developing blister. These painful fluid-filled pockets form when friction, heat, and moisture team up against your skin—turning what should be a joyful trek into a limping endurance test. The good news? Blisters aren’t an inevitable hiking companion. Using the best way to prevent blisters hiking requires understanding your feet’s unique needs and implementing proven strategies before you even hit the trail. This guide reveals the science-backed methods elite hikers use to keep their feet blister-free, from footwear selection to on-trail emergency fixes—so you can focus on the view, not the pain.
Choose Trail-Tested Footwear That Eliminates Heel Slippage

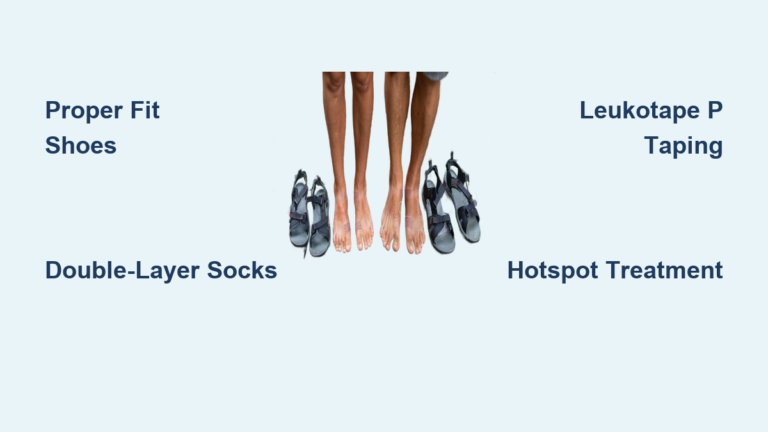
Your hiking shoes or boots serve as your first line of defense against blisters, and proper fit makes all the difference between comfort and catastrophe. Feet swell significantly during long hikes, so always get fitted in the afternoon when your feet are at their largest. When trying on footwear, wear your intended hiking socks and ensure your toes have room to wiggle without hitting the front of the shoe. For boots, you should fit one finger between your heel and the back of the boot when standing—any more slippage creates dangerous friction zones.
Apply Heel Lock Lacing Before Every Hike
This simple technique solves the most common cause of heel blisters in just 30 seconds:
1. Lace your boots normally until reaching the top eyelets
2. Create a loop with each lace end by doubling it back
3. Pass the opposite lace through this new loop
4. Pull tight to lock your heel securely in place
Check your heel position by stomping down—your heel should stay firmly planted without sliding. If you still feel movement, tighten the ankle section of your laces while keeping the toe box loose. Trail runners often prevent more blisters than heavy boots for many hikers due to their lighter weight and reduced break-in time.
Build an Unbeatable Double-Layer Sock System

Cotton socks might feel comfortable at home, but they’re your worst enemy on the trail. When cotton gets wet from sweat, it loses its shape and creates constant friction against your skin—the perfect blister recipe. Instead, adopt the double-layer sock system trusted by long-distance hikers:
Why Merino Wool Outperforms All Other Materials
Your inner sock should be a thin, moisture-wicking liner (synthetic or lightweight Merino wool), while your outer sock needs cushioning and durability (mid-weight Merino wool is ideal). This system works because friction occurs between the sock layers rather than between your skin and the sock. Top brands like Darn Tough and Smartwool offer lifetime guarantees on their Merino blends, which naturally resist odor and manage moisture better than synthetics.
Critical sock features to check before buying:
– Seamless toe construction (flat-locked seams prevent pressure points)
– Arch support bands that stay in place
– Moisture-wicking properties (not just absorbent)
– Proper thickness for your climate (lightweight for hot weather)
Apply Leukotape P to Your Personal Blister Hotspots
Strategic taping prevents blisters before they start—far more effective than treating them after they form. Leukotape P has become the gold standard among serious hikers because it stays firmly attached through sweat, rain, and miles of trail. Unlike duct tape or moleskin, it won’t peel off after a few hours or cause skin reactions.
Perfect Leukotape Application Technique
- Clean and dry your hotspot area thoroughly (use alcohol wipe if needed)
- Apply tincture of benzoin to the skin and wait 30 seconds until tacky
- Cut tape piece 1 inch larger than your hotspot area with rounded corners
- Apply without stretching, smoothing from center outward to eliminate wrinkles
- Rub firmly for 30 seconds to activate adhesive
Top 5 areas to pre-tape before hiking:
– Heel (especially the back ridge where boot rubs)
– Ball of foot (just behind toes)
– Achilles tendon area
– Pinky toe outer edge
– Big toe inner edge
For multi-day trips, carry extra tape and reapply daily during your nighttime foot care routine. Replace any tape showing signs of peeling immediately—don’t wait for trouble.
Spot and Treat Hotspots Before They Become Blisters
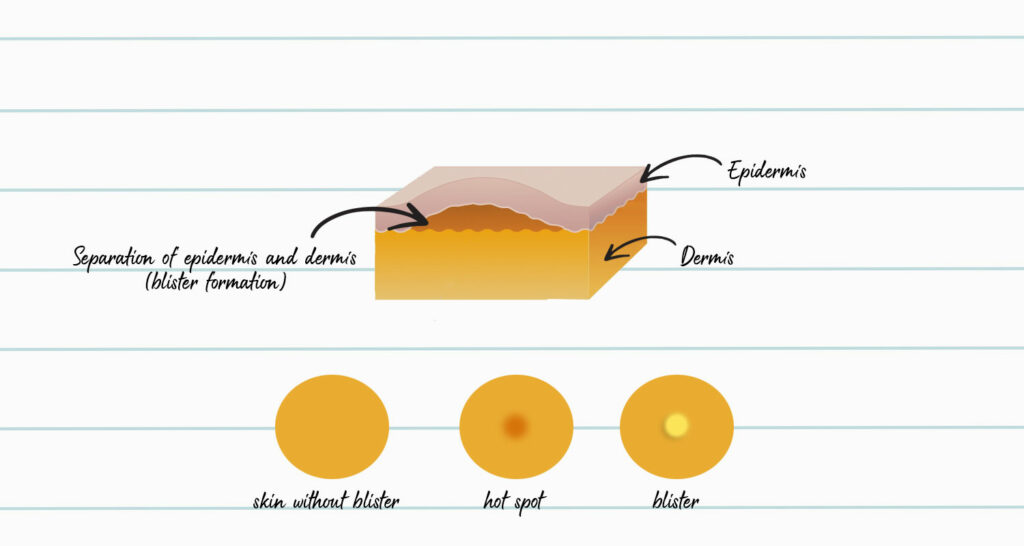
The difference between a minor irritation and a trail-ending blister comes down to how quickly you respond to early warning signs. A “hotspot” feels like localized warmth, tenderness, or a slight burning sensation—your skin’s 911 call for help. Ignoring these signals for just 15 minutes can transform a fixable hotspot into an unfixable blister.
The 5-Minute Hotspot Emergency Protocol
When you feel that first warning sign:
1. Stop immediately—don’t try to “walk it off”
2. Remove your boot and sock to inspect the area
3. Clean thoroughly with an antiseptic wipe
4. Apply hydrocolloid blister bandage (like Compeed)
5. Seal with Leukotape P over the top for extra protection
Carry this lightweight blister kit in your pack: Leukotape P, hydrocolloid patches, antiseptic wipes, and small scissors. On hikes longer than 4 hours, change into fresh dry socks at lunchtime—this single habit prevents more blisters than any other mid-hike intervention.
Troubleshoot Persistent Toe and Heel Blisters
Certain blister locations reveal specific footwear problems that require targeted solutions. Pinky toe blisters almost always indicate your shoes are too narrow, while heel blisters typically point to improper lacing or sizing issues.
Fix Pinky Toe Blisters in 3 Steps
- Widen your toe box—try trail runners instead of boots or size up half a size
- Switch to toe socks (like Injinji) that separate each toe
- Pre-tape the outer edge of your pinky toe before hiking
For heel blisters that persist despite proper lacing, add a thin heel grip pad inside your boot or try a different sock thickness. If ball-of-foot blisters plague you, your shoes likely lack proper metatarsal support—add a thin insole with a metatarsal pad or try lacing techniques that relieve pressure in this area.
Build Your Trail-Ready Blister Prevention Kit
Don’t wait for blisters to form before preparing your emergency kit. A well-designed blister kit weighs less than 2 ounces but can save your entire hike. The minimalist version contains just five critical items:
- Leukotape P (on a flattened cardboard roll)
- Hydrocolloid blister patches (Compeed or equivalent)
- Antiseptic wipes (single-use packets)
- Small, sharp scissors
- Trail Toes or Body Glide anti-friction balm
For multi-day trips, add spare socks stored in waterproof bags, foot powder, and a small pumice stone for smoothing calluses at camp. Keep this kit in an easily accessible pocket—not buried at the bottom of your pack where you can’t reach it when trouble strikes.
Implement Your Nighttime Foot Care Routine
What you do with your feet at camp determines how they’ll feel tomorrow. After a long day, your feet need more than just rest—they require active care to prevent tomorrow’s blisters. Follow this 10-minute routine every evening on multi-day trips:
- Wash gently with mild soap and lukewarm water
- Dry thoroughly, especially between toes
- Inspect carefully for red spots or hot areas
- Apply moisturizer to dry skin (avoid between toes)
- Elevate feet for 15 minutes to reduce swelling
- Air out feet completely before sleeping
Never sleep in damp socks or boots—stuff them with newspaper to absorb moisture overnight. If you notice any developing hotspots, apply fresh tape before bed to prevent tomorrow’s disaster.
Preventing blisters while hiking isn’t about luck—it’s about implementing a systematic approach that addresses friction at every stage of your adventure. By selecting properly fitted footwear, building a double-layer sock system, strategically applying Leukotape P to your personal hotspot zones, and responding immediately to early warning signs, you’ll transform painful hikes into joyful journeys. Remember that the best way to prevent blisters hiking requires understanding your unique foot mechanics and consistently applying these proven techniques. Your feet carry you through some of life’s most beautiful landscapes—give them the care they deserve so every step remains a pleasure, not a punishment.


