
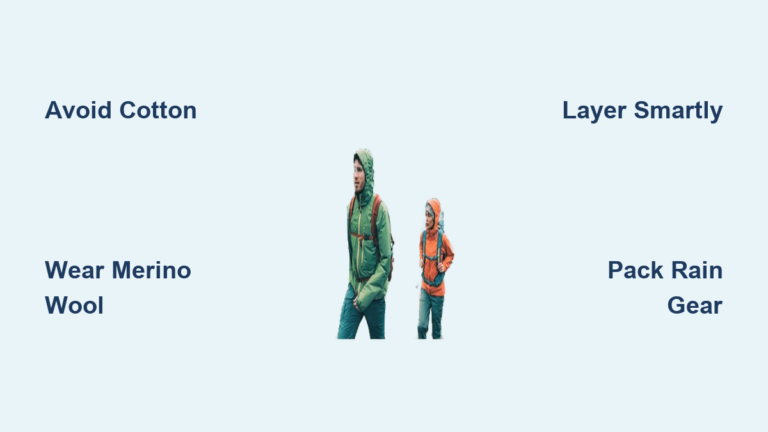
You’re halfway up a mountain trail when a sudden chill sets in. Your cotton t-shirt, soaked with sweat, clings to your skin like a cold, wet blanket. This isn’t just uncomfortable—it’s dangerous. Getting your hiking clothing tips wrong can trigger hypothermia in mild conditions or leave you battling painful chafing on your first mile. The truth? Your outfit is your primary safety system, not just fashion. Most hikers don’t realize that 90% of trail emergencies stem from poor clothing choices, not navigation errors.
Forget “just throwing on a hoodie.” Real trail confidence comes from a dynamic system that adapts to sweat, weather shifts, and altitude changes. In this guide, you’ll get science-backed hiking clothing tips that eliminate guesswork—whether you’re facing desert heat or alpine snow. We’ll expose why cotton is a silent killer, decode fabric technologies, and give you exact layering formulas for every scenario. By the end, you’ll pack with precision, not panic.
Why Cotton Kills on the Trail (And What to Wear Instead)
That soggy cotton t-shirt isn’t just annoying—it’s a hypothermia accelerator. Cotton fibers absorb up to 27 times their weight in water and dry slower than synthetics or wool. When wet against your skin, cotton pulls heat from your body 30 times faster than dry fabric. In 50°F rain, this can drop your core temperature to dangerous levels in under an hour. This is why search-and-rescue teams call it “the silent killer.”
Critical action step: Replace all cotton with moisture-wicking fabrics. Your base layer (the one touching skin) must be merino wool or synthetic. Test fabrics by splashing water on them—wool should bead up and dry in 15 minutes; cotton will stay saturated for hours. Never compromise here, even for “short” hikes.
Merino vs. Synthetics: The Fabric Battle Decoded
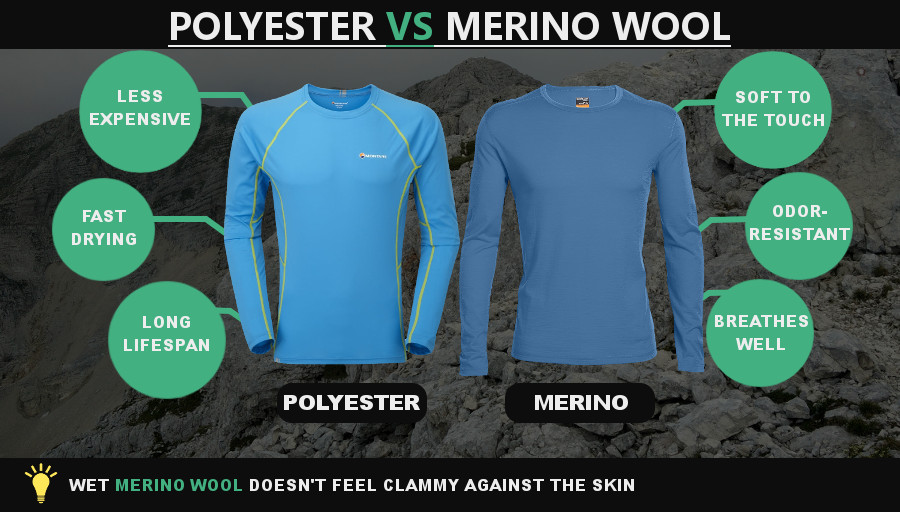
Your fabric choice directly impacts comfort, safety, and odor control. Modern hiking materials fall into three categories, each with tactical advantages:
Merino wool (e.g., Smartwool, Icebreaker):
– ✅ Wins for multi-day trips: Naturally antimicrobial (wear 3+ days without stink), insulates when wet, and regulates temperature.
– ❌ Trade-offs: Costs 30% more than synthetics and requires hand-washing. Avoid if you’ll face heavy abrasion (like bushwhacking).
Synthetics (polyester/nylon blends):
– ✅ Ideal for day hikes: Dries 5x faster than cotton, lightweight, and affordable. Look for anti-odor treatments like Polygiene.
– ❌ Critical flaw: Traps bacteria—expect “eau de trail” after 2 hours of sweating. Rinse in streams to reset freshness.
Pro tip: For unpredictable conditions, choose a 60% merino/40% polyester blend. You get wool’s odor resistance with synthetic durability—perfect for 3-season hikes.
Build Your 3-Layer Armor System (Not Just “Layers”)

Forget stacking sweaters. A true hiking clothing system has three functional layers that work as a unit:
Base layer (your moisture shield): Must fit snug like a second skin—no bagginess. In cold weather, opt for mid-weight merino (200gsm); for heat, choose lightweight synthetics with UPF 50+. Never size up—loose fits trap sweat against your skin.
Mid-layer (your heat trap): This isn’t about thickness—it’s about breathability. Fleece wins for active climbing (it vents sweat), while synthetic puffies (PrimaLoft) excel in wet cold. Avoid down unless you’re 100% certain of dry conditions—it turns useless when damp.
Outer shell (your weather wall): A true rain jacket needs taped seams and a waterproof/breathable membrane (e.g., GORE-TEX). Test breathability by zipping up and jogging—condensation should escape within 2 minutes. Softshells? Only for wind protection in dry weather; they fail in rain.
Fix Your Base Layer Mistakes in 5 Minutes
Most hikers wear the wrong base layer weight. Here’s your fix:
1. Cold hikes (<40°F): Wear a fitted merino top with flatlock seams (prevents chafing).
2. Hot hikes (>75°F): Choose a loose-weave synthetic sun hoodie—light colors reflect 30% more heat than dark.
3. Critical check: Pinch fabric at your wrist. If it doesn’t spring back instantly, it’s too loose and won’t wick properly.
Mid-Layer Hacks for Instant Warmth
Your mid-layer should pack into its own pocket. Prioritize these:
– For variable weather: A zippered 200-weight fleece (allows venting without removing layers).
– For wet cold: Synthetic puffy jacket (PrimaLoft Gold)—retains 90% warmth when soaked.
– Never wear: Cotton hoodies or denim—zero insulation when wet.
Rain Jacket Red Flags That Get You Soaked
Most “waterproof” jackets fail because of these flaws:
– Untaped seams (water seeps through stitch holes)
– Non-breathable coatings (traps sweat inside)
– Poor ventilation (no pit zips = sauna effect)
Pro move: Before buying, submerge the jacket in a sink. If water beads for 10+ minutes, it’s legit.
Essential Non-Layer Gear You’re Overlooking
Head and hands: 40% of body heat escapes through your head. Pack a $5 merino beanie—it compresses to fist-size. For gloves, choose convertible mitts (fingers expose for map-reading).
Leg strategy: Jeans or cotton leggings = chafe magnets. In cold weather, wear merino base layer pants under quick-dry hiking pants. For snow, add waterproof gaiters over boots.
Socks are non-negotiable: Double-layer merino socks prevent blisters better than any tape. Always pack a spare pair—damp socks cause 70% of trail blisters.
Weather-Specific Outfit Formulas (Tested by Rangers)
Desert Hike Survival: Beat 100°F Without Overheating
- Base: Lightweight synthetic sun hoodie (light blue) + capri-length hiking pants
- Why it works: Long sleeves block UV rays better than sunscreen alone. Light colors reflect heat—dark shirts absorb 70% more solar radiation.
- Critical skip: Tank tops—they expose shoulders to sunburn and chafe under pack straps.
Mountain Rain Rescue: Stay Dry in 40°F Downpours
- Base: Mid-weight merino top/bottoms
- Mid: PrimaLoft jacket (synthetic)
- Outer: GORE-TEX rain jacket + pants with taped seams
- Pro tip: Wear rain pants over hiking pants—they won’t ride up during scrambles.
Spring/Fall Variable Weather: The 20-Minute Rule
Start hikes feeling slightly cold. You’ll warm up within 20 minutes of walking. Pack:
– Merino base layer
– Packable fleece
– Windbreaker (not rain jacket—too hot for drizzle)
Mistake to avoid: Overdressing at trailhead. If you’re warm standing still, you’ll sweat through layers in 15 minutes.
Winter Snow Hike: Avoid Frostbite in Sub-Zero Temps
- Base: Heavy merino top/bottoms
- Mid: Fleece + synthetic puffy
- Outer: Hardshell jacket/pants + gaiters
- Non-negotiable: Insulated gloves (not mittens—they restrict dexterity for ice axes)
Pack Like a Pro: The 10-Minute Emergency Kit
Your daypack must hold these hiking clothing tips essentials—no exceptions:
– Rain jacket and pants (fits in palm of hand when packed)
– Merino beanie and gloves (stuffed in jacket pocket)
– Spare merino socks (in waterproof bag)
– Emergency space blanket (weighs 3 oz)
Ranger secret: Test your rain gear before hiking. Wear it in your shower for 5 minutes—any damp spots mean seam failures. If you wouldn’t wear it in a downpour at home, don’t trust it on the trail.
Final Note: Your clothing system is your lifeline. Master these hiking clothing tips, and you’ll hike farther, safer, and with unshakeable confidence—no matter what the trail throws at you. Start small: replace one cotton item with merino this week. Next hike, you’ll feel the difference before you hit the first mile marker.


