That wince-inducing tightness in the back of your thighs when you reach for your boots the morning after a hike isn’t just bad luck—it’s your body signaling overload. For hikers tackling steep descents or pushing distance limits, hamstring pain after hiking often transforms post-adventure euphoria into a stiff-legged shuffle. While mild soreness is common, sharp or persistent pain could indicate anything from routine muscle repair to a significant strain. Ignoring these signals risks turning a weekend warrior into a sidelined spectator. This guide cuts through the confusion, delivering actionable recovery steps and proven prevention tactics so you can conquer trails without dreading the aftermath.
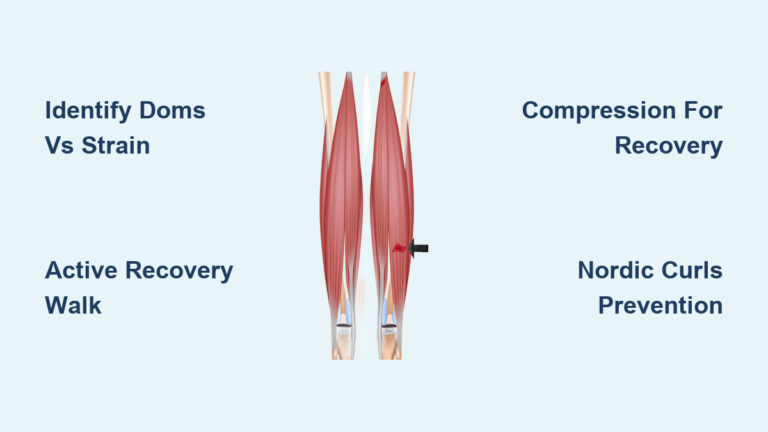
DOMS vs. Hamstring Strain: Spot the Critical Differences
Misdiagnosing your pain leads to wrong treatments. Recognize these distinct patterns immediately to choose the right recovery path.
Delayed Onset Muscle Soreness (DOMS): The Expected Ache
Expect this deep, stiff discomfort 12-48 hours after your hike, especially following steep downhill sections. DOMS feels like a dull, widespread ache in both thighs—tender when you sit, stand, or climb stairs but rarely sharp. It’s your hamstrings’ natural response to eccentric loading (muscles lengthening under tension) during descent control. Key identifiers: Bilateral soreness, peak discomfort at 48 hours, gradual improvement within 72 hours. No bruising or swelling appears. This isn’t injury—it’s your muscles rebuilding stronger after microscopic fiber tears from unusual downhill braking.
Acute Hamstring Strain: The Trail-Ending Injury
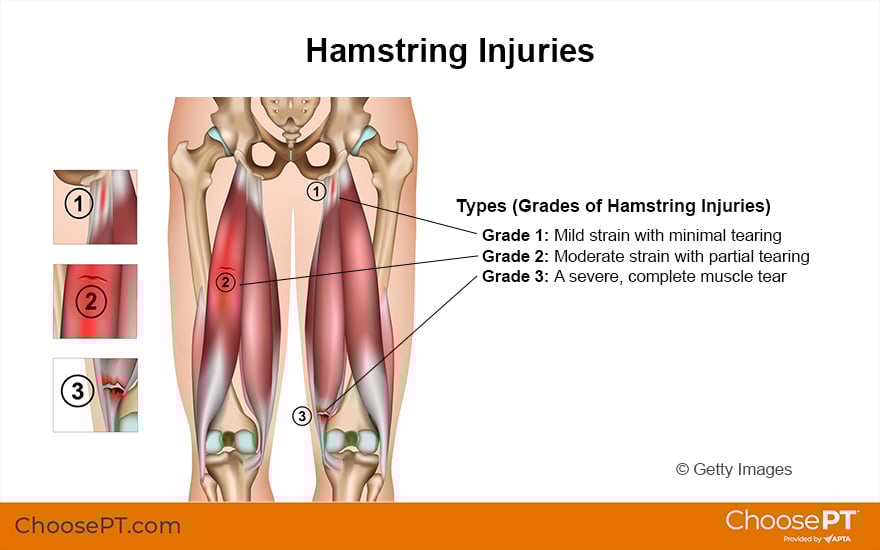
A strain announces itself during or immediately after hiking with a sharp, localized “pop” or “pull,” often when misstepping on uneven terrain. Unlike DOMS, pain concentrates in one spot (outer or inner thigh), worsens when bending forward or straightening the knee, and may cause limping. Critical red flags: Bruising within 24-48 hours, swelling along the muscle, or inability to bear full weight. Grade I strains (mild fiber tears) allow walking with discomfort; Grade II (moderate tearing) causes significant weakness; Grade III (complete rupture) requires surgical intervention. Never stretch through this pain—it worsens the tear.
Referred Pain: When Your Hamstring Isn’t the Culprit
Nerve-related pain masquerades as hamstring issues but requires different treatment. If sharp, electric sensations shoot from your lower back down your leg—especially with numbness or tingling in your foot—sciatica is likely the cause. Similarly, hip joint problems can refer deep buttock pain into the hamstring region. Test this: Sit and straighten your affected leg while keeping your heel on the floor. If nerve pain intensifies when lifting your leg beyond 30 degrees, consult a professional before stretching.
Immediate Post-Hike Recovery: The First 72-Hour Protocol
Your actions in the first three days determine whether soreness fades quickly or evolves into chronic pain. Ditch passive rest—smart recovery is active.
Active Recovery Over Complete Rest (0-72 Hours)
Never crash on the couch post-hike. Instead, complete a 15-20 minute “recovery walk” within 2 hours of finishing your trail. Maintain a slow, pain-free pace on flat ground—this boosts blood flow to flush lactic acid and deliver healing nutrients. Pair this with gentle ankle circles and knee lifts every 30 minutes while resting. Studies show active recovery reduces DOMS intensity by 30% compared to total immobilization. If sharp pain occurs during movement, stop immediately—this indicates strain requiring RICE.
Cold Therapy Timing: DOMS vs. Strain
Apply cold only for acute strains or swelling. Use an ice pack wrapped in thin fabric on the painful spot for 15 minutes every 2 hours during the first 48 hours. Crucial mistake to avoid: Icing DOMS. Since DOMS involves inflammation for repair, cold therapy delays healing. For routine soreness, skip ice and prioritize movement instead.
Compression Shorts: Your Secret Soreness Weapon
Wear graduated-compression tights (20-30 mmHg) for 2-3 hours post-hike. The pressure stabilizes vibrating muscle fibers during descent—reducing micro-tears by up to 28%. Look for thigh-specific compression (not just calf sleeves) and avoid overly tight bands that restrict circulation. Pair with elevated legs (hips higher than heart) for 10 minutes hourly to drain inflammation.
Targeted Stretches That Actually Work (With Timing Tips)

Stretching DOMS too early worsens soreness. Wait 48 hours post-hike before stretching, and never stretch through sharp pain. These three moves target hiking-specific tightness.
Seated Forward Fold for Downhill Damage Control
Sit on a mat with legs extended, feet flexed upward. Place hands beside hips, lengthen your spine first, then hinge forward from hips (not waist). Stop when you feel tension—not pain—along the back thigh. Hold 30 seconds, breathing deeply into tight spots. Pro tip: Place a folded towel under knees if hamstrings are extremely tight. Do this daily for DOMS; skip entirely for acute strains.
Standing Hamstring Release for Trail-Ready Mobility
Face a waist-high surface (table or railing). Place right heel on surface, toes pointing up, knee slightly bent. Keep back flat as you hinge forward, resting hands on hips. Critical cue: Rotate your standing foot outward 15 degrees to target the often-neglected inner hamstring. Hold 25 seconds per leg. Perform this only after pain-free walking resumes—ideal for pre-hike warm-ups later.
Lying Towel Stretch for Deep Tissue Relief
Lie on your back, loop a towel around the ball of your right foot. Keep left foot flat on floor. Gently straighten your right leg toward the ceiling, pulling the towel until you feel a stretch. Key adjustment: Slightly rotate your lifted foot inward to target the biceps femoris (outer hamstring). Hold 20 seconds, repeat twice. Most effective for lingering DOMS at the 72-hour mark.
Strain-Proofing Your Hamstrings: Off-Trail Strength That Works
Prevention beats recovery. These exercises rebuild resilient hamstrings specifically for hiking demands—no gym required.
Nordic Curls: The Gold Standard for Strain Prevention
This eccentric exercise (muscle lengthening under load) cuts strain risk by 51%. Beginner version: Kneel on a cushioned mat, anchor feet under a heavy couch. Slowly lower your torso forward, resisting gravity with hamstrings for 3 seconds. Catch yourself with hands. Do 3 sets of 5 reps twice weekly. Progress to unassisted lowers as strength improves. Warning: Skip if you have prior strains—start with glute bridges first.
Single-Leg Glute Bridges for Asymmetry Fixes
Lie on your back, knees bent, left foot flat. Lift right leg straight up. Squeeze glutes to raise hips until body forms a straight line. Hold 3 seconds, lower slowly. Why it works: Weak glutes force hamstrings to overwork on descents. This move corrects imbalances causing 68% of hiking-related strains. Do 3 sets of 10 reps per leg pre-hike.
Eccentric Lunges for Downhill Simulation
Step forward into a lunge, then slowly lower into the lunge position over 4 seconds (like controlled descent). Push through front heel to return. The extended lowering phase builds the exact strength needed for steep trails. Critical form cue: Keep front knee behind toes to avoid quad dominance. Start with 2 sets of 8 per leg on flat ground before hiking.
When to Stop Self-Treating and See a Pro
Ignoring these signs risks permanent damage. Seek immediate medical help if you experience:
- A palpable gap or dent in the hamstring muscle when flexing the knee
- Inability to bend your knee against light resistance (e.g., lifting foot off floor)
- Numbness spreading down your leg or loss of foot movement control
- Pain persisting beyond 10 days despite proper recovery steps
For DOMS that lingers past 5 days or strains worsening after 72 hours of RICE, consult a physical therapist specializing in sports injuries. They’ll assess gait mechanics and prescribe hiking-specific rehab—often resolving issues in 2-3 sessions.
Final Prevention Checklist Before Your Next Hike:
✅ Warm up with 5 minutes of walking lunges + leg swings
✅ Shorten stride length on descents (take smaller steps)
✅ Use trekking poles to reduce hamstring load by 22%
✅ Post-hike: 20-minute recovery walk + compression tights
✅ Weekly: 3 sets of Nordic curls + single-leg glute bridges
Hamstring pain after hiking doesn’t have to be your trail tax. By matching recovery to your specific pain type and building eccentric strength, you transform post-hike stiffness from an inevitability into a rare exception. The trail rewards those who listen to their bodies—the next summit awaits, pain-free.