That first crisp winter hike feels magical—until your fingers go numb at mile two. One wrong gear choice in freezing temperatures transforms adventure into emergency within hours. Your cold weather hiking checklist isn’t just packing advice; it’s your thermal insurance policy against hypothermia and frostbite. Forget generic tips—this guide delivers battle-tested strategies to keep you warm when temperatures drop below freezing. You’ll learn exactly which layers stop sweat buildup, why cotton guarantees misery, and how to prevent water bottles from freezing solid mid-hike.
Why Your Base Layer Choice Makes or Breaks Cold Weather Hikes
Sweat is your silent killer in freezing conditions. A single mile of uphill hiking can soak cotton layers, triggering rapid heat loss that leads to hypothermia faster than you expect. Your base layer’s sole mission is moving moisture away from your skin before it turns you into an ice machine.
How Merino Wool Outperforms Synthetics in Sub-Zero Temps
While polyester wicks well, merino wool holds a critical advantage: it retains 80% of its insulating power when wet. Synthetic fabrics lose effectiveness as sweat accumulates, but wool’s natural crimp creates air pockets that trap warmth even during intense climbs. For temperatures below 20°F, choose 200g-weight merino for optimal moisture management without bulk. Never wear cotton—its fibers absorb 7x more moisture than synthetics, creating evaporative cooling that drops your core temperature dangerously fast.
The 90-Second Layer Check Before Every Winter Trailhead
Before stepping onto snow-covered trails, perform this critical sequence:
1. Touch-test your skin: Press your palm against your neck. If damp, remove your base layer now—you’re already overheating.
2. Zip-and-pause: Partially unzip your outer shell while standing still. If you don’t feel immediate cooling, you’re overdressed.
3. Glove squeeze: Make fists inside your mittens. If fingers touch fabric, your liners are too bulky, restricting circulation.
Skipping this takes 90 seconds but prevents hours of shivering misery. Most hikers fail by dressing for trailhead temps instead of activity levels—always start feeling slightly chilled.
How to Prevent Frozen Water Tubes at -10°F
Hydration systems become useless ice blocks within minutes below freezing. Standard reservoirs freeze solid at 15°F, leaving you dangerously dehydrated when your body needs fluids most. Dehydration reduces blood volume, accelerating heat loss and impairing judgment.
The Triple-Shield Method for Liquid Water All Day
- Insulate the tube: Thread your drinking hose through your jacket’s chest strap, then tuck it under your collar so body heat warms it continuously.
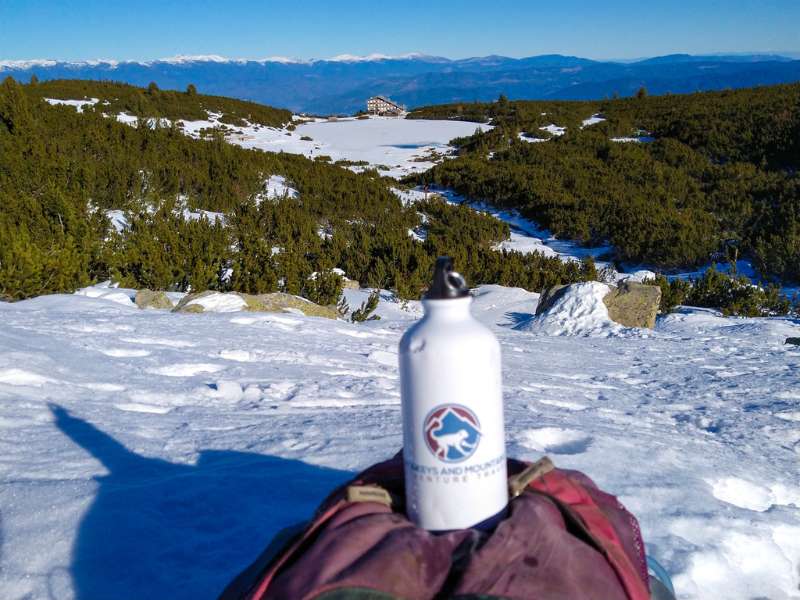
- Bottle backup system: Carry two 20oz insulated Nalgene bottles—one upright in an external pocket, one upside-down in your pack (water won’t freeze from the top down).
- Thermos trick: Fill a wide-mouth thermos with hot broth. Sip hourly—this raises core temperature 2°F per serving and provides critical calories.
Pro tip: Blow forcefully into the tube after each drink to clear residual water. Never store reservoirs in side pockets—they freeze 3x faster there.
Footwear Failures That Cause Frostbite in 20 Minutes

Wet feet at 15°F can trigger frostbite in under 30 minutes. Yet hikers consistently make three critical errors: wearing cotton socks, skipping gaiters, and using flimsy traction devices on ice.
Why Microspikes Beat YakTrax for Trail Safety
YakTrax’s coil design stretches dangerously on steep ice, while microspikes like Kahtoola NANOspikes lock securely with 10+ carbide spikes biting 360° around your boot. On packed snow trails, microspikes prevent slips that cause 68% of winter hiking injuries. For true ice, step into aggressive crampons—but only if you’ve practiced walking on slopes beforehand.
The Sock Sandwich Technique for Dry Toes
- Liner layer: Thin merino sock (e.g., Darn Tough Hiker Micro Crew) wicks moisture immediately.
- Insulation layer: Medium-weight merino hiking sock (250g) traps warm air.
- Boot buffer: Wear boots one half-size larger to accommodate layers without constricting circulation.
Critical: Change socks IMMEDIATELY if damp. Carry spare pairs in a ziplock bag against your body to keep them warm.
Head & Hand Survival Tactics for Sub-Zero Winds
You lose 40% of body heat through your head and 30% through hands. Standard beanies freeze solid in high winds, while single-layer gloves leave fingers vulnerable to frostnip within 15 minutes at -5°F.
The Balaclava Breathing Hack That Prevents Face Frostbite
When windchill drops below 0°F, pull your balaclava over your nose—but leave a 1-inch gap below your eyes. Breathe through this opening so exhaled moisture vents outward instead of freezing your facial hair. For extended stops, apply petroleum jelly to exposed skin; it creates a moisture barrier that delays frostnip by 40%.
Why Mittens Outlast Gloves in Extreme Cold
Mittens keep fingers together, sharing warmth and reducing heat loss by 30% compared to gloves. Use this system:
– Liner: Silk or thin merino for dexterity during navigation
– Outer: Waterproof mittens with gauntlet cuffs (e.g., Outdoor Research Alti Mitts)
– Emergency: Store chemical hand warmers between liner and outer mitten—never directly against skin
Warning: If fingers turn waxy white, get to shelter immediately. Rubbing frostbitten skin causes tissue damage.
Avalanche Terrain Non-Negotiables (Even for Day Hikes)
Most hikers assume avalanches only threaten backcountry skiers. But 22% of avalanche fatalities involve summer trail users caught in spring snow slides. If you see slopes steeper than 30 degrees, your cold weather hiking checklist must include life-saving gear.
The 3-Minute Snow Stability Test Before Entering Slopes
- Dig a pit 3ft deep on the slope’s edge.
- Perform a compression test: Tap snow layers with your hand. If upper layers collapse easily when tapped, unstable slabs exist.
- Check recent activity: Look for recent slide paths or “whumpfing” sounds (sudden settling indicating weak layers).
If any test fails, turn back. No trail shortcut is worth burial risk. In avalanche terrain, carry a beacon, probe, and shovel—and practice rescue drills monthly.
Navigation Nightmares When Trails Disappear Under Snow
Snow buries cairns and trail markers, turning familiar paths into whiteout mazes. GPS units fail when batteries die in cold, and paper maps become useless if wet.
Why Your GPS Needs a Paper Map Backup Strategy
Smartphones lose 50% battery life at 32°F and shut down completely at -22°F. Always:
– Store maps in a waterproof case inside your jacket
– Pre-download offline topographic maps (e.g., Gaia GPS)
– Mark turn-around points with physical landmarks (“turn at third pine after frozen lake”)
Pro tip: Tape spare lithium batteries to your chest—body heat keeps them functional down to -40°F.
The 7-Minute Emergency Hypothermia Fix
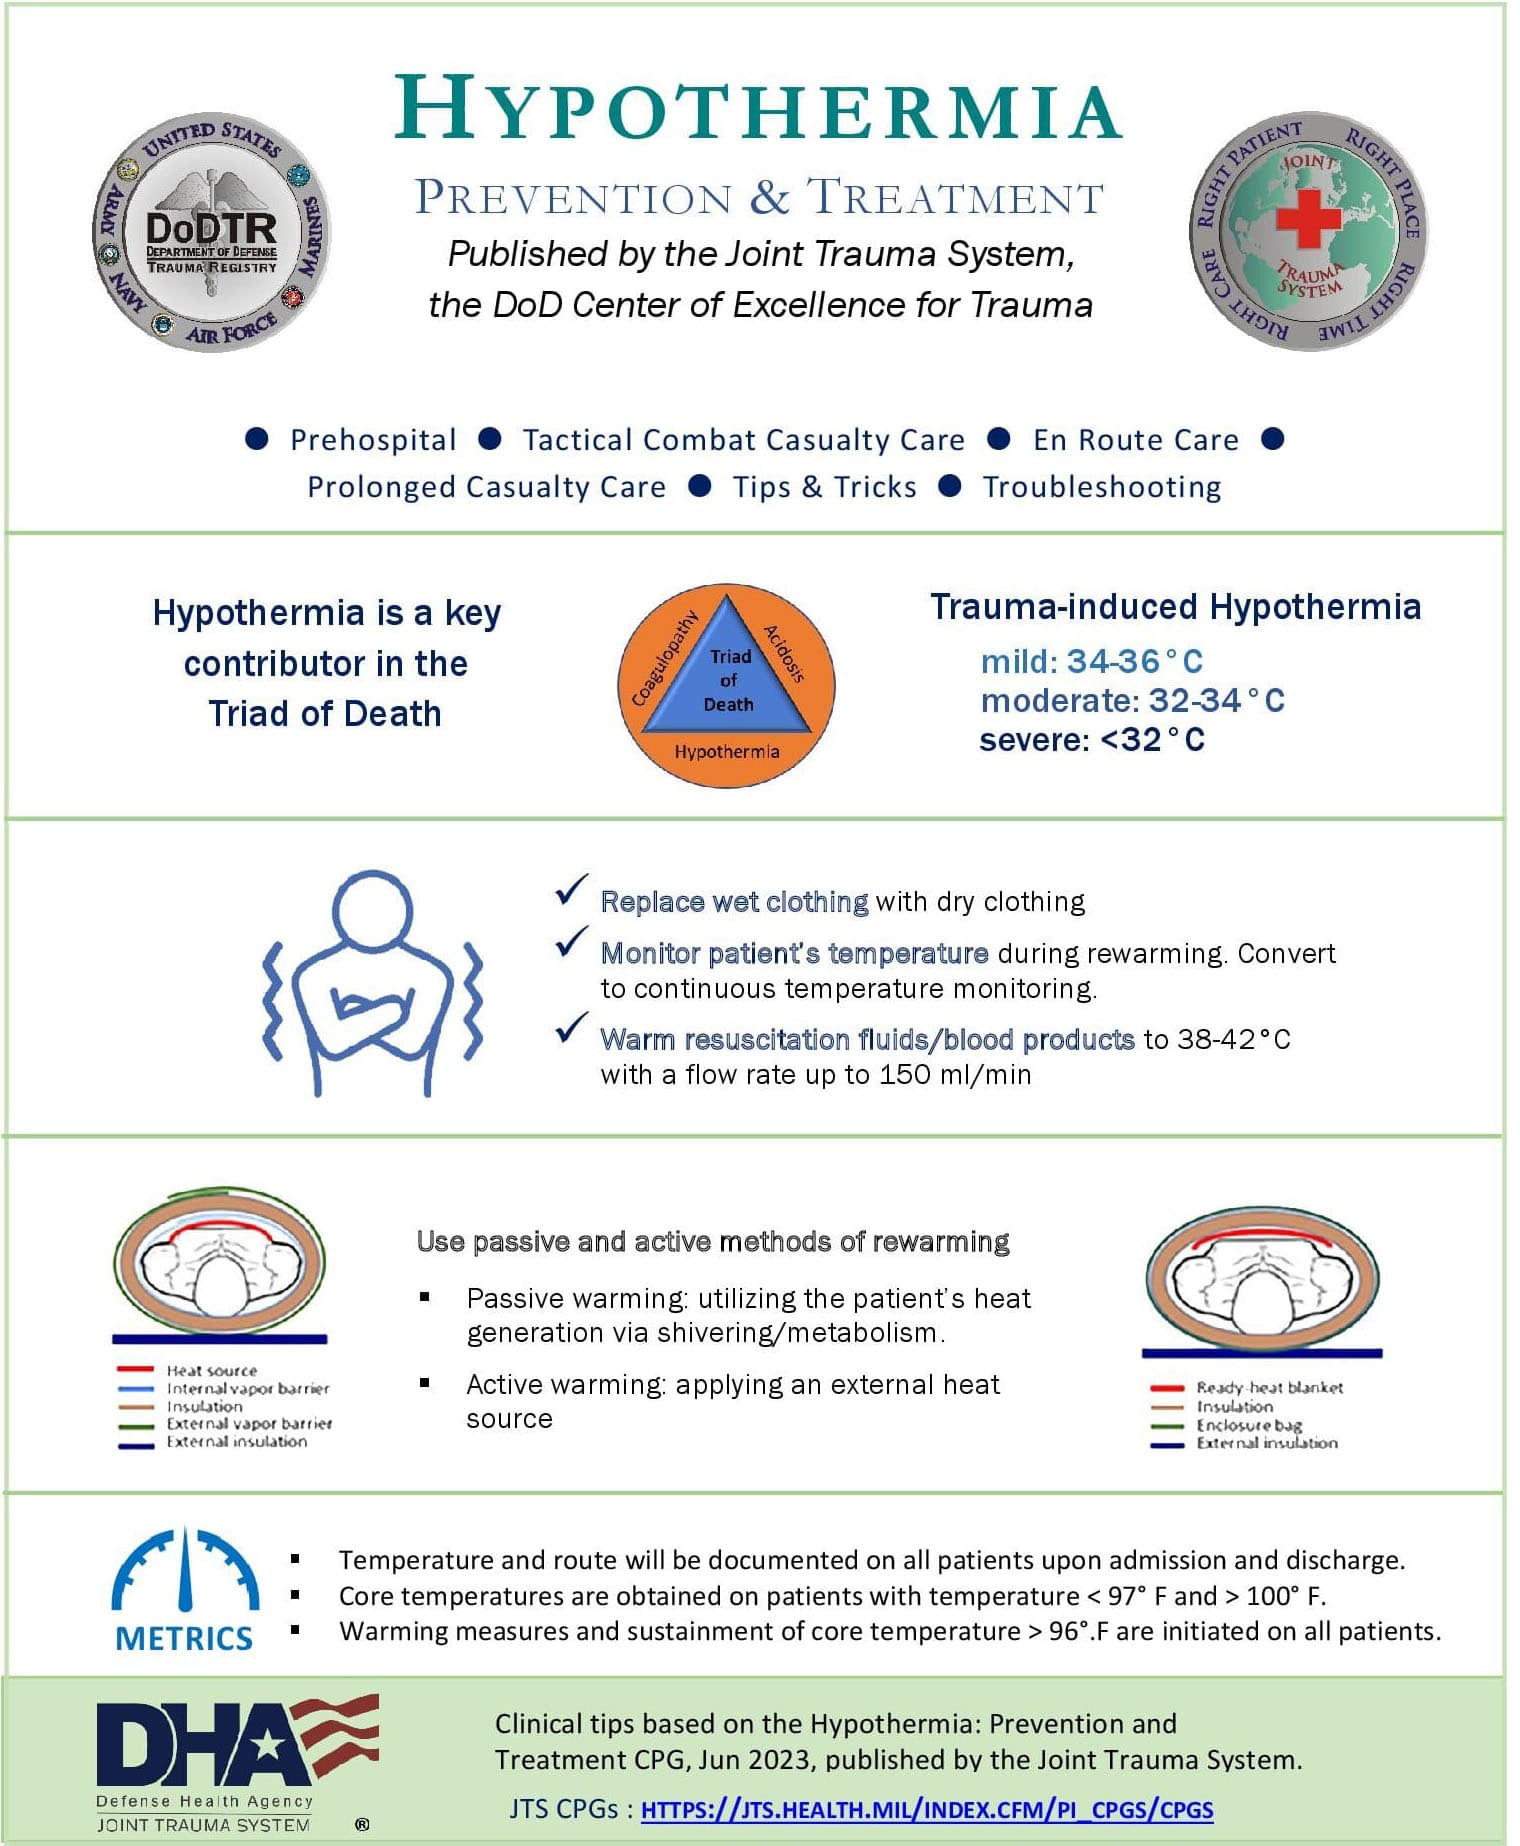
If someone shivers uncontrollably, slurs speech, or stumbles, act immediately—core temperature drops 2°F every 10 minutes untreated. Do NOT give alcohol or let them walk.
Step-by-Step Rescue Protocol
- Insulate from ground: Lay emergency blanket first, then sleeping pad (even if compressed).
- Hot water bottles: Fill your thermos with hot broth, wrap in clothing, place against groin/armpits.
- Body heat transfer: Huddle skin-to-skin in a sleeping bag (remove wet layers first).
- Sugar rush: Feed high-calorie gel (e.g., GU Roctane) every 10 minutes—digestion generates heat.
Stay put until shivering stops. Attempting to hike out often worsens outcomes.
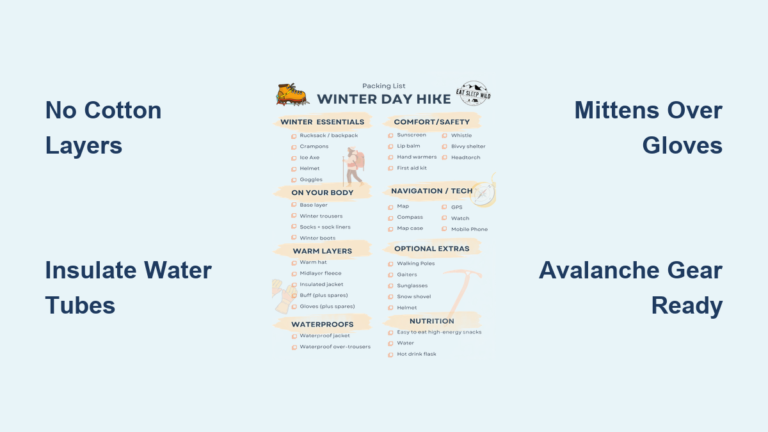
Your Final Cold Weather Hiking Checklist
Before zipping your pack, verify these critical items:
– Water system with triple freeze protection (insulated tube + upside-down bottles + thermos)
– Layering system starting with merino base (NO cotton anywhere)
– Traction appropriate for conditions (microspikes minimum for ice)
– Avalanche gear if slopes exceed 30 degrees (beacon/probe/shovel)
– Navigation redundancy (GPS + paper map + spare batteries taped to body)
Winter trails demand respect, not fear. By implementing these precise strategies, you transform freezing conditions into your most breathtaking adventures. Remember: the difference between misery and magic lies in your checklist. Test your full system on short local trails before committing to remote terrain—your core temperature depends on it.