
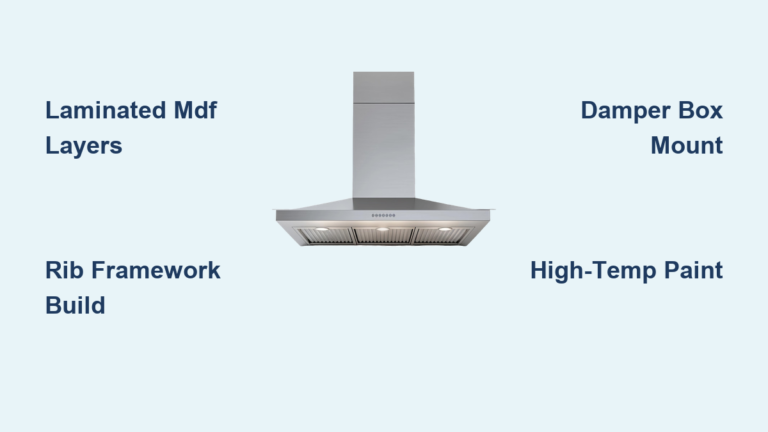
Your kitchen deserves a range hood that’s both functional and breathtaking—but buying a custom unit often means paying $4,000+ for something that may not fit your space. Learning how to make a kitchen hood solves this problem, letting you craft a ventilation system tailored to your exact dimensions and style. Forget cookie-cutter designs; this guide reveals the precise methods woodworkers use to build curved hoods that look professionally fabricated. You’ll discover why laminated MDF outperforms solid wood for complex curves, how to avoid the dreaded “telescope distortion” in bent plywood, and why skipping the damper box integration risks a wobbly installation. Whether you’re matching cherry cabinetry or creating a copper-clad showpiece, these steps—tested by builders who’ve logged 60+ hours per hood—will transform raw materials into a kitchen focal point that clears smoke efficiently and turns heads for years.
Solid Hardwood vs. Laminated Plywood: Which Material Saves You $3,000?
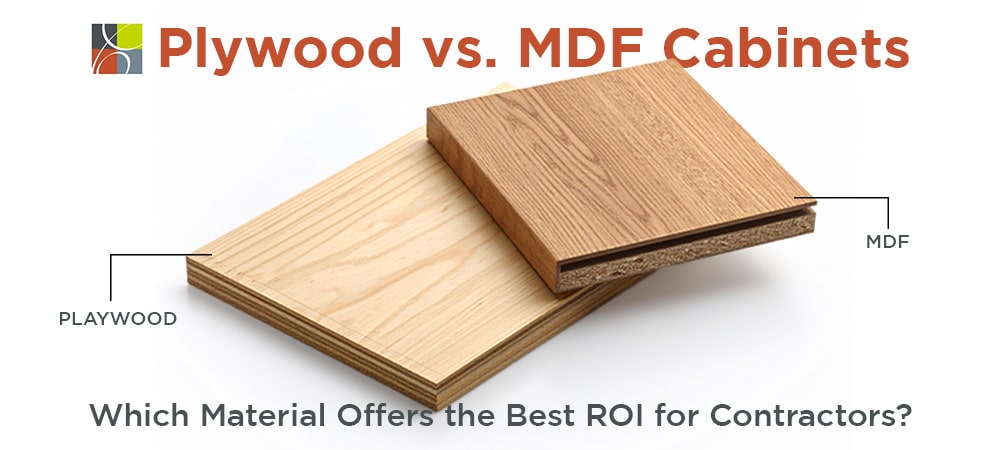
Choosing your material impacts both cost and complexity. Solid hardwoods like maple, cherry, or red oak deliver warmth but struggle with compound curves, often requiring expensive CNC machining. In contrast, laminated 1/4″ MDF or flexible plywood—layered over a framework—creates seamless curves at a fraction of the price. Builders report professional custom hoods cost $2,500–$5,000, while DIY laminated versions use $300–$1,200 in materials. For high-heat zones near stoves, prioritize hardwoods or metal cladding; for purely decorative shells, MDF suffices when sealed with high-temperature paint.
Why Laminated MDF Beats Solid Wood for Curves
Solid wood cracks under tension when bent, while laminated layers flex independently. One builder noted: “I tried cherry for my first hood—beautiful grain, but the curve split during sanding.” MDF’s uniform density handles lamination stress better, especially for deep sweeps. If opting for wood, choose quarter-sawn maple or alder; their straight grain resists warping. For industrial styles, build a laminated MDF core then clad it in copper or stainless steel sheets—a trick that mimics $4,000 chef-style hoods for under $500.
Metal Cladding Pitfalls to Avoid
Copper develops a patina over time (great for vintage looks, problematic if you want shiny consistency). Stainless steel requires welding skills most DIYers lack. Instead, build your hood shell first, then bond thin metal sheets to the finished form using high-temperature epoxy. This avoids distorting the metal during construction.
Kerfing Method: Cutting Plywood for Simple Curves Without Distortion
Kerfing bends plywood by making parallel shallow cuts into its backside, but it’s only suitable for gentle curves like hood supports—not the main body. Misapplication causes “telescope distortion,” where layers slide unevenly, creating ripples.
Executing Kerfs for Structural Components
Set your circular saw to cut 70% through 3/4″ plywood. Space kerfs 3/8″ apart for a 12″ radius curve. Clamp the kerfed section to a template and apply slow pressure—never force it. One builder warned: “I rushed this step and snapped a rib. Let the wood flex naturally over 24 hours.” Use kerfing only for straight-support elements like side brackets; laminated layers handle complex hood profiles better.
Lamination Technique: Building Smooth Curves with 1/4″ MDF Layers
This is the gold standard for seamless hood curves. By gluing thin MDF sheets over a rib framework, you create rigid, gap-free surfaces. Pros use 2–3 layers for stability, with each layer rotated 90° to prevent splitting.
Step-by-Step Lamination Process
- Build your rib framework from 3/4″ MDF (6–8 ribs spaced 4″ apart).
- Apply wood glue to the first rib, then clamp a 1/4″ MDF sheet starting at the top. Work downward, using scrap wood blocks to distribute pressure.
- Add layers every 4 hours—never stack wet layers. The third layer locks the curve perfectly.
- Fair the surface with lightweight joint compound, filling gaps smaller than 1/32″. Sand progressively from 120 to 220 grit.
Pro Tip: Clamp every 2″ along curves. One builder cut 100+ clamping strips from 1×2 scrap—his secret to eliminating waves.
Designing Your Hood: Sizing, Shape, and Creating Accurate Templates
Get dimensions wrong, and your hood won’t clear the stove or match cabinets. Standard widths are 24–30″, depth 6–10″, height 12–24″, with a 6–12″ overhang past the cooktop. Crucially, maintain 24–30″ clearance above the stove per fire codes.
Template Creation Hacks for Non-Circular Curves
Most hoods use compound curves—not perfect arcs—making math calculations unreliable. Instead:
– Cut a 1/4″ MDF test rib to your desired shape.
– Clamp it to the hood framework and scribe the exact profile onto cardboard.
– Refine with sandpaper until the template slides flush against all ribs.
Critical: Test-fit templates before cutting final ribs. Builders average 2–3 template iterations to eliminate gaps.
Building the Curved Skeleton: Cutting Ribs and Assembling the Frame
Your skeleton must be rigid enough to support 50+ lbs of finished hood. Use 3/4″ MDF for ribs, cut with a bandsaw for smooth edges.
Rib Spacing and Alignment Secrets
Space ribs 4″ apart for hoods under 30″ wide; add a center rib for wider units. Assemble on a flat table:
1. Lay out end ribs with stringers (top/bottom connectors).
2. Insert center ribs, checking alignment with a straightedge.
3. Glue and clamp overnight.
Warning: Misaligned ribs compound errors during lamination. One builder measured 1/16″ gaps at corners from a single skewed rib—requiring Bondo fills that added 4 hours of work.
Fixing Gaps in Mitered Corners: Scribing and Custom Fitting Techniques
Mitered corners on curved hoods rarely fit perfectly, leaving gaps up to 1/32″. Sanding alone won’t fix this; you need scribing.
Scribing for Seamless Joints
- Dry-fit the front panel to the side.
- Clamp a compass gauge against the side piece, tracing the curve onto the front panel.
- Cut 1/16″ outside the line, then sand to the scribed line.
This mirrors how cabinetmakers fit countertops. For gaps under 1/32″, fill with tinted wood putty before finishing.
Integrating the Damper Box: Mounting Your Ventilation System
The damper box (housing fan, filters, and ducts) is your hood’s functional core—it must anchor to wall studs, not drywall. The decorative shell simply wraps around it.
Critical Installation Steps
- Mount the damper box first using 3″ lag bolts into studs.
- Ensure ductwork runs straight to the exterior—elbows reduce airflow by 25%.
- Seal joints with foil tape (not duct tape!), which withstands heat.
Never attach the decorative shell directly to the damper box. Leave a 1/8″ gap for thermal expansion, then secure with hidden cleats.
Professional-Quality Finish: Filling, Sanding, and High-Temperature Paint
Kitchen hoods endure heat and grease, so standard paint peels fast. Use high-temperature enamel (rated 500°F+) for the underside.
Finish Sequence That Prevents Blistering
- Fill imperfections with auto-body filler (Bondo), not wood putty—it shrinks less.
- Sand through 120 → 180 → 220 grit between coats.
- Apply two primer coats, then three thin topcoats of Rust-Oleum High Heat paint.
Pro Tip: Add a 10% glaze additive to paint—it extends drying time, preventing brush marks on curved surfaces.
Avoiding 6 Costly Mistakes First-Time Builders Make
Mistake #1: Ignoring Clearance Requirements
Building too low risks fire hazards. Keep hoods 30″ above electric stoves, 36″ above gas—verify local codes first.
Mistake #2: Skipping the Damper Box Test Fit
Assemble the decorative shell before mounting the damper box. One builder’s shell was 1/2″ too narrow—requiring a complete rebuild.
Mistake #3: Using Standard Paint
Regular latex bubbles near heat sources. Budget $40 for high-temp paint—it’s non-negotiable.
Mistake #4: Inadequate Clamping During Lamination
Gaps form where pressure is uneven. Use pipe clamps with felt pads every 4″ along curves.
Mistake #5: DIY Electrical Wiring
Hire an electrician for fan/light wiring. Hood circuits require 20-amp dedicated lines—mistakes risk shocks or fires.
Mistake #6: Rushing the Template Process
Templates take 5 hours but save 20 hours later. Test-fit with cardboard first; skip this and face endless sanding.
DIY vs. Professional Hoods: When to Build and When to Buy
If you value uniqueness and have 60–100 hours, DIY wins. But if your kitchen remodel is time-critical, consider semi-custom options. Companies like Omega National sell unfinished curved hoods in maple or cherry for $1,200–$2,500—half the cost of fully custom units. Their MDF cores accept lamination, letting you add personal touches without the framework headache.
The Break-Even Point for DIY
Calculate:
– DIY Cost: $800 materials + 80 hours labor = $2,400 (valuing time at $20/hr)
– Pro Hood: $3,500 installed
Build only if you’ll enjoy the process—the savings are marginal unless you already own tools.
Building how to make a kitchen hood is a marathon, not a sprint. Focus on precision in your rib framework and lamination—these make or break the curve. Always mount the damper box to structural supports first, then slip on your decorative shell. For beginners, start with a simple rectangular hood before attempting curves; it cuts build time to 30 hours. Once installed, maintain your DIY hood by washing filters monthly and wiping grease with a vinegar-water solution. The payoff? A conversation-starting centerpiece that works flawlessly—and proves you didn’t need a $4,000 price tag to get it. If you hit snags, revisit your templates; 90% of hood flaws trace back to rushed scribing. Now fire up your bandsaw—your dream kitchen awaits.


