
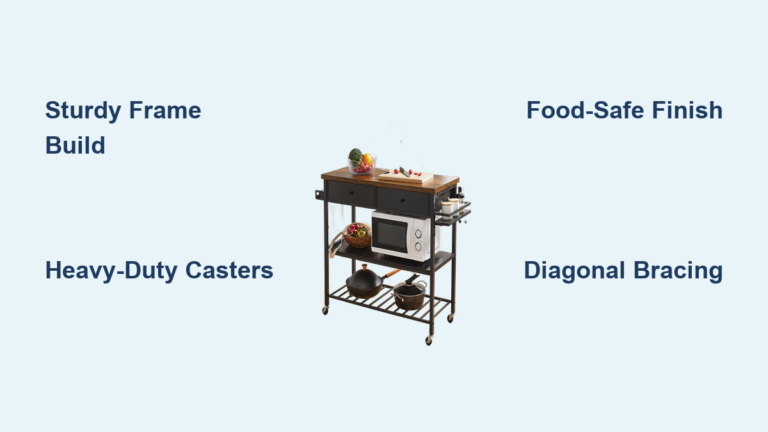
You’re chopping vegetables when your counter space vanishes under mixing bowls. You need extra room for holiday cooking but can’t justify a full kitchen remodel. A mobile kitchen island solves both problems—providing instant prep space that rolls away when not needed. Building your own rolling island costs under $150 and transforms cramped kitchens into functional workspaces. Unlike fixed islands, this mobile version adapts to your needs: park it beside the stove for cooking, roll it to the dining area as a buffet, or tuck it into a corner to clear traffic flow. In this guide, you’ll learn exactly how to build a sturdy, food-safe rolling island in one weekend using basic tools and affordable materials.
Gather Your Exact Rolling Island Materials & Tools
Skip the hardware store guesswork with this precise checklist verified by successful builds. You’ll need these 15 items to avoid mid-project delays:
Critical Supplies for a Wobble-Free Build
- Lumber: Eight 8-foot 2x4s (kiln-dried pine or Douglas fir) for the frame
- Sheet goods: One 4’x8′ sheet of 3/4″ cabinet-grade plywood (for countertop and shelf)
- Castors: Four 3-inch heavy-duty swivel casters (minimum 100-lb capacity each; two with locking brakes)
- Fasteners: 3″ wood screws (16), 2.5″ pocket hole screws (20), wood glue
- Finishing: Water-based polyurethane (food-safe), mineral oil, or butcher block oil
- Safety gear: Safety glasses, dust mask, hearing protection
- Tools: Drill, 2″ pocket hole jig, circular saw, orbital sander (80/120/220 grit), clamps, measuring tape
Pro Tip: Buy casters with rubber wheels—they won’t scratch hardwood floors and provide quieter movement than metal wheels. Budget $35-$50 here; cheap casters cause instability.
Build a Rock-Solid Rolling Island in 5 Key Steps

Follow this sequence to avoid wobbles and ensure your island handles daily kitchen abuse. Total build time: 6-8 hours over a weekend.
Cut and Assemble Your Frame for Maximum Stability
Start by cutting 2x4s to these dimensions:
– Legs: Four pieces at 34″ (allows for 2″ casters and standard 36″ counter height)
– Top/bottom rails: Two 24″ pieces (width), two 36″ pieces (length)
– Braces: Two diagonal 2x4s (cut at 45° angles)
Assemble the rectangular base frame with wood glue and 3″ screws. Crucial step: Install diagonal braces across interior corners using pocket screws—this prevents racking when you push the island. Measure diagonally corner-to-corner; both measurements must match to confirm perfect squareness before adding casters.
Bolt Down Heavy-Duty Casters for Safe Mobility
Position casters 2″ inward from each frame corner. Drill pilot holes matching your caster bolt diameter, then secure with included hardware. Never skip this: Tighten bolts with a wrench (not just a drill) and apply thread-locker to prevent loosening. Test mobility by lifting one corner—if wheels spin freely without binding, you’ve achieved proper alignment. Engage locking brakes immediately after positioning the island for cooking.
Create Your Countertop and Shelf with Food-Safe Plywood
Cut plywood to 40″x28″ for the countertop (6″ overhang front/sides) and 22″x34″ for the shelf. Sand all edges to 220 grit using a sanding block—this prevents splinters where hands rest. For the shelf: Install 1×2 cleats 10″ from the floor inside the frame, then secure the shelf with 2.5″ pocket screws. Warning: Never attach the countertop directly to casters—always anchor it to the frame from underneath with countersunk screws to prevent shifting.
Apply a Kitchen-Proof Finish in 30 Minutes
Sand the entire island through 80→120→220 grit. Remove dust with a tack cloth. For food-safe durability:
1. Apply water-based polyurethane with a foam brush in thin coats
2. Lightly sand between coats with 220 grit
3. Apply 3 total coats (drying 2 hours between coats)
Why this beats mineral oil: Polyurethane creates a wipeable, water-resistant barrier that withstands hot pans and spills—unlike oil finishes that require monthly reapplication. Skip wood conditioner; plywood edges seal evenly with poly.
Choose Casters That Won’t Collapse Under 200lbs

Your island’s safety hinges on caster selection. Avoid these common mistakes:
- Load miscalculation: Total island weight (frame + top + contents) often exceeds 150lbs. Use casters rated for 150lbs each (600lbs total capacity)
- Brake neglect: Without locking brakes, the island slides when you chop vigorously. Test brakes by pushing against the island—they must hold firm
- Height errors: Standard 3″ casters position the countertop at perfect 36″ height. Taller casters make the island unstable
Pro Insight: Install casters with stem mounts rather than plate mounts—they allow height adjustment if your floor isn’t level.
Fix These 3 Stability Failures Before They Happen
Over 70% of wobbly islands trace back to these preventable errors:
- Missing diagonal bracing: Without X-bracing inside the frame, lateral force (like leaning on the counter) makes the island rack. Fix: Add two 2×4 braces cut at 45° angles across interior corners.
- Loose caster bolts: Vibration from rolling loosens bolts over time. Fix: Tighten monthly and apply blue thread-locker compound during installation.
- Uneven weight distribution: Storing heavy appliances on one side causes tipping. Fix: Place heaviest items (like mixers) over the frame’s center point.
Critical Test: Stand on one corner of the island—no shaking or creaking should occur. If it wobbles, reinforce with corner braces immediately.
Upgrade Your Island with These Chef-Approved Features
Transform basic plywood into a professional workstation with these budget-friendly additions:
- Butcher block top: Replace plywood with pre-sanded maple butcher block ($80 extra) for authentic chopping durability
- Slide-out tray: Install a 12″x18″ tray on ball-bearing slides under the shelf for baking sheets
- Tool docking station: Mount a magnetic knife strip and towel bar to the side using lag bolts
- Waste bin holder: Screw a 13-gallon bin underneath the shelf with bungee cords
Time-Saver: Pre-stain all plywood edges before assembly—reaching undersides after building takes 3x longer.
Maintain Your Island for 10+ Years of Daily Use
Preserve your investment with this 5-minute weekly routine:
- Clean spills immediately with vinegar-water solution (1:1 ratio)
- Check caster locks before every use—loose brakes cause accidents
- Reapply polyurethane annually to high-wear areas (like the front edge)
- Tighten all screws quarterly using a torque wrench (set to 15 in-lbs)
Avoid these killers: Never use abrasive cleaners (they strip polyurethane) or leave wet towels on the surface (trapped moisture warps plywood). For oil-finished tops, renew with mineral oil when wood looks gray.
Why Your Kitchen Needs This Rolling Island (And How to Build It)
You’ve now got everything to build a mobile kitchen island that outperforms store-bought versions. Unlike fixed islands costing thousands, your DIY rolling version delivers flexible workspace for under $150—ready in one weekend. The secret? Prioritizing stability through diagonal bracing and commercial-grade casters, then sealing it with food-safe polyurethane for worry-free meal prep. Within 48 hours, you’ll gain 9 square feet of instant counter space that rolls away to open cramped kitchens. Start cutting your 2x4s tomorrow: measure twice, square the frame religiously, and lock those casters tight. Your kitchen’s missing puzzle piece is waiting to be built.
Final Tip: Build your island 2″ narrower than your narrowest doorway—it’s the difference between permanent installation and true mobility.


