
Your kitchen vent fan silently battles grease and smoke every time you cook, but when was the last time you gave it proper attention? A neglected vent hood isn’t just unsightly—grease buildup creates a serious fire hazard while reducing your fan’s efficiency by up to 70%. When airflow diminishes, cooking odors linger, smoke spreads through your home, and your kitchen becomes less pleasant to use. This comprehensive guide shows you exactly how to clean kitchen vent fan components safely and effectively, whether you have a ducted or ductless system. You’ll learn specific techniques for each filter type, discover the vinegar-baking soda soak that melts stubborn grease, and avoid common mistakes that could damage your expensive range hood.
Why Monthly Vent Fan Cleaning Prevents Kitchen Fires
That invisible layer of grease coating your vent fan isn’t just messy—it’s potentially dangerous. Kitchen fires caused by grease buildup in ventilation systems account for thousands of residential fires annually. When grease accumulates on fan blades and motor housings, it creates a perfect fuel source that can ignite from the heat of nearby cooking surfaces or electrical components. Most homeowners don’t realize their vent hood has become a fire hazard until it’s too late.
Grease buildup doesn’t just create safety risks—it dramatically reduces your system’s performance. A heavily coated fan requires significantly more energy to move the same amount of air, forcing the motor to work harder while delivering less ventilation. This double whammy means your kitchen fills with smoke faster during cooking, and odors linger long after you’ve finished preparing meals. Regular cleaning maintains optimal airflow and extends the life of your entire ventilation system.
The 70% Airflow Reduction You Can’t See
Most homeowners only notice their vent fan isn’t working properly when smoke visibly billows into their kitchen. By that point, grease buildup has likely reduced airflow by 50-70%. This hidden performance loss happens gradually as grease coats fan blades, narrowing the space through which air can flow. Think of it like trying to breathe through a straw that’s gradually getting narrower—you might not notice the restriction until it becomes severe. Monthly filter cleaning and quarterly deep cleans maintain maximum airflow and prevent this slow performance decline.
Identifying Your Range Hood Filter Type Before Cleaning

Before you start cleaning, you need to identify exactly what kind of filters your system uses—cleaning the wrong way can damage components or create safety hazards. Most residential range hoods use one of three filter types, each requiring specific cleaning approaches. Mistaking your filter type leads to ineffective cleaning or premature replacement.
Baffle Filters: The Dishwasher-Safe Workhorses
Baffle filters feature multiple aluminum or stainless steel panels arranged in a zigzag pattern that forces air to change direction, trapping grease particles. These are the most effective and durable filters available, commonly found in modern range hoods. Their design captures grease efficiently while maintaining strong airflow. Most baffle filters are dishwasher-safe, making maintenance relatively simple. However, frequent high-heat dishwasher cycles can eventually warp the metal, so hand washing with the vinegar-baking soda solution extends their lifespan significantly. Properly maintained baffle filters can last for years without replacement.
Mesh Filters: When to Clean vs. When to Replace
Mesh filters consist of layered aluminum mesh that traps grease through simple filtration. While less expensive initially, they’re approximately 30% less effective at grease capture than baffle filters and require more frequent attention. These filters often deteriorate faster, especially when exposed to frequent high-heat dishwasher cycles. Hand washing is recommended to preserve their integrity. Under regular cooking conditions, mesh filters typically need replacement every 3-6 months, even with proper cleaning. When you notice holes forming in the mesh or significant warping, it’s time for new filters—don’t risk reduced performance by continuing to use damaged mesh filters.
Charcoal Filters: Why Washing Them Ruins Your Ventilation System
Ductless range hoods rely on charcoal filters to remove odors from recirculated air. These contain activated carbon that absorbs cooking smells but does nothing for grease. A critical mistake many homeowners make is attempting to wash charcoal filters—water destroys the carbon structure and creates mold risks. Charcoal filters cannot be cleaned; they must be replaced when saturated, typically every 1-3 months depending on cooking frequency. If your kitchen retains cooking odors despite regular cleaning, your charcoal filter needs immediate replacement. Check your owner’s manual for the correct model number before purchasing replacements.
Step 1: Removing and Deep Cleaning Your Range Hood Filters
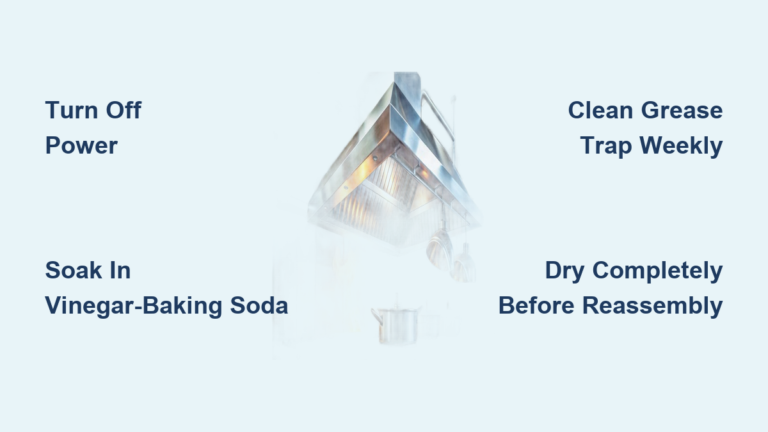
Safety first: Always turn off power to your range hood at the circuit breaker before starting any cleaning procedure. Most filter removal is straightforward—baffle filters typically slide out or release with a simple latch mechanism, while mesh filters often pull straight down. Handle filters carefully as accumulated grease makes them slippery.
The Vinegar-Baking Soda Soak That Melts Grease in 15 Minutes
For the most effective deep clean, prepare a sink or large bucket with very hot water, 1 cup of distilled white vinegar, 2 tablespoons of dish soap, and ½ cup of baking soda. Submerge your filters and let them soak for 10-15 minutes. The chemical reaction between vinegar and baking soda breaks down stubborn grease bonds, making removal effortless. After soaking, use a soft-bristled brush (an old toothbrush works perfectly) to gently scrub remaining grease spots. Rinse thoroughly with hot water and allow filters to air dry completely before reinstalling—never reinstall damp filters as this creates mold risks.
Dishwasher Cleaning: When It’s Safe and When It Damages Filters
While many baffle filters are labeled dishwasher-safe, frequent high-heat cycles accelerate wear. If using your dishwasher, place filters on the top rack only and run the hottest, heaviest cycle available. Add vinegar to the rinse aid compartment to boost grease-cutting power. Avoid dishwasher cleaning for mesh filters—the high heat and aggressive water jets deteriorate the delicate mesh structure much faster than hand washing. Never put charcoal filters in the dishwasher—they’re not designed for any water exposure.
Step 2: Cleaning the Grease Trap and Drip Collection System
Most range hoods feature a removable grease cup or tray at the bottom designed to catch dripping grease before it reaches your filters. This component requires weekly attention as it fills quickly during regular cooking.
Removing Baked-On Grease From Your Hood’s Collection Tray
For routine cleaning, simply remove the tray and wash with hot, soapy water. When faced with stubborn, baked-on grease, fill the tray with the same vinegar-baking soda solution used for filters and let it soak overnight. The next day, most hardened grease will wipe away easily with a soft cloth. For particularly stubborn deposits, apply a commercial degreaser like Simple Green, let it sit for 5-10 minutes, then gently scrape with a plastic scraper before rinsing thoroughly.
Step 3: Deep Cleaning Your Vent Fan and Motor Housing

This step is crucial for maintaining peak performance but requires extra caution. Always ensure power is disconnected at the circuit breaker before proceeding.
Critical Safety Steps Before Touching the Fan Assembly
After removing filters, locate the fan cover—typically held by screws or a twist-lock mechanism. Carefully remove this cover to access the fan blades and motor housing. Never spray degreasers directly onto electrical components; instead, apply cleaner to a cloth first. Avoid excessive moisture near the motor—damp electrical components can cause shorts or fire hazards when power is restored.
The Right Degreaser for Electrical Components (And What to Avoid)
For fan blades and accessible housing surfaces, use a commercial degreaser diluted according to manufacturer instructions. Apply with a cloth rather than spraying to prevent overspray on electrical parts. Wipe components thoroughly, then use a dry cloth to remove any remaining cleaner residue. For stainless steel components, a 50/50 vinegar-water solution works well without damaging finishes.
How Often Should You Maintain Each Component?
Establishing a regular cleaning schedule prevents overwhelming buildup and extends your system’s lifespan. Wipe down the hood exterior weekly with a damp microfiber cloth to prevent surface grease accumulation. Clean metal filters monthly using the vinegar-baking soda soak method. Replace charcoal filters every 1-3 months depending on cooking frequency—when odors linger after cooking, it’s replacement time. Every 3-6 months, perform a deep clean of the fan assembly and interior hood surfaces. Grease traps need weekly emptying and cleaning to prevent overflow.
Common Mistakes That Damage Your Kitchen Vent Fan
Many homeowners accidentally damage their ventilation systems through well-intentioned but incorrect cleaning methods. Never use steel wool or abrasive pads on stainless steel surfaces—they create microscopic scratches that trap grease faster. Avoid running your oven’s self-clean cycle while cleaning the hood—the extreme heat damages hood components and melts grease into harder-to-remove deposits. Most importantly, never reinstall components while damp—thorough drying prevents electrical hazards and mold growth.
Preventing Grease Buildup Between Cleanings
Your cooking habits significantly impact how often your vent hood needs cleaning. Always turn on your vent fan before you start cooking and leave it running for 5-10 minutes after you finish—this captures residual smoke and grease. Position pots and pans toward the back of your cooktop where airflow is strongest. For heavy frying or searing, use higher fan speeds to capture more grease particles before they settle on your hood. These simple habits reduce filter cleaning frequency by up to 50% while maintaining better indoor air quality.
Regular vent fan maintenance isn’t just about cleanliness—it’s a critical safety measure that protects your home and family. By following this systematic cleaning approach, you’ll maintain optimal airflow, prevent fire hazards, and extend the life of your entire ventilation system. Set calendar reminders for your monthly filter cleaning and quarterly deep cleans to stay on schedule without effort. Your kitchen will stay fresher, safer, and more pleasant to cook in with this simple maintenance routine.


