

Finding a crack in your kitchen countertop can send your renovation budget into panic mode. Whether it’s a hairline fracture in your quartz surface or a concerning split in your granite countertop, most cracks don’t automatically mean a full replacement is necessary. With the right approach, you can successfully repair that crack in your kitchen counter yourself, saving hundreds or even thousands of dollars. This guide walks you through identifying the cause, assessing severity, and implementing the proper repair technique for your specific countertop material—so you can restore both function and beauty to your kitchen workspace.
Why Your Kitchen Countertop Developed That Crack
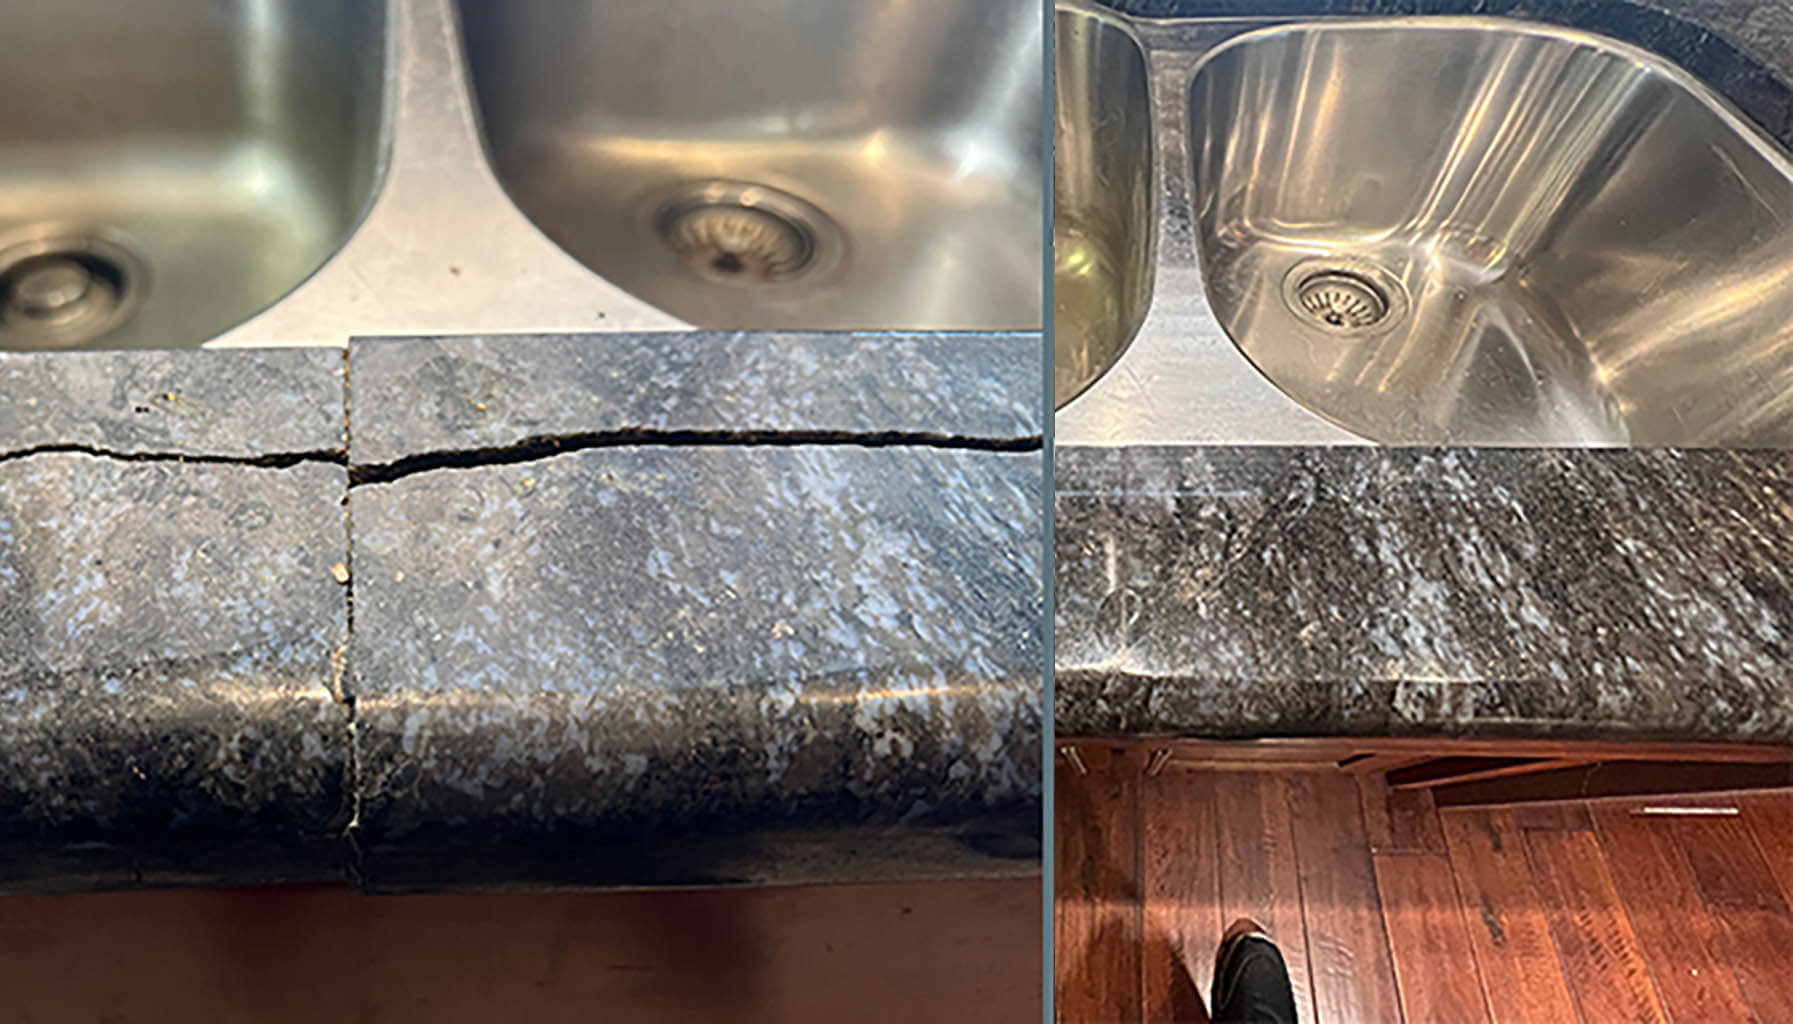
Sharp internal corners with radii smaller than 5/16 inch create natural stress points where cracks begin, especially around sink cutouts and cooktop openings. Structural issues like improperly aligned cabinets or overhangs without adequate support transfer stress directly to your countertop material. Thermal shock from placing hot pans directly on surfaces or using appliances like sous vide machines without proper protection causes sudden expansion and contraction that leads to cracks. Even seasonal humidity changes can cause different materials to expand and contract at varying rates, creating tension points that eventually crack.
How to Assess Your Countertop Crack Severity in 5 Minutes
Before grabbing repair materials, determine if your crack is a simple cosmetic issue or a serious structural problem requiring professional intervention. This quick assessment prevents wasted effort on repairs that won’t hold.
Is Your Countertop Material Granite, Quartz, or Laminate?
Identify your countertop material first, as repair methods vary significantly. Tap the surface—granite produces a solid, resonant sound while laminate sounds hollow. Quartz feels cool to the touch and has a uniform pattern, unlike granite’s natural variations. Laminate shows a visible edge where the plastic surface meets particleboard substrate. Proper identification ensures you use the correct repair technique—mistaking laminate for solid surface could lead to moisture damage beneath the surface.
Spotting Structural vs. Cosmetic Damage
Run your finger along the crack—does it create a noticeable lip or height difference? Structural cracks penetrate the entire thickness and often cause uneven surfaces. Shine a flashlight across the surface at a low angle; hairline cracks reflect light differently than deep fissures. Knock lightly around the damaged area; a hollow sound indicates delamination (in laminate) or separation from underlying support. Structural cracks longer than six inches or forming network patterns require professional reinforcement, while shallow surface cracks often yield to DIY repair.
Essential Tools for Kitchen Countertop Crack Repair

Gather these specific tools before starting your crack repair project to avoid mid-process delays. Safety glasses and nitrile gloves protect against epoxy chemicals and dust particles. A small vacuum with narrow attachment removes debris from deep within the crack. Diamond-tipped drill bits (1/16 inch) create stop holes to prevent crack propagation. Two-part epoxy with color-matching pigments works for most materials, while laminate requires specialized repair paste. Fine-grit sandpaper (200-3000 grit) creates seamless finishes, and painter’s tape contains messy overflow during application.
Fixing Countertop Cracks with Epoxy: A Complete Step-by-Step Guide
The epoxy injection method delivers professional-looking results for most countertop materials when executed properly. This technique fills the crack completely while bonding separated surfaces for lasting repair.
Step 1: Prepare the Crack Properly (Don’t Skip This!)
Thorough cleaning determines whether your repair lasts months or years. Remove all debris from the crack using compressed air or a vacuum with a narrow nozzle attachment. Wipe the area with acetone or denatured alcohol to eliminate grease, oils, and waxes that prevent epoxy adhesion. Ensure the crack is completely dry—moisture trapped beneath epoxy causes future separation. For deep cracks, use a toothpick or fine wire to verify debris removal throughout the entire length.
Step 2: Drill Stop Holes to Prevent Crack Spreading
Locate both ends of the crack and mark them with a pencil. Using a 1/16-inch diamond drill bit, carefully drill small holes at each termination point—this prevents the crack from extending during repair. Drill perpendicular to the crack at low speed to avoid creating new fractures. These relief holes absorb stress that would otherwise propagate the crack further across your countertop surface. For cracks longer than four inches, consider adding intermediate stop holes every few inches.
Step 3: Mix and Inject the Perfect Epoxy Solution
Follow manufacturer instructions precisely when mixing two-part epoxy—incorrect ratios cause weak bonds or improper curing. For stone countertops, add matching pigment to camouflage the repair. Use a syringe or fine applicator tip to inject epoxy deep into the crack, working from one end to the other. Apply slight pressure to ensure complete penetration into all crevices. For wide cracks, overfill slightly to compensate for epoxy shrinkage during curing. Wipe excess immediately with acetone-dampened cloth before it hardens.
Step 4: Sand and Polish for an Invisible Repair
Allow epoxy to cure completely according to manufacturer specifications—typically 24 hours—before sanding. Begin with 200-grit wet/dry sandpaper, keeping the surface moist to minimize dust. Progress through increasingly finer grits (400, 800, 1500, 3000) until the repair blends seamlessly with surrounding material. For natural stone countertops, finish with appropriate polishing compound to restore original sheen. Check your work by running your hand across the repair—you shouldn’t feel any transition between epoxy and original surface.
Laminate vs. Granite vs. Quartz: Tailored Crack Repair Approaches
Each countertop material requires specific techniques to achieve successful crack repair. Understanding these differences prevents costly mistakes and ensures lasting results.
Repairing Cracks in Laminate Countertops
Laminate cracks often indicate underlying particleboard damage from moisture infiltration. Clean the crack thoroughly and remove any swollen substrate material. Apply laminate-specific repair paste using a putty knife, overfilling slightly to account for shrinkage. For deep damage exposing particleboard, use a two-part laminate repair compound that hardens to match surface durability. Seal the repair with waterproof tape during curing to prevent moisture entry. Remember that laminate repairs are primarily cosmetic—structural damage usually requires professional attention.
Fixing Granite Countertop Cracks Without Professional Help
Granite’s natural porosity requires special attention during crack repair. Mix clear epoxy with stone dust from an inconspicuous area or matching pigment to camouflage the repair. Thoroughly clean the crack with acetone to remove oils that granite readily absorbs. Inject epoxy slowly to allow air bubbles to escape upward. After initial curing, apply a quality stone sealer to protect both the repair and surrounding area. Professional-grade granite repairs often include vacuum-assisted epoxy injection for complete penetration into microscopic fissures.
Quartz Countertop Crack Repair: Special Considerations
Quartz’s non-porous nature creates unique repair challenges. Clean cracks with denatured alcohol rather than acetone, which can damage some engineered stone resins. Use a high-strength clear epoxy specifically formulated for quartz surfaces. Since quartz contains ground stone particles, adding matching quartz dust to the epoxy creates a more seamless appearance. Avoid excessive sanding after repair—quartz’s uniform composition means scratches are more visible than on natural stone. For cracks near seams or edges, consider professional assistance to maintain structural integrity.
Decorative Crack Repair: Transforming Damage with Kintsugi

The Japanese art of Kintsugi offers an elegant alternative to hiding cracks. Instead of matching your countertop color, fill the crack with gold-tinted epoxy to create a striking decorative feature. Prepare the crack normally by cleaning and drilling stop holes. Mix clear epoxy with gold mica powder or gold leaf particles until achieving your desired metallic effect. Inject the gold epoxy mixture into the crack using precision techniques. Once cured, the gold-filled crack becomes a conversation piece rather than a flaw to conceal—turning countertop damage into intentional design.
7 Clear Signs Your Countertop Crack Needs Professional Repair
Your crack repair attempt will fail if you ignore these critical warning signs. Multiple cracks forming interconnected patterns indicate serious structural issues beyond DIY capabilities. Cracks longer than six inches often require reinforcement from underneath with metal brackets or C-channel supports. If the countertop surface feels unstable or moves when pressed near the crack, immediate professional assessment is necessary. Cracks near seams or edges compromise structural integrity more severely than center-surface fractures. Visible substrate damage in laminate countertops, especially with swelling or discoloration, signals moisture damage requiring professional remediation. If previous DIY repairs keep failing, the underlying cause remains unaddressed. Finally, cracks in rare or high-value stone materials warrant professional attention to preserve your countertop’s value.
How to Prevent Countertop Cracks: 5 Proven Strategies
Protect your investment with these simple daily habits. Always use trivets and hot pads under cookware—thermal shock causes more countertop cracks than people realize. Never cut food directly on countertops; use proper cutting boards to prevent impact damage and scratches that become crack initiation points. Distribute heavy items evenly rather than concentrating weight on unsupported overhangs. Seal natural stone countertops every 1-2 years to maintain flexibility and prevent moisture-related damage. Finally, quarterly inspect your countertops for hairline cracks, addressing them immediately before they worsen. These small habits extend your countertop’s life significantly and prevent the need for future crack repairs.
A well-executed countertop crack repair preserves both function and aesthetics of your kitchen workspace. While small hairline cracks respond well to DIY methods, structural damage requires professional expertise. By understanding your countertop material, properly assessing damage severity, and applying the correct repair technique, you can successfully fix that crack in your kitchen counter and enjoy years of additional service from your existing surface. Remember that prevention through proper use and maintenance represents the most cost-effective approach to countertop longevity.


