
That persistent drip from your Delta kitchen faucet isn’t just annoying—it’s wasting hundreds of gallons monthly and inflating your water bill. The good news? Most Delta faucet repairs are DIY-friendly thanks to their modular design and lifetime warranty coverage. Unlike many brands, Delta intentionally builds serviceable components that you can fix with basic tools. This guide delivers the exact steps to diagnose and repair common leaks, saving you $150+ in plumber fees. You’ll learn to pinpoint whether your issue stems from a worn cartridge, failed O-rings, or clogged aerator—and fix it properly without damaging your fixture.
Delta’s lifetime warranty means you can often get free replacement parts directly from the manufacturer, even if you’re not the original homeowner. Before disassembling anything, always contact Delta first at 1-800-345-3358 for model-specific diagrams and warranty validation. Their technicians will identify your exact issue and ship necessary parts at no cost. With water supply shut off and the right approach, you’ll restore full function to your faucet while preventing costly water damage.
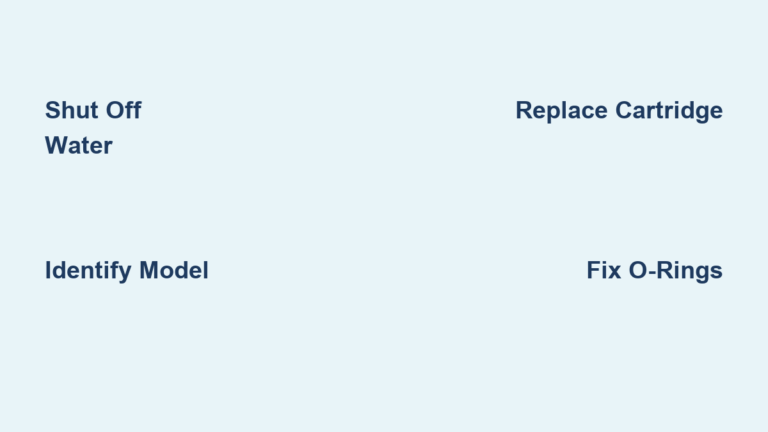
Shut Off Water Supply Before Delta Faucet Repair
Skipping this critical step risks flooding your cabinets and flooring. Delta faucets connect to separate hot and cold supply lines, each requiring individual shutoff.
Locate and Close Under-Sink Shutoff Valves
Crawl under your sink and identify two small valves (usually chrome) connected to flexible supply hoses. Turn both valves clockwise until fully closed—don’t force them. For older installations without shutoffs, locate your home’s main water valve instead.
Verify Water Is Off and Prepare Workspace
Turn on the faucet to drain residual water pressure. Place towels in the sink basin and a bucket under supply lines to catch drips. If water still flows after shutoff, double-check valve positions—partially open valves cause 70% of DIY repair floods. Never proceed until all water stops flowing from the spout.
Identify Your Delta Faucet Model for Correct Parts
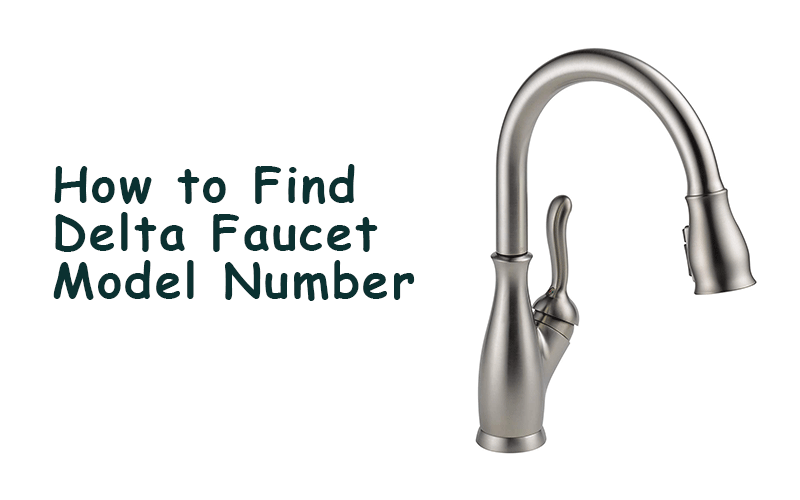
Using mismatched parts guarantees repair failure. Delta has produced over 50 distinct kitchen faucet series since 2000, each with unique cartridges.
Find Model Number on Spout Base or Handle
Remove decorative caps with a flathead screwdriver. Check under handle screws, along the spout collar, or on the faucet’s base ring. Model numbers typically start with “91” (single-handle) or “19” (two-handle) followed by letters like “SS” for stainless steel. If obscured by mineral deposits, scrub gently with vinegar-soaked cloth.
Cross-Reference Parts with Delta Support
Call Delta with your model number before disassembly. They’ll confirm whether you have a Diamond Seal (post-2012), MultiChoice (2008-2012), or older ceramic cartridge system. Incorrect cartridge installation is the #1 cause of post-repair leaks—Delta’s support prevents this costly mistake.
Diagnose Leaks: Spout Drips vs. Handle Leaks vs. Base Leaks
Your leak location reveals the failed component. Misdiagnosis leads to unnecessary part replacements.
Why Water Pools Under Sink Base After Repair
Leakage around the faucet’s mounting base almost always indicates worn spout O-rings—not the cartridge. When these rubber seals degrade, water seeps down the spout shaft into your cabinet. Check for mineral crust around the spout collar; if present, O-rings need replacement within 48 hours to prevent cabinet rot.
Handle Leaks During Hot/Cold Water Use
Water spraying from the handle base when adjusting temperature points directly to cartridge failure. Unlike aerator clogs, this leak stops immediately when you release the handle. Inspect for calcium buildup on handle stems—if white crust covers the screw hole, mineral deposits are accelerating seal wear.
Replace Worn Cartridge Causing Delta Faucet Handle Leaks
Cartridge replacement fixes 80% of Delta faucet leaks. This 15-minute repair requires no special tools for most post-2008 models.
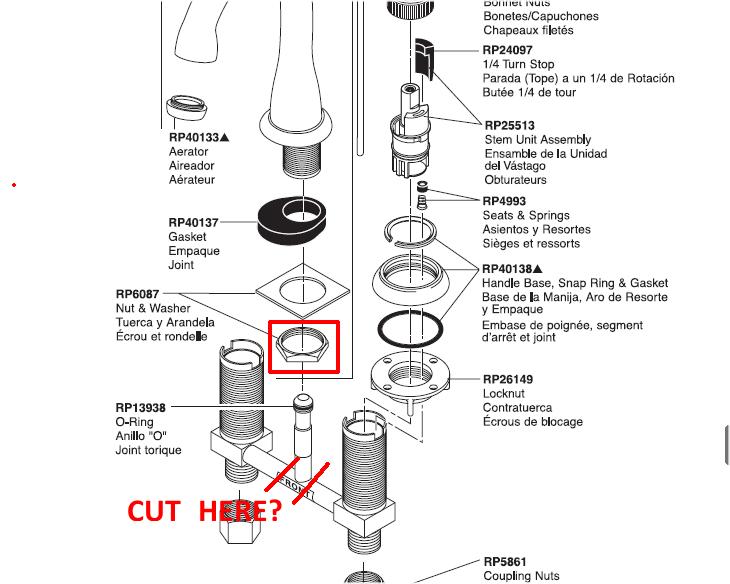
Remove Handle and Access Cartridge Assembly
Pry off the handle’s temperature indicator cap (red/blue) with a knife edge. Unscrew the 1/8″ hex or Phillips screw beneath. Lift straight up—never twist—to avoid breaking plastic tabs. For stuck handles, wrap pliers in cloth and gently wiggle side-to-side while pulling upward.
Extract and Install New Cartridge
Remove the metal retaining clip with needle-nose pliers. Grasp the cartridge stem with slip-joint pliers and pull straight out—no twisting. Compare old and new cartridges for identical slot patterns before applying plumber’s grease to all O-rings. Insert new cartridge squarely and reassemble in reverse order. Critical: Never force the cartridge; misalignment causes immediate re-leaking.
Fix Delta Spout Drips and Low Water Pressure
Spout issues usually involve aerators or swivel seals—not the cartridge. These fixes take under 10 minutes.
Unclog Aerator Causing Weak Water Flow
Grip the aerator housing at the spout tip with channel-lock pliers wrapped in rubber tape. Turn counterclockwise to remove. Soak all components in white vinegar for 30 minutes to dissolve lime scale. Use an old toothbrush to scrub mesh screens, then replace the internal rubber washer before reinstalling. Reattach by hand-tightening only—overtightening cracks plastic housings.
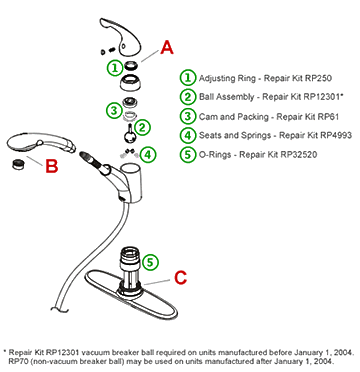
Stop Pull-Down Hose Leaks at Spout Base
For faucets with spray heads, leaks around the swivel point mean failed spout O-rings. After removing the handle, unscrew the large hex nut at the spout base with a 1-1/8″ wrench. Lift the spout straight up to expose 2-3 O-rings on the shaft. Replace all rings simultaneously (they degrade at similar rates) and lubricate with silicone grease before reassembly. Test swivel action before reattaching the handle.
When to Call Delta Support Instead of DIY
Some situations require manufacturer intervention to avoid permanent damage.
Stuck Components Requiring Specialized Tools
If the cartridge won’t budge after 5 minutes of gentle pulling, stop immediately. Delta’s service kits include plastic extraction tools that prevent brass body damage—using metal pliers often cracks the valve housing. Call Delta for their free “Stuck Cartridge Removal Kit” before applying penetrating oil, which can degrade nearby seals.
Warranty Claim Process for Free Parts
Delta covers all repair parts for life, but requires proof of purchase for full warranty. Non-original owners still get free technical support and discounted parts. When calling, have your model number ready and describe: 1) Leak location 2) Faucet age 3) Previous repair attempts. They’ll email diagrams and ship parts within 48 hours—no receipt needed for basic cartridge/O-ring replacements.
Prevent Future Leaks With Delta Faucet Maintenance
Proactive care extends your faucet’s life beyond 15 years. Delta’s engineers recommend these simple habits.
Monthly Aerator Cleaning Routine
Remove and rinse aerators every 4 weeks in hard water areas. Soak in vinegar overnight if flow decreases by 25%. Replace rubber washers annually—$2 spares prevent $200 cabinet repairs. Never use chemical drain cleaners; their fumes degrade internal seals within months.
Handle Operation Best Practices
Turn handles gently to the stop points—never force beyond full hot/cold. Abrupt stops strain cartridge seals. For single-handle models, avoid resting hands on the handle during dishwashing; constant pressure wears out pivot points 3x faster. Wipe splashes immediately to prevent mineral buildup around bases.
Final Note: Mastering how to repair a Delta kitchen faucet saves significant money while giving immediate satisfaction when that drip stops. Always start with Delta’s free support line for model-specific guidance before disassembly. Remember that 90% of repairs involve replacing the cartridge or O-rings—tasks requiring less than $15 in tools and under 30 minutes of your time. By following these precise steps and leveraging Delta’s warranty, you’ll maintain a leak-free faucet for years. For persistent issues, their technicians provide video troubleshooting guides upon request—call 1-800-345-3358 to access this hidden resource.


