
That persistent rattling, grinding, or whining from your kitchen exhaust fan isn’t just an irritation—it’s a clear signal that your range hood needs attention. A properly functioning exhaust system should operate with a quiet hum, not drown out conversation or make cooking feel like a chore. When your kitchen exhaust fan becomes excessively loud, it’s often trying to tell you something’s wrong with its components or installation. Whether you’re dealing with a subtle squeak that’s grown louder over time or a sudden grinding noise that started overnight, this guide will help you diagnose and resolve the issue efficiently. You’ll learn exactly how to fix noisy kitchen exhaust fan problems through systematic troubleshooting that addresses the most common causes, from simple cleaning to more complex repairs.
Ignoring a noisy kitchen exhaust fan can lead to more serious problems down the line. That extra vibration stresses components, accelerates wear on the motor, and reduces the fan’s effectiveness at removing cooking odors, smoke, and moisture. The good news is that in most cases, the solution is straightforward and doesn’t require professional help. By following these targeted steps, you can restore quiet operation to your kitchen ventilation system and extend the life of your appliance. This guide provides practical, hands-on solutions that address the specific noises you’re hearing, so you can pinpoint the problem quickly and implement the right fix.
Essential Safety Precautions Before Repairing Your Kitchen Exhaust Fan
Before you reach for any tools, you must disconnect power to your range hood at the circuit breaker. This isn’t optional—your safety depends on ensuring no electricity flows to the unit while you work. Kitchen exhaust fans connect directly to your home’s electrical system, and even a brief accidental contact with live components could result in serious injury. After turning off the correct circuit, verify power is disconnected by attempting to turn on the fan.
Working on an overhead appliance requires proper positioning to avoid strain or accidents. Use a sturdy step stool or ladder that provides stable footing and allows you to work comfortably without overreaching. Have all your tools within easy reach before you begin, and consider having a helper steady your ladder. If you’re dealing with a ducted system, be aware that accumulated grease in the ductwork can create fire hazards when disturbed, so work carefully and avoid creating sparks near the area.
Diagnose Your Specific Kitchen Fan Noise Problem
Your exhaust fan’s noise pattern holds crucial clues about what’s wrong. Listen carefully to identify which of these common sound profiles matches your situation:
Grinding or Rattling Sounds: This often indicates a physical obstruction or mechanical issue. Something might be caught in the fan blades, or the blower wheel could have become loose on its shaft. Metal-on-metal contact creates this distinctive noise, and it usually worsens as the fan speeds up. Check for loose screws that have worked their way out and are now vibrating against the housing.
Humming or Buzzing Noises: When your fan emits a constant electrical hum without spinning properly, this typically points to motor trouble. A failing capacitor—which provides the initial jolt to start the motor—or worn motor windings often causes this sound. If the fan starts but then develops a loud hum, the motor bearings might be seizing up.
Squealing or Squeaking Sounds: These high-pitched noises almost always signal bearing problems. As motor bearings dry out or wear down, they create friction that produces this distinctive sound. The noise may start intermittently and become more constant as the problem worsens. In some cases, a few drops of lubricant can provide temporary relief.
Vibration or Shaking Sensations: When your entire hood assembly vibrates noticeably, this usually means an imbalance issue. Grease buildup on one side of the fan blades, a warped blower wheel, or loose mounting hardware can all cause this symptom. The vibration might be subtle at low speeds but become violent at higher settings.
Step-by-Step Kitchen Exhaust Fan Repair Process
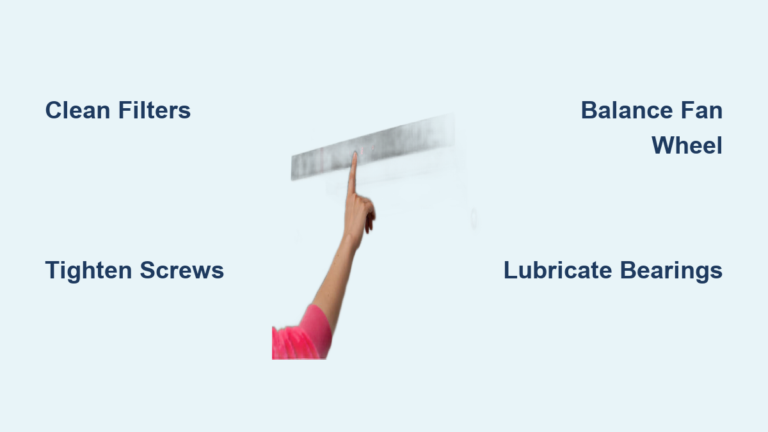
Deep Clean Your Range Hood Fan and Filters
Grease accumulation accounts for nearly 70% of noisy kitchen exhaust fan issues. Begin by removing metal mesh filters and soaking them in hot water with heavy-duty degreaser—either a commercial product or a 1:1 vinegar-water solution. While filters soak, unplug your hood and carefully remove the access panel using a screwdriver. Use a plastic putty knife to scrape stubborn grease from fan blades without damaging them, then wipe all surfaces with a degreasing solution. Pay special attention to the blower wheel (fan cage), as even minor grease buildup creates imbalance that causes vibration. Reassemble only when all components are completely dry—this process typically takes 45-60 minutes but resolves most noise issues immediately.
Tighten All Critical Components in Your Exhaust System
With the housing open, methodically check every fastener you can reach. Start with the obvious: wall or cabinet mounting screws that secure the entire hood unit. Then examine internal components—loose motor mounts transmit vibration directly to the housing, creating amplified noise. The critical set screw that secures the fan wheel to the motor shaft often loosens over time; use the appropriate hex key to tighten it while holding the fan blade stationary. Don’t overtighten plastic components, as they can crack, but ensure all metal-to-metal connections are snug. This simple tightening procedure takes just 15-20 minutes but frequently eliminates rattling and vibration issues.
Balance Your Kitchen Exhaust Fan Wheel

If cleaning and tightening haven’t silenced your fan, the blower wheel likely has uneven grease buildup or physical damage. Remove the fan wheel by loosening its set screw, then inspect it for warping or broken blades. Clean it thoroughly with degreaser, checking for areas where grease has accumulated more heavily on one side. If the wheel appears straight but still causes vibration, you may need to replace it—most manufacturers sell replacement wheels for common models. Installing a new wheel takes 20-30 minutes and provides immediate noise reduction when imbalance was the culprit.
Address Motor Bearing Noise in Your Range Hood
Persistent high-pitched squealing indicates failing motor bearings. Some motors have oil ports where you can add a few drops of lightweight machine oil (3-in-1 oil works well), but many modern units have sealed bearings that can’t be lubricated. If oil provides only temporary relief or the noise continues immediately after application, the motor bearings are too far gone. In this case, you’ll need to replace the entire motor assembly—a moderately difficult repair taking 45-60 minutes that requires matching the exact motor specifications from your old unit.
Inspect and Secure Your Exhaust Ductwork Connections
Noise sometimes originates from the duct system rather than the fan itself. Check where the hood connects to the duct—this transition point often vibrates loudly when screws loosen. Ensure all duct sections are tightly connected with metal screws (not just tape), and replace any flexible ducting with rigid metal pipe where possible. If you hear banging sounds, your backdraft damper might be slamming shut; clean it with degreaser and ensure it moves freely. Ductwork fixes typically take 30-45 minutes but can eliminate mysterious rattling noises that seem unrelated to the fan unit.
When Professional Help Becomes Necessary for Your Noisy Exhaust Fan
Certain situations demand professional expertise. If your fan makes a loud humming sound but won’t start, this indicates electrical problems that require a multimeter to diagnose safely—capacitors can hold dangerous electrical charges even when the unit is unplugged. Similarly, if you’ve replaced the motor but still hear unusual noises, the issue might involve improper installation or incompatible parts. Complex ductwork modifications, electrical wiring repairs, or integrated hood systems with custom cabinetry often require specialized knowledge. Professionals can also diagnose less common issues like unbalanced fan motors or harmonic resonance problems that aren’t obvious to DIYers.
Prevent Future Noise Problems with Proper Range Hood Maintenance
Avoid recurring noise issues through regular maintenance. Clean metal grease filters monthly in a dishwasher or with hot, soapy water—don’t wait until they’re heavily caked with grease. Every three months, perform a quick internal inspection: wipe down accessible surfaces with degreaser and check for loose screws. Replace charcoal filters every 6-12 months as they lose effectiveness. Most importantly, run your exhaust fan for 5-10 minutes after cooking to clear residual moisture and grease from the system. These simple habits prevent the buildup that leads to noise problems and extend your hood’s lifespan significantly.
Restore Quiet Kitchen Operation with Targeted Repairs
A noisy kitchen exhaust fan rarely indicates an unsolvable problem—most issues respond well to methodical troubleshooting. Start with the simplest solutions: thorough cleaning and tightening loose components. These basic steps resolve the majority of noise complaints without requiring specialized tools or expertise. When problems persist, systematically work through the diagnostic process based on your specific noise pattern. Remember that safety always comes first—never work on an electrical appliance without disconnecting power at the circuit breaker. With proper maintenance, your kitchen exhaust system should operate quietly for years, maintaining a comfortable cooking environment while effectively removing smoke, odors, and moisture from your home. The time invested in fixing your noisy kitchen exhaust fan pays off immediately in restored peace and quiet while you cook.


