
That annoying wobble when you wash dishes isn’t just irritating—it’s a warning sign. A loose kitchen sink creates gaps where water can seep into your countertop and cabinetry, leading to expensive damage, mold growth, and potential structural issues. Learning how to fix a loose kitchen sink properly prevents these problems and restores stability to your most-used kitchen fixture. This guide provides step-by-step instructions for both drop-in and undermount sinks, helping you complete this repair safely and effectively without calling a plumber for what’s often a straightforward DIY project.
Diagnose Your Sink’s Mounting Problem Before Starting
Before grabbing tools, you need to identify exactly why your sink has become loose. The repair method depends entirely on your sink type and the specific failure point. Most homeowners encounter problems with either drop-in or undermount sinks, each requiring different approaches.
Identify Your Sink Type and Failure Point
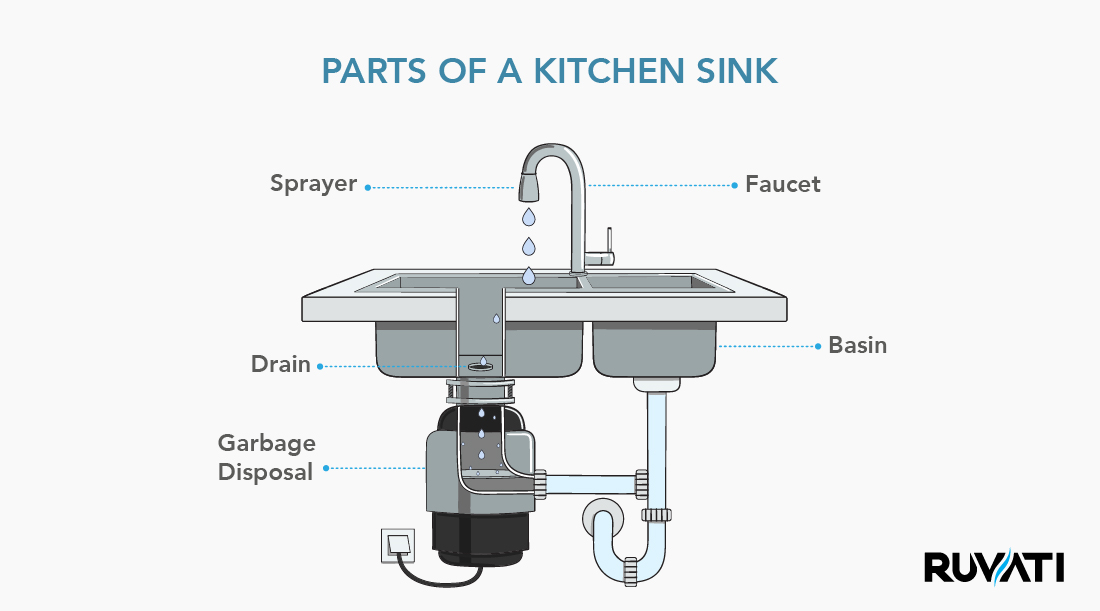
Drop-in sinks (also called self-rimming) sit on top of the countertop with a visible rim that rests on the counter surface. These rely on metal clips underneath that secure the sink to the countertop. When these sinks become loose, it’s usually because the mounting clips have loosened, rusted, or broken over time due to constant moisture exposure and daily vibration from use.
Undermount sinks attach beneath the countertop for that sleek, modern look. These depend entirely on strong adhesive and mechanical support brackets. When undermount sinks loosen, it’s often because the adhesive has failed or the supporting brackets have weakened. Never attempt to fix an undermount sink without proper support from below—this is a critical safety step many DIYers overlook.
Pinpoint the Exact Cause of Instability
Check for these specific issues before starting your repair:
– Failing mounting hardware: Rusty or bent brackets, loose screws, or broken clips
– Degraded sealant: Cracked, dried-out caulk that no longer creates a watertight seal
– Countertop damage: Water-damaged areas around the sink cutout that compromise structural integrity
– Cabinet flexing: Weak cabinet construction that can’t properly support the sink’s weight
Gather These Essential Tools Before You Begin

Having the right tools and materials ready prevents mid-repair frustration and ensures a lasting fix. For most kitchen sink repairs, you’ll need these specific items:
Must-have tools:
– Putty knife and utility knife (for removing old sealant)
– Screwdrivers (both flathead and Phillips)
– Adjustable wrench or socket set
– Cordless drill/driver
– Basin wrench (for hard-to-reach plumbing connections)
– Caulking gun
– Safety glasses and work gloves
Critical materials:
– 100% silicone sealant (not regular caulk—this must withstand constant water exposure)
– Replacement sink clips or brackets if damaged
– Plumber’s putty (for some drop-in sink installations)
– 90%+ isopropyl alcohol (for surface preparation)
– Painter’s tape (for clean caulk lines)
– C-clamps and scrap wood (essential for undermount sink support)
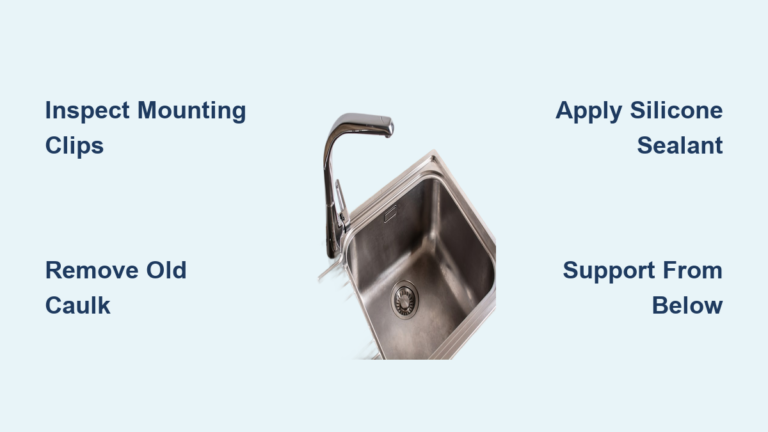
Fix Your Loose Drop-In Sink in 8 Actionable Steps
Drop-in sinks are the most common type and generally the easiest to repair when they become loose. Follow these specific steps for a permanent fix:
Prepare the Work Area and Remove the Sink
-
Turn off water supply at the shutoff valves under the sink and disconnect both hot and cold supply lines. Place a bucket underneath to catch residual water.
-
Disconnect the P-trap by loosening the slip nuts with an adjustable wrench. Be prepared for water drainage—have towels ready.
-
Remove old caulk completely using a utility knife to score the sealant line, then a putty knife to scrape away all remnants from both the sink rim and countertop edge. This step is non-negotiable—any remaining old sealant prevents proper adhesion of new material.
-
Loosen and remove mounting clips from underneath the sink. If they’re rusted, apply penetrating oil and let it sit for 15 minutes before attempting removal.
Reinstall and Secure Your Sink Properly
-
Clean both surfaces thoroughly with isopropyl alcohol to remove grease, dust, and moisture. Let them dry completely—this creates the optimal bonding surface.
-
Apply a continuous bead of 100% silicone along the underside of the sink’s rim. Don’t skip sections—gaps in the sealant will lead to future leaks.
-
Carefully lower the sink into position with a helper. While holding it steady, begin attaching the mounting clips underneath, tightening them in a crisscross pattern to distribute pressure evenly.
-
Wipe excess sealant immediately with a damp cloth and painter’s tape along the seam for a professional finish. Allow the silicone to cure fully (typically 24 hours) before reconnecting plumbing and using the sink.
Secure a Loose Undermount Sink Without Creating Bigger Problems
Undermount sinks require special attention because they hang from the countertop without visible support. Many DIY attempts fail because people skip the critical support step.
Critical Support Steps Before Touching Adhesive
-
Create a solid support system by placing a 2×4 across the cabinet opening and using C-clamps to secure it. Your sink must be fully supported from below before you remove any old adhesive—never rely on the adhesive alone to hold the sink’s weight during repair.
-
Remove all old adhesive completely using a putty knife. For stubborn residue, heat it gently with a hair dryer to soften before scraping. Any remaining old adhesive prevents new adhesive from bonding properly.
-
Clean both surfaces meticulously with isopropyl alcohol. Undermount sinks require perfect surface preparation because they bear the entire weight of the sink and its contents through this bond.
Proper Reinstallation Technique for Long-Term Security
-
Apply high-strength construction adhesive (like Loctite PL 500) in a continuous bead along the sink’s top rim. Don’t skimp—undermount sinks need generous adhesive application.
-
Slowly release the support system while guiding the sink into position. Have a helper apply gentle, even pressure upward to ensure full contact between sink and countertop.
-
Install additional support brackets if needed, especially for larger or heavier sinks. These provide mechanical backup to the adhesive bond.
-
Apply a thin bead of 100% silicone around the top seam where sink meets countertop. This creates a watertight seal that prevents water from seeping behind the sink.
Avoid These 4 Costly Sink Repair Mistakes

Even experienced DIYers make critical errors when fixing loose sinks. Learn from these common pitfalls:
Skipping surface preparation is the #1 reason sink repairs fail. Old caulk, grease, or moisture prevents new sealant from bonding properly. Take time to clean thoroughly with isopropyl alcohol—don’t just wipe with a damp cloth.
Using the wrong sealant guarantees a short-term fix. Bathroom/kitchen caulk isn’t always 100% silicone. Check the label—only products specifically labeled “100% silicone” provide the waterproofing needed for sink installations.
Ignoring countertop damage leads to recurring problems. If the countertop around your sink shows water damage, soft spots, or cracks, fixing the sink alone is temporary. Address the underlying countertop issue first.
Rushing the curing process compromises your entire repair. Most silicone sealants need 24 hours to fully cure. Using the sink too soon breaks the seal and requires starting over.
When to Call a Professional Instead of DIY
While many loose sink repairs are DIY-friendly, certain situations warrant professional help:
- Water-damaged countertops that feel soft or spongy around the sink cutout
- Multiple failed mounting points indicating systemic structural issues
- Cast iron or heavy stone sinks that require special handling equipment
- Visible cabinet damage that can’t support the sink’s weight
- Recurring problems after previous repair attempts
Professional repairs typically cost $150-$300 for minor fixes but can reach $800+ for complex situations involving countertop or cabinet damage. If repair costs approach 50% of replacement value, consider installing a new sink instead.
A properly secured kitchen sink shouldn’t move when you press down on the edges. By following these specific steps for your sink type, you’ll create a stable, watertight installation that lasts for years. Implement a simple quarterly maintenance routine—check mounting hardware tightness and inspect sealant integrity—to catch small issues before they become major problems. Remember that surface preparation is 80% of a successful sink repair; skip this step and your fix won’t last. With the right approach, you can confidently fix a loose kitchen sink and prevent the water damage that often follows neglected mounting issues.


