
That frustrating moment when your kitchen drawer won’t slide smoothly—catching halfway, grinding against the cabinet, or worse, falling out completely—can ruin your cooking flow. Whether it’s your utensil drawer jamming during meal prep or your spice drawer refusing to close properly, fixing a kitchen drawer track is one of the most common yet manageable DIY repairs homeowners face. The good news? Most track problems stem from simple issues like loose screws, debris buildup, or minor misalignment that you can fix yourself without professional help. This guide will walk you through diagnosing your specific track problem and implementing the right fix so your drawers glide smoothly again.
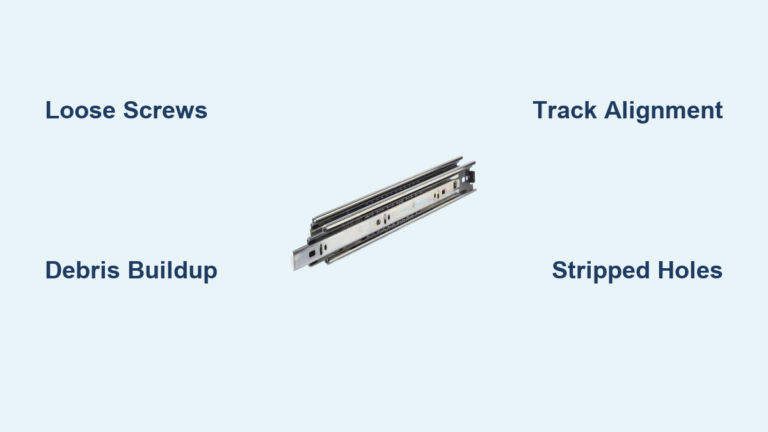
A properly functioning drawer track system should open and close with minimal effort, staying perfectly aligned throughout its range of motion. When your kitchen drawer track fails, it’s usually due to one of three common culprits: stripped mounting holes, misaligned hardware, or debris clogging the mechanism. By following this step-by-step approach, you’ll identify the exact issue with your bottom-mount slide system and implement a lasting repair—saving you the cost of replacement cabinets or professional service calls.
Why Your Kitchen Drawer Won’t Slide Smoothly: Quick Diagnosis
Before grabbing tools, properly diagnose your drawer track issue to avoid unnecessary work. Remove the drawer completely by pulling it out until it stops, then locate the release mechanism—typically a small lever or tab on each side of the drawer slide. On most bottom-mount systems, lifting this tab while pulling the drawer free releases it from the track. With the drawer out, inspect both the cabinet-mounted track and the drawer-mounted runner.
Look for these specific failure signs: loose mounting screws (the most common issue), cracked plastic wheels, bent metal brackets, or debris buildup in the track channels. Pay special attention to where the drawer sticks—this pinpoint location often reveals the exact problem area. For example, if your drawer catches at the halfway point, you likely have a bent track section or misaligned bracket at that specific position rather than a general lubrication issue.
Is It a Track Alignment Problem or Hardware Failure?
Ask yourself these critical questions to determine your repair path:
– Does the drawer bind at the same position every time? → Alignment issue
– Do you hear grinding or scraping noises? → Debris or broken components
– Has the drawer suddenly become difficult to open after years of smooth operation? → Loose mounting screws
– Is the drawer sagging on one side? → Failed bracket or stripped screw hole
If your drawer slides smoothly when empty but binds when loaded, you’ve likely exceeded the weight capacity of your track system. Quality bottom-mount slides typically handle 50-75 pounds, but cheap or aged hardware may struggle with much less weight.
Tools You Need to Fix a Kitchen Drawer Track in Under 30 Minutes
You probably already own everything required for most drawer track repairs. Skip unnecessary purchases by gathering these essentials:
- Phillips and flathead screwdrivers (or drill/driver with appropriate bits)
- Needle-nose pliers for manipulating small components
- Small hammer for gentle persuasion of stubborn parts
- Level or straight edge (a ruler works in a pinch)
- White lithium grease or dry silicone lubricant (avoid WD-40—it attracts dust)
- Wood glue and toothpicks for repairing stripped screw holes
- Replacement screws (slightly longer than originals for stripped holes)
Critical Tool Tip: The Right Lubricant Matters
Using the wrong lubricant causes more problems than it solves. Oil-based products like WD-40 create a sticky surface that traps dust and food particles, accelerating wear. Instead, use a dry silicone spray or white lithium grease sparingly on metal contact points. Apply only a pea-sized amount to rollers and tracks—excess lubricant attracts debris that causes future sticking.
Fixing a Bottom-Mount Drawer Track: 6 Steps to Smooth Operation
:max_bytes(150000):strip_icc()/102667115-7e8293fe7e6b4b5c98da88f39589e905.jpg)
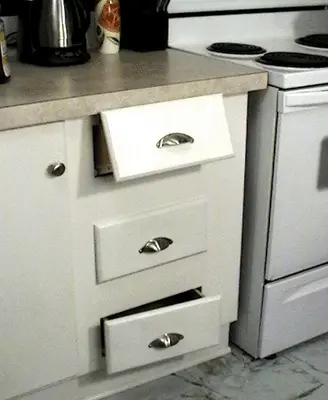
Bottom-mount slides (where the mechanism attaches to the drawer bottom) account for 70% of modern kitchen drawers. Follow this proven sequence for reliable results:
Step 1: Remove the Drawer and Clean the Tracks Thoroughly
Empty the drawer completely and release it from the tracks using the side tabs. Lay the drawer on a stable surface and vacuum all track channels—pay special attention to corners where food debris accumulates. Wipe tracks with a dry cloth, then use a stiff brush (an old toothbrush works perfectly) to dislodge stubborn grime. This simple cleaning step resolves 30% of “sticking drawer” issues immediately.
Step 2: Tighten Every Visible Screw (Including Hidden Ones)
Most drawer problems stem from loose mounting hardware. With the drawer removed, check all screws on both the cabinet-mounted track and drawer-mounted runner. Use a screwdriver—not a power drill—to avoid stripping heads. If screws spin without tightening, you have stripped holes (see Step 4). Properly tightened hardware should require moderate force to turn.
Step 3: Check Track Alignment with a Straight Edge
Place a level or ruler along the cabinet-mounted tracks to verify they’re perfectly parallel. Misaligned tracks cause binding and premature wear. If tracks aren’t parallel, loosen mounting screws slightly, adjust positioning, then re-tighten while holding the track in proper alignment. The front and back of each track should sit 1/8 inch from the cabinet edge for proper clearance.
Step 4: Repair Stripped Screw Holes Using the Toothpick Method
For stripped holes where screws won’t grip:
1. Remove the loose screw completely
2. Fill the hole with wood glue
3. Insert 3-5 toothpicks dipped in glue (break off excess)
4. Allow 24 hours for full curing
5. Re-drill a pilot hole
6. Reinstall the screw
This simple technique creates a solid anchor point that often outlasts the original wood. For particleboard cabinets, use golf tees instead of toothpicks—they provide more surface area for grip.
Step 5: Lubricate Critical Contact Points Sparingly
Apply a pea-sized amount of dry silicone lubricant to:
– Roller wheels where they contact the track
– Metal-on-metal sliding surfaces
– Pivot points of any moving mechanisms
Wipe away excess immediately—visible lubricant attracts debris. Test the drawer movement before replacing contents; it should glide smoothly with minimal resistance throughout its full range.
Step 6: Test Under Load Before Final Installation
Before reloading your drawer, test with 75% of its typical weight. Place canned goods or books inside to simulate real-world conditions. Open and close 10 times, watching for binding or misalignment. If problems persist, revisit Steps 3-4—most recurring issues stem from improper track alignment rather than lubrication.
Fixing Common Kitchen Drawer Track Failures
The Drawer Falls Out When Pulled Too Far
This dangerous failure indicates broken retaining clips or severely worn rollers. Inspect the track’s end stop mechanism—most quality slides have plastic tabs that prevent complete drawer removal. If broken, replace the entire slide assembly as individual components are rarely available.
Drawer Rubs Against Cabinet Frame
This alignment issue requires adjusting the mounting position:
1. Loosen (don’t remove) all mounting screws
2. Gently shift the track inward or outward
3. Test drawer movement frequently during adjustment
4. Tighten screws when clearance is even on all sides
Most modern slides have micro-adjustment screws specifically for this purpose—look for small set screws near the mounting points.
Sagging Drawer Bottom
When the drawer front sags lower than the cabinet front, your mounting hardware has failed. This usually requires:
– Reinforcing stripped screw holes (Step 4)
– Installing longer screws that reach solid cabinet framing
– Adding wood blocks behind the track for extra support
For severe sagging, replace the entire slide assembly—bent tracks won’t maintain proper alignment.
Prevent Future Drawer Track Problems with These Maintenance Tips
- Monthly: Wipe tracks with a dry cloth during routine cleaning
- Quarterly: Check and tighten all visible screws
- Annually: Apply dry lubricant to moving parts
- Immediately: Address minor sticking before it becomes major binding
Critical prevention tip: Never overload drawers beyond their capacity. Heavy pots and pans in a single drawer cause premature track failure. Distribute weight evenly across multiple drawers when possible.
When to Replace Instead of Repair Your Kitchen Drawer Track
While most track issues are repairable, replace the entire assembly if:
– Metal tracks are bent beyond straightening
– Multiple plastic components are broken
– The drawer slides more than 1/4 inch side-to-side
– You’ve repaired the same track three or more times
Quality replacement slides cost $15-$40 per pair and install in 20 minutes using the same techniques outlined here. Measure your existing track length precisely before purchasing—common sizes are 12″, 15″, 18″, and 24″.
Fixing a kitchen drawer track doesn’t require special skills—just the right approach and tools. By diagnosing the specific failure point, addressing stripped screw holes properly, and ensuring perfect track alignment, you’ll restore smooth operation to even the most stubborn drawer. Most repairs take less than 30 minutes and cost nothing if you already own basic tools. The next time your utensil drawer sticks during meal prep, remember this guide and get that drawer sliding smoothly again before your pasta boils over.


