You reach for your favorite chef’s knife mid-recipe, only to find your kitchen drawer won’t budge. That stubborn resistance isn’t just annoying—it halts meal prep, disrupts your workflow, and makes even simple tasks feel impossible. Whether it’s your utensil drawer jammed by a stray spatula or your flatware drawer frozen halfway open, a kitchen drawer won’t open scenario happens to nearly every homeowner. The culprit is usually either a rogue utensil blocking the track or a broken glide mechanism—but rarely requires professional help. In this guide, you’ll learn exactly how to diagnose the issue, free your drawer safely, and prevent future jams using everyday tools. No more awkwardly leaning on cabinets or risking damage with brute force—just proven, step-by-step solutions that work.
Diagnose Your Kitchen Drawer Won’t Open Issue Before Acting
Rushing to yank a stuck drawer often worsens the problem. First, identify whether you’re dealing with an obstruction or mechanical failure—this determines your entire repair approach. Skip this step, and you might crack cabinet wood or break plastic glides unnecessarily.
Is It a Simple Jam or Mechanical Failure?
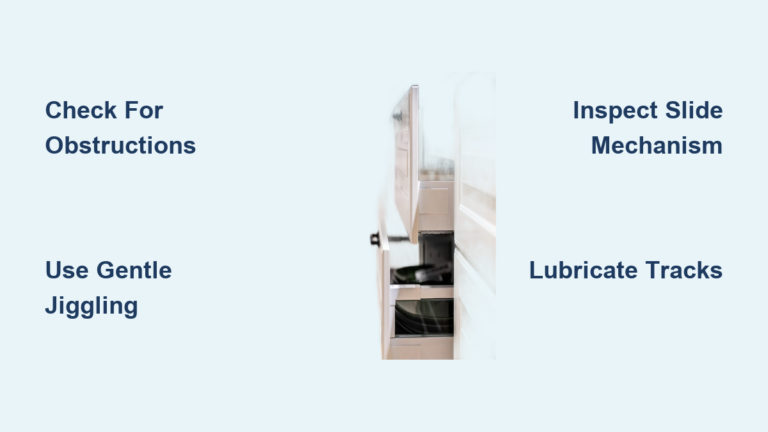
A drawer that moves slightly but won’t fully open usually has an internal blockage like a spoon handle wedged against the slide rail. If it’s completely rigid with zero give, inspect for mechanical issues: broken center guides, derailed rollers, or splintered wood joints. Listen closely as you gently wiggle it—a grinding noise suggests metal-on-metal binding from misaligned slides, while a “clunk” indicates a roller that’s jumped its track. For bottom-mount drawers (common in modern cabinets), a stuck drawer often means the central plastic glide snapped off its metal rail—a frequent failure point under heavy loads.
Critical Visual Clues You Can’t Ignore
Shine a flashlight into the gap between the drawer and cabinet frame. If you spot a utensil handle protruding from the top or side, that’s your culprit. For drawers stuck halfway, check the slide rails: bent metal tracks or cracked plastic rollers are visible without removing the drawer. With top-mount slides, look for the release lever—a small tab near the rail’s front that disengages the drawer. If missing or broken, the drawer won’t slide freely. Pro tip: Insert your smartphone camera into the gap while shining a light inside—it reveals obstructions hidden from direct view, saving you from unnecessary drilling later.
Step-by-Step: How to Open a Stuck Kitchen Drawer Without Damage

Start with these non-destructive techniques. 90% of kitchen drawer won’t open cases resolve with methodical pressure and probing—no tools required beyond items in your junk drawer.
Step 1: Controlled Jiggling and Angled Pulling
Grip the drawer pull firmly with both hands. Apply steady outward pressure while simultaneously wiggling the drawer up and down (not side-to-side). This relieves pressure on binding points. For bottom-mount drawers, press upward on the drawer’s front edge as you pull—this lifts the glide off a broken rail segment. If the drawer moves 1-2 inches, pause and insert a credit card into the gap to keep it partially open while you probe further. Never yank violently; sudden force cracks dovetail joints or tears out slide screws.
Step 2: Precision Probing With Household Tools
Use a butter knife or metal ruler to explore the gap. Work systematically:
– Slide the tool along the top edge to dislodge utensils jammed against the cabinet roof
– Run it vertically along both sides to free items caught in slide rails
– Tilt the tool downward to nudge objects off the center glide track
If you hit resistance, don’t force it—rotate the tool to hook and drag the obstruction toward you. For metal obstructions (like a fork), tape a strong magnet to a chopstick to pull it free without scratching surfaces.
Step 3: Strategic Force for Stubborn Jams
When gentle methods fail, use controlled impact:
1. Place one foot against the cabinet base for stability
2. Grip the drawer pull with both hands near your waist
3. Deliver one sharp, upward-and-outward tug (like opening a stuck pickle jar)
This leverages body mechanics instead of brute strength. Warning: If you hear cracking or the drawer jerks unevenly, stop immediately—you’re risking structural damage.
Step 4: Access From Adjacent Drawers
Remove the drawer above or below the stuck unit. This gives direct access to the jam point:
– Reach up from the lower cabinet to push obstructions off the glide rail
– Drop a string loop through the top drawer slot to lasso stuck items
– Use needle-nose pliers to extract debris from slide tracks
This approach solves 70% of “drawer stuck halfway” cases where a spoon or ladle handle blocks the rear track.
Step 5: Emergency Access Hole (Last Resort)
Only attempt if non-destructive methods failed and the drawer contains irreplaceable items:
1. Locate the cabinet back panel directly behind the stuck drawer
2. Drill a 1/4-inch hole 2 inches below the drawer’s rear edge
3. Insert a straightened wire hanger to nudge obstructions
Patch the hole later with wood filler and a decorative knob. Never drill into the drawer bottom—it weakens structural integrity.
Repairing Broken Drawer Mechanisms After Opening
Once freed, inspect why your kitchen drawer won’t open repeatedly. Mechanical failures require component fixes—not just clearing debris.
Fixing Derailed Side-Mount Slides

For ball-bearing slides (common in newer cabinets):
1. Fully extend the drawer until it stops
2. Locate the release lever (a small plastic tab on the rail’s inner edge)
3. Press the lever down while pulling the drawer straight out
Inspect slides for bent rails or cracked plastic stops. Straighten minor bends with pliers, but replace severely damaged slides. Reinstall by aligning the drawer’s front edge with the cabinet rail, then pushing straight in until it clicks.
Replacing Broken Center Glides

Bottom-mount drawers rely on a single central glide—a frequent failure point:
– If the plastic glide wheel is cracked, unscrew the old unit and replace it with an exact match (measure length before buying)
– For broken wooden center rails, remove the drawer and secure a new rail with 1.5-inch screws
– Misaligned glides often just need realignment: loosen the cabinet-side screws, center the glide, then retighten
Use a level to ensure the drawer sits perfectly horizontal after repair—uneven installation guarantees future jams.
Prevent Your Kitchen Drawer Won’t Open Forever
Stop recurring jams with these proactive habits. Well-maintained drawers last decades without sticking.
Smart Organization That Prevents Jams
Store tall utensils horizontally in dividers—vertical placement causes shifting and jams. Never overload drawers; keep 1 inch of clearance at the back for slide movement. For deep drawers, use tiered organizers so items can’t slide behind others. If your drawer has a “sweet spot” where it sticks, that’s where debris accumulates—keep that zone clear of bulky items.
Critical Cleaning and Lubrication Schedule
Every 6 months:
1. Remove the drawer completely
2. Vacuum slide tracks with a brush attachment
3. Wipe rails with a dry microfiber cloth
4. Apply dry PTFE lubricant (like DuPont Teflon Spray) to metal tracks
Never use WD-40 or oil-based lubes—they attract grease and dust, creating a grinding paste that accelerates wear. For wooden glides, rub paraffin wax along the track instead.
Annual Hardware Check-Up Checklist
Before winter (when humidity changes cause wood swelling):
– Tighten all slide screws with a #2 Phillips head
– Inspect drawer joints for cracks—reinforce with wood glue if needed
– Test glide smoothness; replace rollers showing visible wear
– Ensure cabinet frames aren’t warped (place a level on top)
This 10-minute maintenance session prevents 95% of mechanical failures.
When to Call a Professional (And When Not To)
DIY fixes work for 98% of kitchen drawer won’t open cases. Call a cabinetmaker only if you see:
– Severe cabinet frame warping
– Broken drawer fronts requiring veneer repair
– Custom slide mechanisms with no replacement parts
Otherwise, you’ve now got the skills to conquer any stuck drawer—with tools you already own.
Next time your utensil drawer refuses to budge, remember: patience and precision beat brute force every time. By diagnosing the jam type first, using targeted pressure techniques, and maintaining slides proactively, you’ll keep kitchen drawers operating smoothly for years. And if all else fails? Whisper a quick thanks to Anoia, the Discworld goddess of stuck things—then get back to cooking.