
That morning coffee splash on your countertop? It’s slowly eroding your wall behind the sink. A properly installed kitchen backsplash doesn’t just protect your walls from years of splatters and steam—it transforms your cooking space into a showstopper. Whether you’re tackling a budget-friendly ceramic update or a stunning glass mosaic, this guide cuts through the confusion of how to install kitchen backsplash like a pro. You’ll discover exactly how to avoid cracked tiles, uneven grout lines, and costly rework with field-tested techniques that deliver results you’ll love for decades.
Stop staring at outdated tile or bare drywall. Installing a kitchen backsplash is one of the most impactful DIY projects you can tackle this weekend. We’ve helped thousands of homeowners transform their kitchens with strategic planning and precise execution. By the end of this guide, you’ll know exactly how to measure for perfect symmetry, handle tricky outlet cuts, and achieve that coveted seamless finish—without hiring a single contractor. Let’s turn your splash zone into the kitchen’s crown jewel.
Gather Your Essential Tools and Materials Before Starting
Skipping proper tool preparation causes 70% of DIY backsplash failures. You’ll need specific gear that handles tile’s unique demands—not your standard hardware store basics.
Critical Tile-Specific Tools:
– 1/4″ square-notched trowel (not V-notched) for consistent adhesive ridges
– Wet saw with diamond blade for clean glass or stone cuts (rent for $25/day)
– Rubber grout float (not metal) to prevent scratching tile surfaces
– Laser level (or 4-foot bubble level) for perfect alignment
Material Must-Haves:
– Modified thinset mortar (not mastic) for moisture resistance
– Sanded grout for joints wider than 1/8″ (unsanded for glass)
– 100% silicone caulk (color-matched) for countertop seams
– PVA primer for drywall to prevent adhesive failure
Pro Tip: Test your wet saw on scrap tile first—dull blades cause chipping. Wear safety goggles when cutting; tiles shatter unpredictably.
Prepare Your Wall for Flawless Tile Adhesion
Greasy kitchen walls are the #1 reason tiles detach within months. This preparation step takes 45 minutes but prevents years of regret.
Why Proper Wall Prep Prevents Future Tile Failures
Start by removing outlet covers and turning off power at the breaker—safety trumps speed. Clean walls with TSP (trisodium phosphate) to strip cooking grease that repels adhesive. Sand glossy paint to “tooth” level using 120-grit paper. Check flatness with a 4-foot level: any dips deeper than 1/8″ need joint compound filling. Prime with PVA bonding agent for drywall—it creates a mechanical grip thinset can’t achieve alone.
Warning: Never tile over wallpaper or loose paint. You’ll hear tiles pop off within 6 months as adhesive fails.
The Moisture Test You Can’t Skip
Place a 12″x12″ plastic sheet over the wall, taping all edges. After 24 hours, check for condensation. Moisture means you need vapor barrier paper behind tiles—critical in humid climates. Ignoring this causes mold growth behind tiles, requiring full removal later.
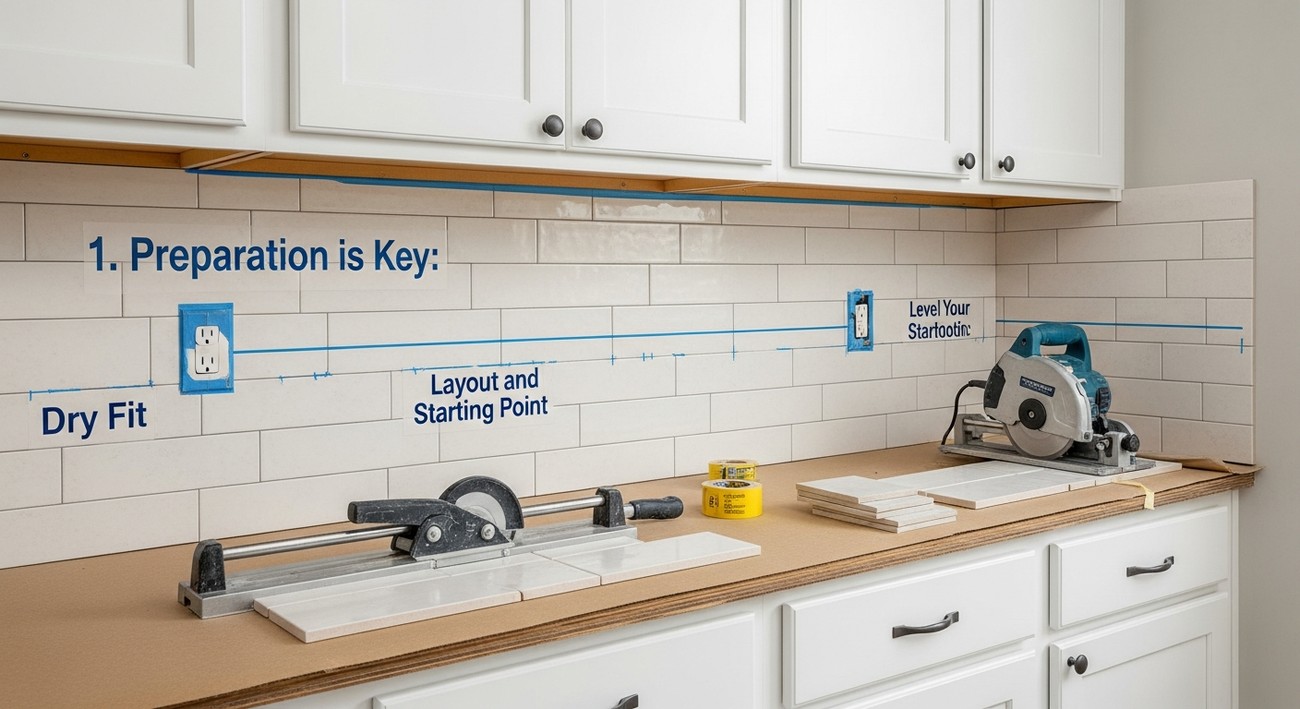
Plan Your Layout to Avoid Tiny Tile Slivers
Starting at the wrong point creates unsightly slivers at corners—a dead giveaway of amateur work. This technique guarantees balanced sight lines.
How to Find the Perfect Starting Point for Symmetry
Locate the visual center above your sink or range hood (not the wall’s physical center). Snap a level horizontal chalk line 1/8″ above the countertop—this gap allows for expansion and future caulk. Dry-fit full tiles outward from your center point using spacers. If end cuts are less than 1/3 tile width, shift your starting line to balance both sides. For outlets, position cuts so seams fall directly under cover plates.
Time Saver: Use painter’s tape to mark cut lines on wall before applying adhesive—no frantic measuring mid-project.
Apply Adhesive and Set Tiles Without Lippage
Uneven tiles (“lippage”) ruin backsplash aesthetics and trap grime. Master these adhesive techniques for perfectly flush results.
The Right Trowel Angle for Maximum Tile Hold
Mix modified thinset to peanut butter consistency—thinner batches sag, thicker ones won’t bond. Apply to 3×3 ft sections using the flat trowel side first, then comb ridges at a strict 45° angle. Press tiles firmly with a slight twist, checking level every 3 rows. Remove excess adhesive immediately with a damp sponge—dried mortar causes stubborn haze later.
Critical Mistake: Don’t overwork tiles after placement. Excessive wiggling creates voids underneath that lead to cracks.
Cut Tiles Around Outlets and Fixtures Like a Pro

Electrical boxes cause panic for first-time installers. These methods ensure safe, clean openings every time.
Quick Method for Safe Electrical Box Cutouts
Trace outlet outlines on tile backs using a pencil. For rectangular cuts: score lines with a glass cutter, then snap with tile nippers. For perfect circles: drill 1/4″ pilot holes at corners, then connect with a rod saw. Always cut tiles 1/16″ larger than openings—grout lines will hide minor gaps. Test-fit before adhesive application; cover plates should sit flush over tiles.
Warning: Never force tiles against electrical boxes. Shoving causes cracks that spread across entire tiles within weeks.
Grout Your Backsplash Without Streaks or Haze
Grout haze turns beautiful tile into a cloudy mess. Timing and technique make all the difference.
The 20-Minute Window for Perfect Grout Cleanup
Let adhesive cure 24 hours before grouting—early work dislodges tiles. Mix sanded grout to thick peanut butter consistency. Force it diagonally across joints with a rubber float at 45°, then wipe excess at 90° after 15 minutes. Use two buckets: one for initial cleaning (damp sponge), one for final rinses (clean water). Stop when water runs clear—over-sponging removes grout from joints.
Pro Tip: Add grout additive for stain resistance in high-splash zones. It extends work time by 10 minutes—crucial for beginners.
Seal and Caulk for a Professional, Waterproof Finish
Skipping sealing invites permanent water damage behind your backsplash. This two-step process creates invisible armor.
Silicone vs. Grout: Where to Use Each Seam
Apply grout sealer 72 hours after grouting—earlier applications fail. Spray penetrating sealer evenly, wiping excess immediately. For the countertop seam, use 100% silicone caulk (not grout). Run a continuous bead along the joint, then smooth with a wet finger dipped in soapy water. Caulk accommodates movement where grout would crack.
Time Saver: Use masking tape on countertop edges during caulking—peel off before silicone skins over for razor-sharp lines.
Troubleshoot Common Backsplash Installation Mistakes
Even pros encounter issues—knowing these fixes saves your project from disaster.
Fixing Adhesive That Won’t Stick to Your Wall
If tiles slide down immediately, your wall isn’t prepped properly. Remove all adhesive, clean with TSP again, and apply PVA primer. Wait 4 hours before reapplying modified thinset. For glossy surfaces like glass tile, use white polymer-modified mortar—it grips better than standard thinset.
Critical Insight: Adhesive failure often starts at the top. Support upper tiles with painter’s tape for 2 hours while curing.
Final Note: Your new backsplash needs 72 hours to fully cure before heavy use. For long-term beauty, reapply grout sealer annually—simply spray and wipe. When cleaning, avoid vinegar-based solutions that erode grout; stick with pH-neutral cleaners. Now that you’ve mastered how to install kitchen backsplash like a pro, consider upgrading your under-cabinet lighting to highlight your handiwork. That gleaming tile surface isn’t just protection—it’s your kitchen’s new conversation starter every time you brew coffee or sear salmon.


