
That stubborn pot that won’t fit under your faucet? The greasy pan that needs targeted rinsing? This is exactly why you need a functional kitchen sink sprayer hose. When your current sprayer fails or you’re upgrading an older sink, knowing how to install a kitchen sink sprayer hose properly becomes essential. Many homeowners attempt this seemingly simple DIY project only to face frustrating leaks, weak pressure, or premature failure. The good news is that with the right approach, you can complete this installation in under an hour with minimal tools. This guide walks you through the exact steps professional plumbers use to ensure your new kitchen sink sprayer hose functions flawlessly for years.
Most kitchen sink sprayer hose installations go wrong at the very beginning—improper preparation. Skipping critical safety steps or using the wrong tools creates problems that manifest as leaks days or weeks later. Whether you’re replacing a worn-out hose or adding a sprayer to a sink that never had one, following a systematic approach prevents costly mistakes. By the end of this guide, you’ll confidently handle every aspect of kitchen sink sprayer hose installation, from water shut-off to final leak testing.
Must-Have Tools for Installing a Kitchen Sink Sprayer Hose

Having the right tools makes the difference between a 20-minute installation and a frustrating afternoon under your sink. A basin wrench is non-negotiable for most installations—this specialized tool reaches connections in tight spaces where standard wrenches can’t pivot. Without it, you’ll struggle to access the mounting nut under the sink deck, often resulting in stripped fittings or incomplete tightening. Keep an adjustable wrench and channel-lock pliers nearby for standard connections, and don’t forget Teflon tape for sealing threaded joints.
Critical items you absolutely need:
– Basin wrench for under-sink mounting points
– Adjustable wrenches in multiple sizes (8″, 10″, 12″)
– Channel-lock pliers for stubborn connections
– High-quality Teflon tape (not the thin, cheap variety)
– Flashlight or headlamp to illuminate dark spaces
– Towels and small bucket for inevitable drips
Before touching any tools, clear the cabinet space completely. Remove all cleaning supplies and杂物 to give yourself ample room to work. Position a small step stool nearby so you can comfortably access the area without straining your back. This preparation saves more time than you’d think—rarely do DIYers account for how much cabinet organization slows down the actual installation process.
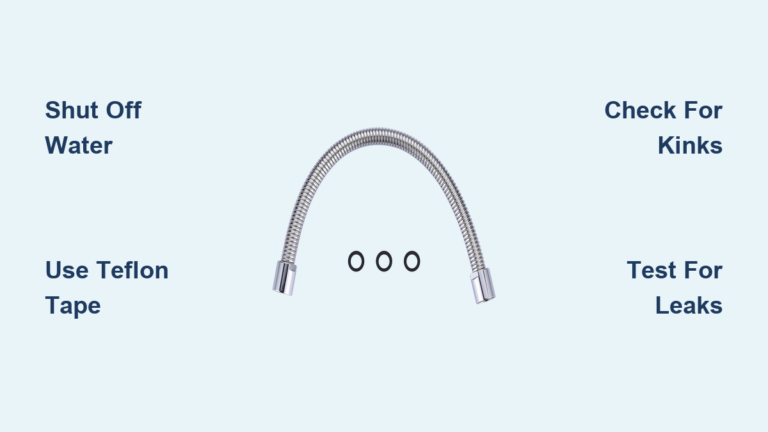
Critical Water Shut-Off Steps to Prevent Kitchen Flooding
Locating and properly shutting off your water supply is the most crucial step in how to install a kitchen sink sprayer hose. Most modern homes have individual shut-off valves under the sink for hot and cold lines—turn these clockwise until fully closed. If your home lacks these valves (common in older properties), you’ll need to shut off the main water supply to the entire house. After closing the valves, turn on your kitchen faucet to release pressure and drain remaining water from the lines—this prevents unexpected gushes when disconnecting hoses.
What to do when standard shut-offs are missing:
1. Locate your home’s main water shut-off valve (usually in basement, crawl space, or near water meter)
2. Use an adjustable wrench to turn the valve clockwise until fully closed
3. Open all faucets in the house briefly to drain residual water
4. Place towels under connections before disconnecting anything
Never skip the pressure release step. Residual water pressure can send a jet of water spraying into your cabinet when you disconnect the old hose, potentially damaging flooring or adjacent cabinets. Keep a bucket positioned under the connections and have multiple dry towels ready—this small precaution prevents what could become a major water damage incident.
Remove Your Old Sprayer Hose Without Damaging the Faucet
Disconnecting an existing sprayer requires careful technique to avoid damaging your faucet’s diverter valve. From under the sink, locate where the sprayer hose connects to your faucet’s supply line—this is typically a small brass fitting with a threaded connection. Use an adjustable wrench to loosen this connection counterclockwise, but grip the faucet body with another wrench to prevent twisting the entire assembly. If the connection resists, apply penetrating oil and wait 10 minutes before trying again.
From above the sink, unscrew the sprayer head from its dock using one hand while stabilizing the base with the other. For stubborn installations, wrap a rubber jar opener around the base to prevent scratching your sink while providing extra grip. Once disconnected, feed the old hose up through the sink deck hole and remove all mounting hardware. Inspect the sink deck hole for debris or old plumber’s putty that could interfere with the new installation.
Install Your Kitchen Sink Sprayer in 5 Critical Steps
Step 1: Mount the Sprayer Base Securely
Insert the new hose up through the sink deck hole from below. Position the decorative deck plate over the hole from above, then slide the rubber washer and mounting nut onto the threaded shank underneath. Hand-tighten first, then use your basin wrench for a quarter-turn more—overtightening cracks fittings and strips threads. The base should be secure but still rotate slightly when tested.
Step 2: Route the Hose Without Kinks
Create a gentle arc with the hose as you route it under the sink, avoiding contact with sharp cabinet edges. Leave 4-6 inches of slack near the faucet connection point to prevent stress on fittings. Secure excess hose with plastic zip ties, but never bend the hose tighter than a 4-inch radius—this causes permanent kinks that restrict water flow.
Step 3: Connect to the Faucet Diverter Valve
Attach the hose to your faucet’s sprayer port using hand-tightening plus a quarter-turn with pliers. For quick-connect fittings, push firmly until you hear a click. Apply Teflon tape clockwise around male threads (3-4 wraps) before connecting threaded fittings—this simple step prevents 90% of connection leaks.
Step 4: Install the Spray Head and Dock
Attach the spray head to the hose end, hand-tightening until snug. Position the dock so the sprayer head clicks securely into place—adjust the angle if needed before tightening set screws. Test the magnetic strength by lifting the sprayer; it should stay firmly docked but release with moderate pressure.
Step 5: Final Connection Check
Before restoring water, double-check all connections. The hose should have no sharp bends, the base should be secure without wobble, and all fittings should be properly tightened. A single overlooked connection can turn your successful installation into a hidden leak disaster.
Why Your New Sprayer Hose Won’t Stay in the Dock (And How to Fix It)
A sprayer that won’t stay docked is one of the most common frustrations after installing a kitchen sink sprayer hose. This usually happens because the dock isn’t properly aligned with the magnetic field in the sprayer head. Loosen the dock’s mounting screw slightly, then press the sprayer into position while tightening the screw—this ensures perfect alignment. If your model uses magnets, check that both the dock and sprayer head contain metal plates; some cheap replacements omit these critical components.
For persistent docking issues, apply plumber’s grease to the sprayer head’s contact points. This reduces friction while maintaining magnetic attraction. As a last resort, replace the entire dock assembly—many manufacturers sell upgraded models with stronger magnets specifically designed to solve this common problem.
Fix These 4 Common Kitchen Sink Sprayer Hose Issues
Stopping Sprayer Hose Leaks at the Faucet Connection
If water seeps from the faucet connection point, turn off the water and disconnect the hose. Inspect the rubber O-ring inside the quick-connect fitting—if flattened or cracked, replace it immediately. Reapply Teflon tape to the male threads (clockwise direction only) before reconnecting. Hand-tighten, then give one-quarter turn with pliers—overtightening is the #1 cause of recurring leaks.
Restoring Full Water Pressure to Your Kitchen Sprayer
Weak spray pressure usually indicates a kinked hose or clogged aerator. First, check for hose kinks under the sink and straighten any sharp bends. Then unscrew the spray head and soak it in white vinegar for 30 minutes to dissolve mineral deposits. Use a toothpick to clear any remaining debris from the spray holes before reassembling.
Eliminating Annoying Sprayer Dripping After Each Use
A slow drip from the sprayer head means worn internal seals. Disassemble the spray head (most twist apart) and inspect the rubber washers and O-rings. Replace any that show signs of wear using the replacement kit that should have come with your new hose. Reassemble carefully, ensuring all components seat properly.
Solving Pulsating Water Flow in Your New Sprayer Hose
Pulsing water indicates air trapped in the line or a faulty diverter valve. Run the sprayer continuously for 2 minutes to purge air. If pulsing continues, remove and clean the diverter valve inside your faucet body—mineral deposits often prevent it from sealing properly.
Professional Secrets for a Leak-Free Sprayer Hose Installation

Plumbers know that proper Teflon tape application makes or breaks how to install a kitchen sink sprayer hose successfully. Wrap tape clockwise around male threads (as you face them), overlapping each wrap by 50% for 3-4 complete revolutions. Never wrap past the end of the threads—this creates tape shreds that clog your spray head. For added security, apply pipe thread sealant paste over the taped threads before connecting.
How much tightening is too much?
Hand-tighten all connections first, then give exactly one-quarter turn with your wrench. Any more risks cracking plastic fittings or stripping threads. If a connection still leaks after proper tightening, disassemble and check for damaged washers rather than applying more force—this simple rule prevents most installation disasters.
Post-Installation Testing That Catches Leaks Before Damage Occurs
Don’t skip the 15-minute leak test—this professional technique catches problems before they cause water damage. Turn water supply back on slowly while watching all connections. Place dry paper towels under each joint, then run the sprayer for 2 minutes. Check towels immediately and again after 15 minutes—any moisture indicates a slow leak that needs attention. Test all spray functions and ensure water stops completely when released.
Inspect connections with a flashlight from multiple angles—some leaks only appear under pressure. If you find a leak, turn off water immediately and address it before considering the job complete. A single drop per second creates nearly 2 gallons of water damage per day—this small test prevents thousands in potential repair costs.
By following these precise steps for how to install a kitchen sink sprayer hose, you’ll achieve a professional-quality installation that lasts for years. Remember to perform monthly maintenance by running a vinegar solution through your sprayer to prevent mineral buildup. When done correctly, your new kitchen sink sprayer hose will provide reliable service for 5-7 years before needing replacement. The key to success lies in proper preparation, careful installation technique, and thorough leak testing—never rush the final verification steps that ensure your sink remains leak-free.


