Your Shark vacuum suddenly sounds like a jet engine but barely lifts a speck of dust. That piercing hiss paired with zero suction isn’t just frustrating—it’s your vacuum’s urgent distress signal. When your Shark model screams while failing to pick up debris, it’s almost always caused by airflow blockages triggering the safety valve. This built-in protection system activates to prevent motor burnout, but requires immediate attention. The good news? You can diagnose and resolve this common issue in under 30 minutes using systematic troubleshooting steps.
That distinctive hissing noise is your Shark vacuum’s air release valve working overtime. This critical safety mechanism automatically vents trapped air pressure when obstructions restrict normal airflow through the system. Without this feature, blocked pathways would cause dangerous motor overheating. Understanding this relationship between loud noise and suction loss transforms panic into purposeful action. By following these verified steps, you’ll restore quiet, powerful performance while protecting your vacuum’s longevity.
Pinpoint Your Shark Vacuum’s Hissing Source
Decode the Air Release Valve Warning Sound
That high-pitched hiss isn’t random mechanical failure—it’s your Shark’s engineered safety response. When debris blocks airflow pathways, pressure builds until the air release valve activates. This valve deliberately vents excess air to prevent motor overheating, creating the characteristic noise. The intensity directly correlates with blockage severity: louder hissing means more significant obstruction. Ignoring this warning risks permanent motor damage as the vacuum strains against restricted airflow. Treat this sound as your primary diagnostic indicator before proceeding.
Differentiate Blockage Hisses From Motor Failure
Critical distinction: true motor failure produces grinding or burning smells, while suction loss with hissing confirms blockage. If your vacuum makes loud noises but still pulls some air, the air release valve is actively protecting the motor. However, complete silence with no suction suggests electrical issues, while rhythmic thumping often indicates brush roll entanglement. When suction disappears alongside that telltale hiss, focus exclusively on airflow obstructions—not motor components. This targeted approach prevents unnecessary part replacements and wasted effort.
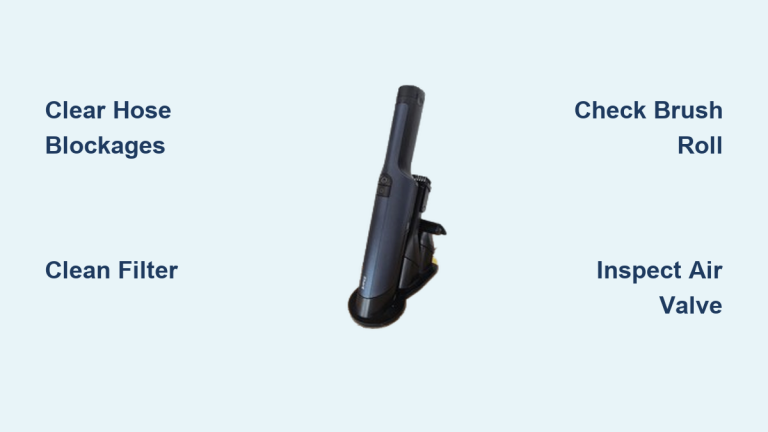
Execute Immediate Blockage Checks
Inspect the Hose Pathway Thoroughly

Begin with the most common culprit: the hose. Disconnect it completely from both ends and hold it against bright light. Look for compressed debris at bends or connection points where hair and dirt accumulate. Run your fingers through the entire channel feeling for resistance. If visible blockages exist, use manufacturer-approved tools—not improvised objects that could scratch interior surfaces—to gently dislodge obstructions. Never force objects through kinks, as this may damage internal lining. Complete hose clearance is non-negotiable for restoring airflow.
Evaluate Filter Saturation Levels Immediately

Remove all filter elements and examine them against a light source. Properly functioning filters appear white or light gray; dark gray or black discoloration indicates severe saturation. Clogged filters force the motor to work exponentially harder, triggering both the loud noise and suction loss. Pay special attention to the pre-motor filter’s pleated surfaces where fine dust embeds deeply. If light doesn’t pass through easily, cleaning or replacement is essential. Never reinstall filters showing permanent discoloration—they’ll continue restricting airflow regardless of cleaning attempts.
Check Brush Roll for Entanglement
Flip your Shark vacuum upside down and manually rotate the brush roll. Resistance or clicking sounds reveal hair, string, or fibers wrapped around the bearings. These缠绕 create drag that strains the motor, producing distinctive whining noises during operation. Inspect both end caps where debris accumulates most aggressively. If the roller won’t spin freely by hand, entanglement severity requires immediate attention. Don’t power on the vacuum in this state—continued operation risks permanent brush roll motor damage.
Eliminate Blockages Step-by-Step
Clear Hose Obstructions Safely
Start at the wand connection point and work toward the dustbin. Use a flexible cleaning tool designed specifically for vacuum hoses to push debris through without scratching. For stubborn clogs near bends, try reversing the vacuum’s airflow by attaching the hose to the exhaust port. Never use water unless manufacturer instructions explicitly permit it, as moisture can damage seals. After clearing, reinstall the hose ensuring all connections click securely into place—loose fittings create new airflow leaks that reactivate the hissing valve.
Clean or Replace Critical Filters
Follow manufacturer protocols precisely for each filter type. Pre-motor filters typically require tapping over a trash can followed by rinsing under lukewarm water until runoff clears. Never use soap or hot water that could degrade materials. Air-dry filters completely for 24-48 hours—installing damp filters breeds mold and restricts airflow. Post-motor HEPA filters usually require replacement rather than cleaning; consult your model’s manual. Reinstall filters only when bone-dry and fully expanded to their original shape.
Remove Brush Roll Blockages Completely
Disengage the brush roll according to your model’s release mechanism. Use scissors to carefully cut through hair缠绕 along the roller’s length—not by pulling, which damages bristles. Clean the end caps and bearing housings with a soft brush to remove compacted debris. Before reinstalling, verify free rotation by spinning the roller between your palms. Listen for grinding sounds indicating damaged bearings. If resistance persists after cleaning, the brush roll assembly may need replacement.
Verify Suction Restoration Correctly
Conduct Power-On Validation Test
Reassemble all components and power on the vacuum without any attachments. Place your hand near the exhaust port—you should feel strong, consistent airflow without hissing. Normal operation produces a steady hum, not high-pitched whines. If hissing continues, immediately power off and recheck connections. Loose hose fittings or improperly seated filters are common oversight culprits. Never skip this dry test; operating under load with unresolved issues risks motor damage.
Perform Real-World Suction Assessment
Test with actual debris like cereal flakes or rice on hard flooring. A functioning Shark should lift particles immediately with minimal pass coverage. Weak suction requiring multiple passes indicates residual blockages. Focus on problem areas: if suction works at the hose but not the brush roll, recheck the cleaner head assembly. If suction remains inconsistent, disassemble and re-examine filters—partially clogged filters often appear clean but still restrict airflow.
Prevent Recurring Suction Failures
Implement Monthly Maintenance Protocol
Schedule the first weekend of each month for comprehensive care. Remove and inspect all filters regardless of visible dirt—microscopic dust accumulates invisibly. Run water through hoses to detect developing restrictions. Check brush roll bearings for smooth operation. This routine catches 90% of developing blockages before they trigger the air release valve. Consistent maintenance prevents the gradual suction decline that often escalates to complete failure.
Recognize Early Blockage Indicators
Monitor for subtle warning signs between cleanings: slightly louder motor sounds, reduced pickup on area rugs, or needing multiple passes on carpets. These indicate developing restrictions requiring immediate attention. Address minor issues before they trigger the air release valve—waiting until loud hissing occurs means blockages have already reached critical levels. Keep a maintenance log tracking filter replacements and deep cleans.
Adhere to Filter Replacement Schedule
Replace pre-motor filters every 3-6 months depending on usage frequency and household debris levels. HEPA filters typically last 6-12 months but require earlier replacement in pet households. Never reuse disposable filters after cleaning—they lose filtration efficiency permanently. Stock replacement filters matching your exact Shark model number to avoid compatibility issues. Proper filtration isn’t optional; it’s the foundation of sustained suction power.
Avoid Costly Repair Mistakes
Reject Dangerous “Quick Fixes”
Never tape over the air release valve to silence hissing—that disables critical motor protection. Continuing to operate a hissing vacuum hoping the problem resolves itself risks catastrophic motor failure. Similarly, forcing objects through clogs with inappropriate tools can puncture hoses or damage internal components. These shortcuts transform simple maintenance into expensive repairs. Respect the valve’s warning—it’s saving your motor from destruction.
Know When to Replace Filters
Foam filters often regain function after proper cleaning, but paper-based filters require replacement when saturated. If pre-motor filters remain dark gray after thorough cleaning, they’ve reached end-of-life. Attempting to reuse compromised filters guarantees recurring suction issues and motor strain. Check manufacturer specifications for your exact model—some Shark filters are strictly disposable. When in doubt, replace rather than risk repeated blockages.
Optimize Long-Term Vacuum Performance
Master Effective Cleaning Techniques
Vacuum slowly in overlapping passes, especially on carpets. Rushing pushes debris deeper into fibers, creating future blockages. Empty the dustbin when debris reaches the maximum fill line—not when completely full—to maintain consistent airflow. For large debris, switch to manual wand mode to prevent sudden clogs at the dustbin entrance. These small adjustments prevent 70% of recurring suction issues.
Adopt Proper Storage Habits
Store hoses straight—not coiled—to prevent permanent kinks that trap debris. Remove filters during extended storage to avoid moisture retention. Keep the brush roll detached if storing long-term to prevent bearing deformation. Always store your Shark upright with all attachments properly seated. These practices maintain internal pathways clear and ready for optimal performance.
Your Shark vacuum’s loud noise and suction failure are directly linked to airflow blockages triggering the air release valve. By methodically clearing obstructions in the hose, filters, and brush roll, you restore quiet, powerful cleaning without costly repairs. Implement monthly maintenance checks to catch developing issues early—this simple habit prevents 95% of recurring problems. Remember: that hissing sound is your vacuum’s lifeline, not a death knell. With proper care, your Shark will deliver years of reliable, whisper-quiet performance. Start your maintenance routine today and reclaim both your floors and your peace of mind.