
Is your Shark Professional vacuum not performing like it used to? A worn or broken belt could be the culprit. The belt is essential for powering the brush roll, which agitates carpets and sweeps up debris. Fortunately, replacing the belt on a Shark Professional vacuum is a straightforward process you can do at home, saving you time and money on repairs.
This guide will walk you through the steps of changing the belt on your Shark Professional vacuum, ensuring your machine is back to its optimal cleaning performance in no time. Let’s get started!
Identifying the Need for a Belt Replacement
Before diving into the replacement process, confirm that a worn-out belt is indeed the problem. Here are some common signs:
- Reduced Suction: A loose or broken belt can prevent the brush roll from spinning effectively, leading to decreased suction power.
- Unusual Noises: Squealing, grinding, or rattling sounds coming from the brush roll area often indicate a damaged belt.
- Visible Damage: Inspect the belt for cracks, fraying, stretching, or complete breakage.
- Brush Roll Stoppage: If the brush roll isn’t spinning at all, even when the vacuum is turned on, the belt is likely broken or severely worn.
Tools and Materials You’ll Need
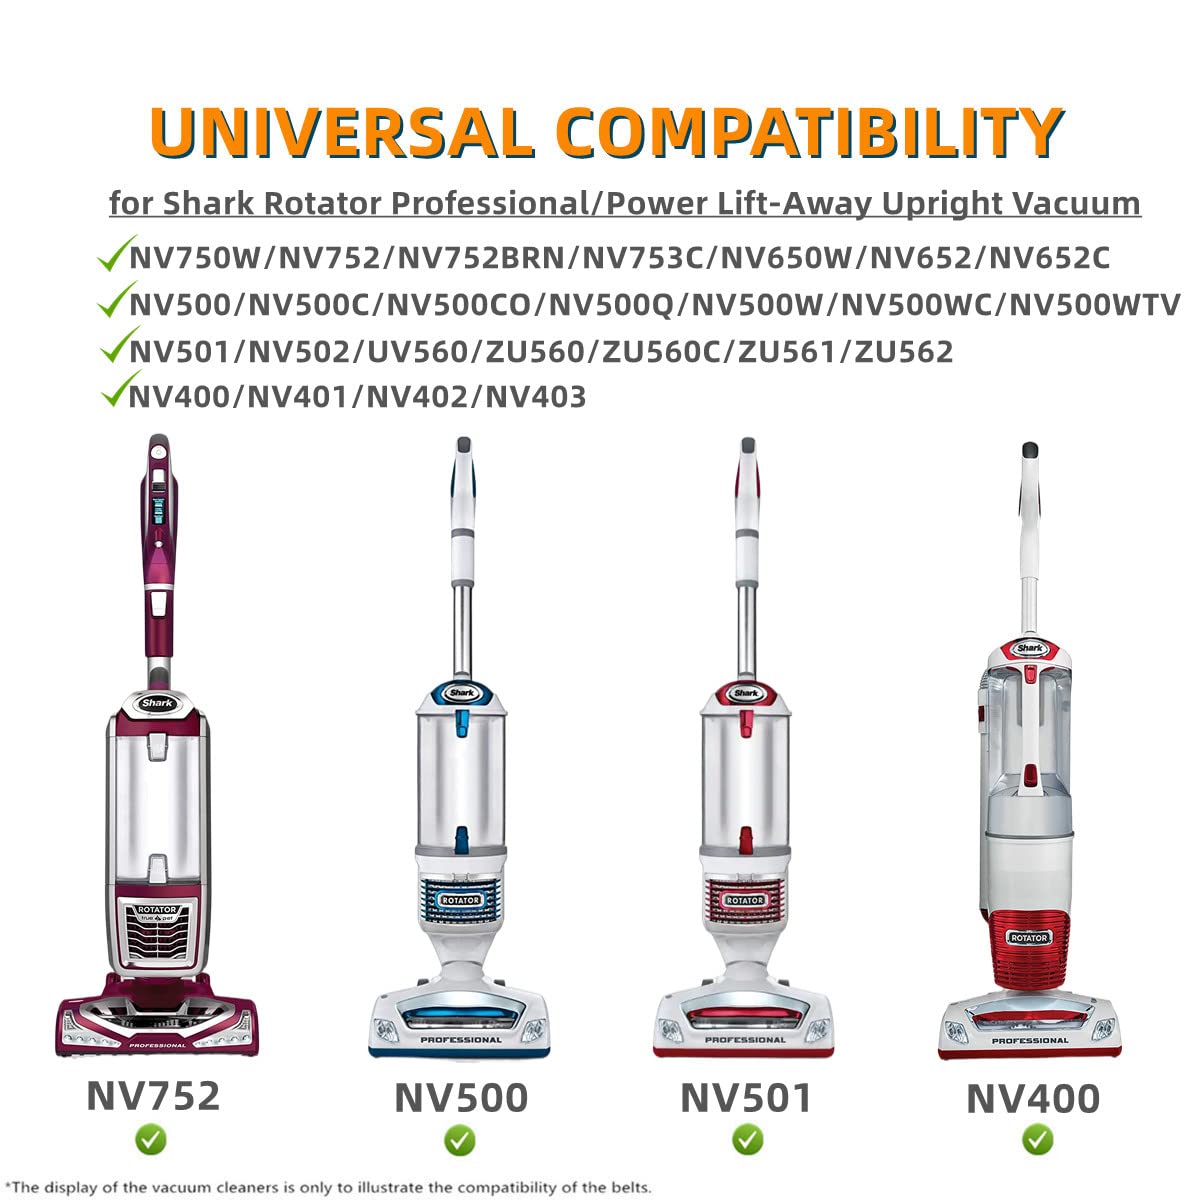
- Replacement Belt: Ensure you purchase the correct belt specifically designed for your Shark Professional vacuum model. Check your owner’s manual or the Shark website for the appropriate part number.
- Screwdriver: A Phillips head screwdriver is typically required to remove the brush roll cover and access the belt.
- Scissors or Utility Knife: May be needed to cut away any tangled hair or debris around the brush roll.
- Gloves (Optional): To keep your hands clean during the process.
Step-by-Step Guide to Changing the Belt
- Power Off and Unplug: Always disconnect the vacuum from the power outlet before performing any maintenance or repairs. This is a crucial safety precaution.
- Access the Brush Roll:
- Locate the brush roll cover on the vacuum head. This is usually on the bottom of the vacuum head.
- Use the screwdriver to remove the screws securing the brush roll cover. Keep the screws in a safe place.
- Carefully remove the brush roll cover to expose the brush roll and belt.
- Remove the Old Belt:
- Carefully lift the brush roll out of the vacuum head.
- Inspect the old belt. If it’s broken, remove the pieces. If it’s intact, gently stretch it off the brush roll and the motor pulley.
- Use scissors or a utility knife to cut away any tangled hair, threads, or debris that may be wrapped around the brush roll or the motor pulley.
- Install the New Belt:
- Position the new belt around the motor pulley.
- Carefully stretch the other side of the belt around the brush roll. Ensure the belt sits snugly in the designated groove on the brush roll.
- Reinstall the Brush Roll:
- Place the brush roll back into the vacuum head, ensuring it’s properly seated.
- Manually rotate the brush roll to check that the belt is correctly aligned and the brush roll spins freely.
- Reattach the Brush Roll Cover:
- Position the brush roll cover back onto the vacuum head.
- Secure the cover with the screws you removed earlier. Make sure the cover is firmly in place.
- Test the Vacuum:
- Plug the vacuum back into the power outlet.
- Turn the vacuum on and check if the brush roll is spinning properly.
- Test the vacuum on different floor types to ensure optimal cleaning performance.
Troubleshooting Common Issues

- Brush Roll Not Spinning After Belt Replacement:
- Problem: The belt may not be properly seated on the motor pulley or brush roll.
- Solution: Double-check the belt alignment and ensure it’s snug in the grooves.
- Problem: The brush roll may be obstructed by hair or debris.
- Solution: Remove the brush roll and clean away any obstructions.
- Belt Keeps Slipping Off:
- Problem: The belt may be the wrong size or type.
- Solution: Verify that you are using the correct replacement belt for your specific Shark Professional vacuum model.
- Problem: The motor pulley or brush roll grooves may be worn or damaged.
- Solution: Inspect the pulley and brush roll for damage. If necessary, replace the affected part.
- Vacuum Making Loud Noises After Belt Replacement:
- Problem: The belt may be too tight.
- Solution: Ensure you’ve installed the correct belt size. A belt that’s too tight can cause excessive friction and noise.
- Problem: The brush roll bearings may be worn or damaged.
- Solution: Inspect the brush roll bearings and replace them if necessary.
Pro Tips for Maintaining Your Shark Vacuum Belt

- Regularly Clean the Brush Roll: Remove hair, threads, and debris from the brush roll after each use to prevent tangling and strain on the belt.
- Check the Belt Periodically: Inspect the belt for signs of wear and tear every few months. Replace it proactively before it breaks completely.
- Avoid Overloading the Vacuum: Don’t try to vacuum excessively large or heavy debris, as this can put extra stress on the belt.
- Use the Correct Floor Setting: When vacuuming hard floors, turn off the brush roll to prevent unnecessary wear on the belt.
Alternatives to Changing the Belt Yourself
- Shark Customer Support: Contact Shark customer support for assistance. They may be able to provide troubleshooting advice or direct you to a certified repair technician.
- Local Vacuum Repair Shop: Take your vacuum to a local repair shop. A qualified technician can diagnose the problem and replace the belt for you.
FAQ About Shark Vacuum Belt Replacement
What is the lifespan of a Shark vacuum belt?
The lifespan of a Shark vacuum belt varies depending on usage and maintenance. On average, a belt can last from 6 months to a year with regular use. However, if you frequently vacuum thick carpets or experience frequent clogs, you may need to replace the belt more often.
How do I find the right replacement belt for my Shark vacuum model?
The easiest way to find the correct replacement belt is to consult your vacuum’s owner’s manual. The manual should list the specific belt part number for your model. You can also visit the Shark website and search for replacement parts using your model number.
Can I use a generic belt instead of a Shark-branded belt?
While generic belts may seem like a cost-effective option, it’s generally recommended to use a Shark-branded replacement belt. Shark belts are specifically designed to fit your vacuum model and provide optimal performance. Generic belts may not have the same quality or durability, which could lead to premature wear or damage to your vacuum.
How often should I clean my Shark vacuum brush roll?
It’s best to clean your Shark vacuum brush roll after each use, or at least once a week, especially if you have pets or long hair. Regular cleaning prevents hair and debris from building up and tangling around the brush roll, which can strain the belt and reduce cleaning effectiveness.
What happens if I don’t replace the belt on my Shark vacuum?
If you don’t replace a worn or broken belt, your Shark vacuum won’t be able to clean effectively. A faulty belt can cause the brush roll to stop spinning, resulting in reduced suction and poor cleaning performance. Continuing to use the vacuum with a damaged belt can also cause further damage to the motor and other components.
Tips, Warnings, and Best Practices
- Safety First: Always unplug your vacuum before performing any maintenance or repairs.
- Read the Manual: Refer to your owner’s manual for specific instructions and safety guidelines.
- Don’t Force It: If you encounter resistance when removing or installing parts, double-check that you’re following the correct procedure. Forcing components can cause damage.
- Keep it Clean: Regularly clean your vacuum and its components to maintain optimal performance and extend its lifespan.
Conclusion
Changing the belt on your Shark Professional vacuum is a simple yet essential maintenance task that can significantly improve your vacuum’s performance. By following this guide, you can confidently replace the belt yourself and keep your vacuum running smoothly for years to come. Regular maintenance, including belt replacement, ensures your Shark vacuum continues to deliver powerful cleaning performance, keeping your home clean and healthy. Don’t wait until your vacuum stops working; proactively replace the belt when you notice signs of wear to maintain optimal suction and cleaning power.


