
Cleaning your Shark vacuum roller is essential for maintaining optimal performance and extending the life of your appliance. A clean roller ensures effective dirt and debris pickup, prevents clogs, and reduces unpleasant odors. This guide provides a step-by-step approach to cleaning your Shark vacuum roller, along with helpful tips and troubleshooting advice.
Your Shark vacuum is an investment in maintaining a clean home. However, over time, hair, threads, and other debris can accumulate on the brush roller, hindering its ability to effectively clean your floors. Ignoring this buildup can lead to reduced suction power, overheating, and even damage to the vacuum motor. By regularly cleaning the roller, you can avoid these problems and keep your Shark vacuum running smoothly. This article will walk you through the process of cleaning your Shark vacuum roller, offering practical tips and solutions to common issues you might encounter.
1. Gather Your Cleaning Supplies
Before you begin, gather the necessary supplies:
- Scissors or seam ripper
- A soft brush or toothbrush
- Damp cloth or paper towels
- Small bowl of warm water (optional)
- Mild dish soap (optional)
Having these tools at hand will make the cleaning process more efficient and effective.
2. Unplug and Prepare Your Shark Vacuum
Safety first! Always unplug your Shark vacuum before performing any maintenance or cleaning tasks.
- Unplug the Vacuum: Disconnect the vacuum from the power outlet to prevent accidental start-ups.
- Detach the Roller Brush: Depending on your Shark model, you may need to remove a cover plate or press a release button to access the roller brush. Consult your owner’s manual for specific instructions.
- Prepare Your Work Area: Choose a well-lit area where you have enough space to work comfortably. Placing a sheet of newspaper or a towel underneath can help protect your floor or countertop.
3. Remove Hair and Debris from the Roller Brush
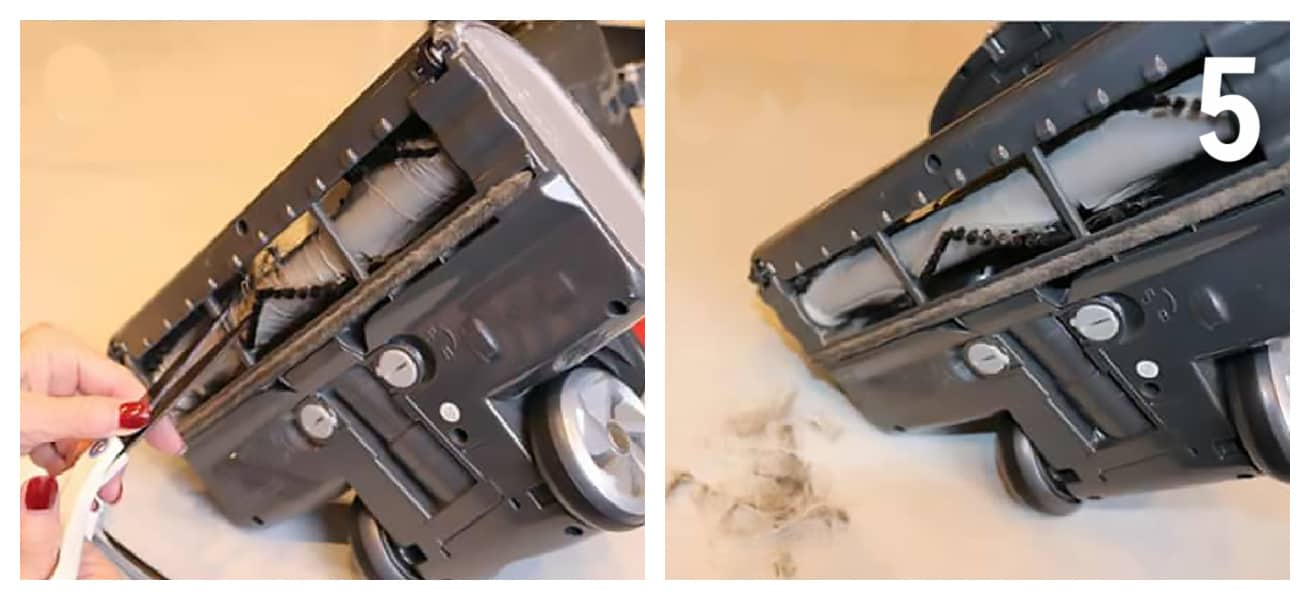
This is the most crucial step in cleaning your Shark vacuum roller.
- Cut Away Tangled Hair: Use scissors or a seam ripper to carefully cut away any tangled hair, threads, or string wrapped around the roller brush. Be gentle to avoid damaging the bristles.
- Remove Stubborn Debris: For tightly wound debris, try using a seam ripper to gently pick it apart before cutting.
- Dispose of Waste: As you remove the debris, dispose of it in a trash can to keep your work area clean.
4. Deep Clean the Roller Brush (Optional)

If your roller brush is particularly dirty or has a lingering odor, a deeper cleaning may be necessary.
- Prepare a Cleaning Solution: Fill a small bowl with warm water and add a few drops of mild dish soap.
- Wash the Roller Brush: Dip the soft brush or toothbrush into the soapy water and gently scrub the roller brush to remove any remaining dirt or grime.
- Rinse Thoroughly: Rinse the roller brush under running water until all traces of soap are gone.
- Remove Excess Water: Gently squeeze the roller brush to remove excess water.
- Air Dry Completely: Allow the roller brush to air dry completely before reassembling it into your vacuum. This may take several hours, so plan accordingly.
5. Clean the Vacuum Head
While the roller brush is drying, take the opportunity to clean the vacuum head.
- Inspect for Blockages: Check the vacuum head for any obstructions, such as large debris or clumps of dirt.
- Wipe Clean: Use a damp cloth or paper towel to wipe down the interior and exterior of the vacuum head.
- Remove Dust and Debris: Use a soft brush or the hose attachment of your vacuum to remove any dust or debris from the vacuum head.
6. Reassemble Your Shark Vacuum
Once the roller brush is completely dry, reassemble your Shark vacuum.
- Reinstall the Roller Brush: Place the roller brush back into the vacuum head, ensuring it is properly aligned.
- Secure the Cover Plate: Replace the cover plate or close the release mechanism to secure the roller brush in place.
- Plug in the Vacuum: Once everything is properly reassembled, plug the vacuum back into the power outlet.
7. Troubleshooting Common Issues
Here are some common problems you might encounter when cleaning your Shark vacuum roller and how to solve them:
- Roller Brush Won’t Spin: Check for obstructions or tangled debris preventing the roller from moving freely. Also, ensure the roller brush is properly installed and the cover plate is securely fastened.
- Vacuum Has Reduced Suction: A dirty roller brush can significantly reduce suction power. Clean the roller brush thoroughly and check for any clogs in the hose or vacuum head.
- Unpleasant Odors: Lingering odors often indicate trapped dirt and bacteria on the roller brush. Deep clean the roller brush with soapy water and ensure it is completely dry before reassembling.
- Roller Brush is Damaged: If the bristles are worn or the roller brush is cracked, it may be time to replace it. Contact Shark customer support or visit their website to purchase a replacement roller brush.
- Vacuum Overheats: Overheating can occur if the vacuum is working too hard due to a clogged roller brush or other obstructions. Clean the roller brush, check for blockages, and allow the vacuum to cool down before using it again.
8. Pro Tips for Maintaining Your Shark Vacuum
Follow these tips to keep your Shark vacuum in top condition:
- Regular Cleaning: Clean the roller brush at least once a month, or more often if you have pets or heavy foot traffic.
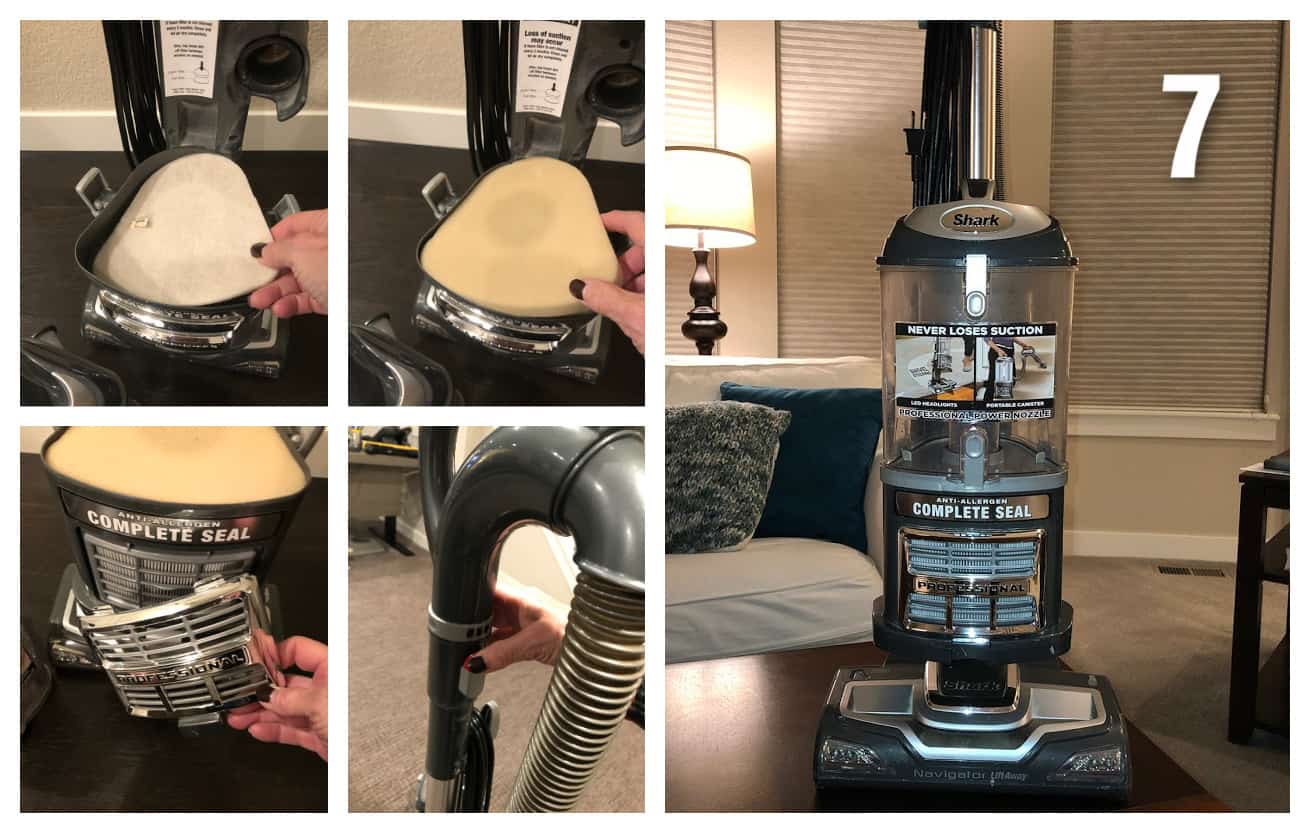
- Empty the Dust Cup: Empty the dust cup after each use to maintain optimal suction power.
- Clean Filters: Clean the filters regularly according to the manufacturer’s instructions.
- Check for Blockages: Periodically check the hose and vacuum head for any clogs or obstructions.
- Store Properly: Store your vacuum in a clean, dry place to prevent dust and debris from accumulating.
FAQ Section
How often should I clean my Shark vacuum roller?
It’s recommended to clean your Shark vacuum roller at least once a month. However, if you have pets or experience heavy shedding, you may need to clean it more frequently, such as every 2-3 weeks, to maintain optimal performance and prevent clogs.
Can I use bleach to clean my Shark vacuum roller?
No, it’s not recommended to use bleach or harsh chemicals to clean your Shark vacuum roller. Bleach can damage the bristles and other components of the roller. Instead, use mild dish soap and warm water for effective cleaning.
What is the best way to remove pet hair from my Shark vacuum roller?
The best way to remove pet hair is to use scissors or a seam ripper to carefully cut away tangled hair. For stubborn pet hair, try using a rubber brush or pet hair remover tool to loosen the hair before cutting. Regular cleaning will also help prevent excessive buildup.
How do I know when it’s time to replace my Shark vacuum roller?
You should consider replacing your Shark vacuum roller if the bristles are worn down, damaged, or no longer effectively picking up dirt and debris. Additionally, if the roller is cracked or warped, it’s time for a replacement to ensure optimal cleaning performance.
Can I put my Shark vacuum roller in the washing machine?
No, you should not put your Shark vacuum roller in the washing machine. The washing machine can damage the roller’s components and affect its performance. Hand washing with mild soap and water is the recommended cleaning method.
What type of scissors should I use to remove hair from the roller?
Small embroidery scissors or manicure scissors are a great choice to use.
Tips, Warnings, and Best Practices
- Safety First: Always unplug your Shark vacuum before performing any maintenance or cleaning tasks.
- Avoid Water Damage: Ensure the roller brush is completely dry before reassembling it into the vacuum to prevent water damage.
- Use the Right Tools: Using the appropriate tools, such as scissors or a seam ripper, can make the cleaning process easier and more effective.
- Regular Maintenance: Regular cleaning and maintenance will extend the life of your Shark vacuum and ensure optimal performance.
- Refer to the Owner’s Manual: Consult your owner’s manual for specific instructions and recommendations for your Shark model.
Conclusion
Cleaning your Shark vacuum roller is a simple yet essential task that can significantly improve the performance and longevity of your appliance. By following these steps and tips, you can keep your Shark vacuum running smoothly and maintain a clean, healthy home. Make it a part of your regular cleaning routine to enjoy the full benefits of your Shark vacuum. Regular maintenance and cleaning of your Shark vacuum roller ensure it operates efficiently, saving you time and effort in the long run and extends the life of your appliance.


