Are you finding that your Shark Navigator vacuum cleaner isn’t picking up dirt and debris as efficiently as it used to? A likely culprit is a full or clogged dust cup. Regularly cleaning the dust cup is essential for maintaining your vacuum’s performance and extending its lifespan. This guide provides a simple, step-by-step process on how to wash your Shark Navigator dust cup, ensuring your vacuum continues to operate at its best.
Keeping your Shark Navigator in top condition doesn’t require complicated maintenance. This guide will walk you through the process of safely and effectively washing your vacuum’s dust cup. By following these instructions, you’ll improve suction power, eliminate odors, and keep your home cleaner. Let’s dive in!
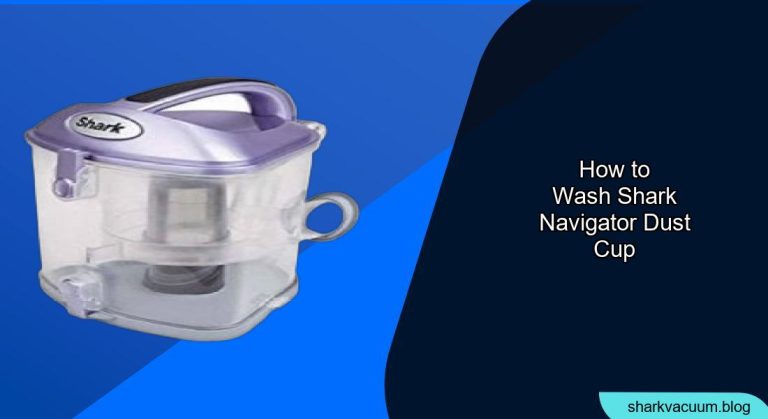
Removing the Dust Cup
The first step in washing your Shark Navigator dust cup is, of course, removing it from the vacuum. Follow these steps carefully to avoid any damage:
- Power Off and Unplug: Ensure your Shark Navigator is powered off and unplugged from the electrical outlet for safety.
- Locate the Dust Cup Release: The dust cup release mechanism is typically located on the front or side of the dust cup. Look for a button or latch.
- Release the Dust Cup: Press or slide the release mechanism to detach the dust cup from the vacuum body.
- Carefully Remove: Gently pull the dust cup away from the vacuum. Be careful not to force it.
Emptying the Dust Cup

Before washing, you need to empty the contents of the dust cup. Here’s how:
- Prepare a Trash Bag: Place a trash bag nearby to minimize dust and debris scattering.
- Open the Bottom Lid: Most Shark Navigator dust cups have a bottom-release lid. Position the dust cup over the trash bag and press the release button to empty the contents.
- Remove Remaining Debris: If any debris remains stuck inside, gently tap the dust cup or use a soft brush to dislodge it.
- Separate the Filter (if applicable): Some models have a pre-motor filter attached to the dust cup. Remove this filter before washing the cup.
Washing the Dust Cup
Now that the dust cup is empty, you can proceed with washing it. Here’s a detailed guide:
- Rinse with Warm Water: Rinse the dust cup thoroughly with warm water to remove any loose debris. Avoid using hot water, as it can damage the plastic.
- Wash with Mild Soap: Fill a sink or tub with warm water and add a small amount of mild dish soap. Submerge the dust cup and wash it gently with a soft sponge or cloth.
- Clean Hard-to-Reach Areas: Use a soft brush or old toothbrush to clean any hard-to-reach areas or crevices inside the dust cup.
- Rinse Thoroughly: Rinse the dust cup thoroughly under warm running water until all soap residue is gone. Ensure no soap remains, as it can attract dirt and affect the vacuum’s performance.
Drying the Dust Cup

Proper drying is crucial to prevent mold and mildew growth. Follow these steps:
- Shake Off Excess Water: Shake off as much excess water as possible.
- Air Dry: Place the dust cup in a well-ventilated area to air dry completely. You can place it upside down on a clean towel to facilitate drying.
- Ensure Complete Dryness: Make sure the dust cup is completely dry before reattaching it to the vacuum. This may take several hours or even overnight.
Cleaning the Filter (If Applicable)
If your Shark Navigator dust cup has a pre-motor filter, clean it as follows:
- Rinse the Filter: Rinse the filter under warm running water until the water runs clear.
- Gently Squeeze: Gently squeeze out excess water from the filter. Avoid twisting or stretching the filter, as this can damage it.
- Air Dry Completely: Allow the filter to air dry completely before reinserting it into the dust cup. Ensure it is fully dry to prevent mold and mildew.
Reassembling the Dust Cup

Once the dust cup and filter (if applicable) are completely dry, reassemble them:
- Reinsert the Filter: If you removed a filter, reinsert it into its designated slot on the dust cup.
- Attach the Dust Cup: Align the dust cup with the vacuum body and push it until it clicks into place.
- Ensure Secure Attachment: Make sure the dust cup is securely attached before using the vacuum.
FAQ About Washing Shark Navigator Dust Cup
How often should I wash my Shark Navigator dust cup?
It’s recommended to wash your Shark Navigator dust cup every 1-3 months, depending on usage. If you vacuum frequently or have pets, you may need to wash it more often. Regularly checking the dust cup for clogs and debris is also a good practice.
Can I put the Shark Navigator dust cup in the dishwasher?
No, it is generally not recommended to put the Shark Navigator dust cup in the dishwasher. The high heat and harsh detergents can damage the plastic and affect its performance. Always hand wash the dust cup with mild soap and warm water.
What happens if I don’t wash the dust cup regularly?
If you don’t wash the dust cup regularly, it can lead to reduced suction power, decreased cleaning performance, and potential damage to the vacuum motor. A clogged dust cup can also cause unpleasant odors and spread dust and allergens back into your home.
How do I remove stubborn dirt from the dust cup?
For stubborn dirt or buildup, soak the dust cup in warm soapy water for about 30 minutes before washing. Use a soft brush or sponge to scrub away the dirt. You can also use a solution of equal parts water and vinegar to help break down mineral deposits.
Can I use bleach to clean the dust cup?
It is not recommended to use bleach to clean the dust cup, as it can damage the plastic and release harmful fumes. Stick to mild dish soap and warm water for safe and effective cleaning.
What should I do if my dust cup still smells after washing?
If your dust cup still smells after washing, try soaking it in a solution of warm water and baking soda for a few hours. You can also add a few drops of essential oil, such as lemon or tea tree oil, for a fresh scent. Make sure to rinse thoroughly and air dry completely.
Tips, Warnings, and Best Practices
- Avoid Abrasive Cleaners: Do not use abrasive cleaners or scrub brushes, as they can scratch and damage the dust cup.
- Check for Cracks: Inspect the dust cup for any cracks or damage before washing. If you notice any issues, replace the dust cup to prevent leaks and maintain optimal performance.
- Dry Completely: Ensure all components are completely dry before reassembling to prevent mold and mildew growth.
- Regular Maintenance: Regularly cleaning the dust cup and filters will extend the life of your Shark Navigator vacuum and improve its cleaning performance.
Conclusion
Washing your Shark Navigator dust cup is a straightforward yet essential part of maintaining your vacuum cleaner. By following these simple steps, you can ensure optimal suction, eliminate odors, and prolong the life of your appliance. A clean dust cup means a cleaner home and a more efficient cleaning routine. So, take the time to wash your dust cup regularly and enjoy the benefits of a well-maintained vacuum. Now that you know how to properly clean your Shark Navigator dust cup, take the next step and schedule a cleaning session to keep your home spotless!